Woes of a Serial Multitasker
We all do it, us crafters who thrive on multitasking. We over work ourselves, take on too many projects at once, and put too much pressure on ourselves. I am sure if I asked any one of you out there who do any sort of craft - be it crochet, knitting, embroidery, weaving, spinning, or all of the above - how many projects you are currently working on, you would have to sit back and count. You may even forget about a couple. Perhaps not all of you are that bad, but I am one of the worst. Serial multitasker and hardcore procrastinator; a deadly combo. Whenever I am procrastinating on one project, a new amazingly shiny idea pops into my head and BOOM, I am on a roll excitedly heading full force into a new project. Those other five? Oh they can wait...this won't take too long...I have all of the materials already....easy peasy. Inevitably though, I hit a bump. Maybe I need to buy some essential material (or 10 more skeins of yarn, three spools of wire, and just a few more beads), maybe I get caught up in too many design choice possibilities and end up just staring at the materials for thirty minutes, accomplishing nothing. Either way, the project gets put on hold and I move on, just adding one more partially started project to the queue.
Recently, I have been working on a queen-sized crocheted blanket, a hand-knotted rug, a floral embroidery piece, reupholstering an ottoman, a crocheted mermaid costume for my darling niece, and I just finished crocheting an Adventure Time doll for a dear friend. A few weeks ago I thought it would be great if we had a nice heavy quilt for our new home, since we are moving to a colder climate (as a Floridian, I am a weeny when it comes to being cold). It just so happened that I had recently acquired a bunch of tapestry/upholstery weight fabric samples from work, so obviously it made perfect sense that I should just make us a beautiful warm quilt! What money we would be saving! Plus, it would be awesome and unique and special. So now I am also hand stitching a quilt. All of this in the middle of preparing for a cross-country move, working a demanding full time job, and trying to start up a business and blog.
The terribly ridiculous part of all of this is that I have been really hard on myself all week about not being quick enough or finding enough time to write this blog post. My goal had been to get it up by last Thursday (this includes getting the below pattern finalized, typed up and photographed). It now being Sunday, I clearly was not successful in meeting my deadline, and I have been really disappointed in myself. Even while writing this, I have been rushing myself along, berating myself, anxious to get started on the next important task of the weekend. Now that is harsh self criticism. I believe we are truly our own worst critics, and our own criticism affects us more deeply than any other. I am lucky to have a partner who is constantly pulling me back into the world of reality and reassuring me that there is no reason to be so hard on myself. He lifts me up and helps me refocus and reprioritize, which doesn't always last very long, but it helps. How many of you are similarly hard on yourselves? Setting unrealistic deadlines for far too many projects at once? What does your long list of projects look like? Let's all try to remember to take a breath, take a walk, rest those hands for just a bit, and try to practice a little more self love. When you have done that and you are ready for a new project, try out the the pattern below...the pattern is free!
ADVENTURE TIME : FINN
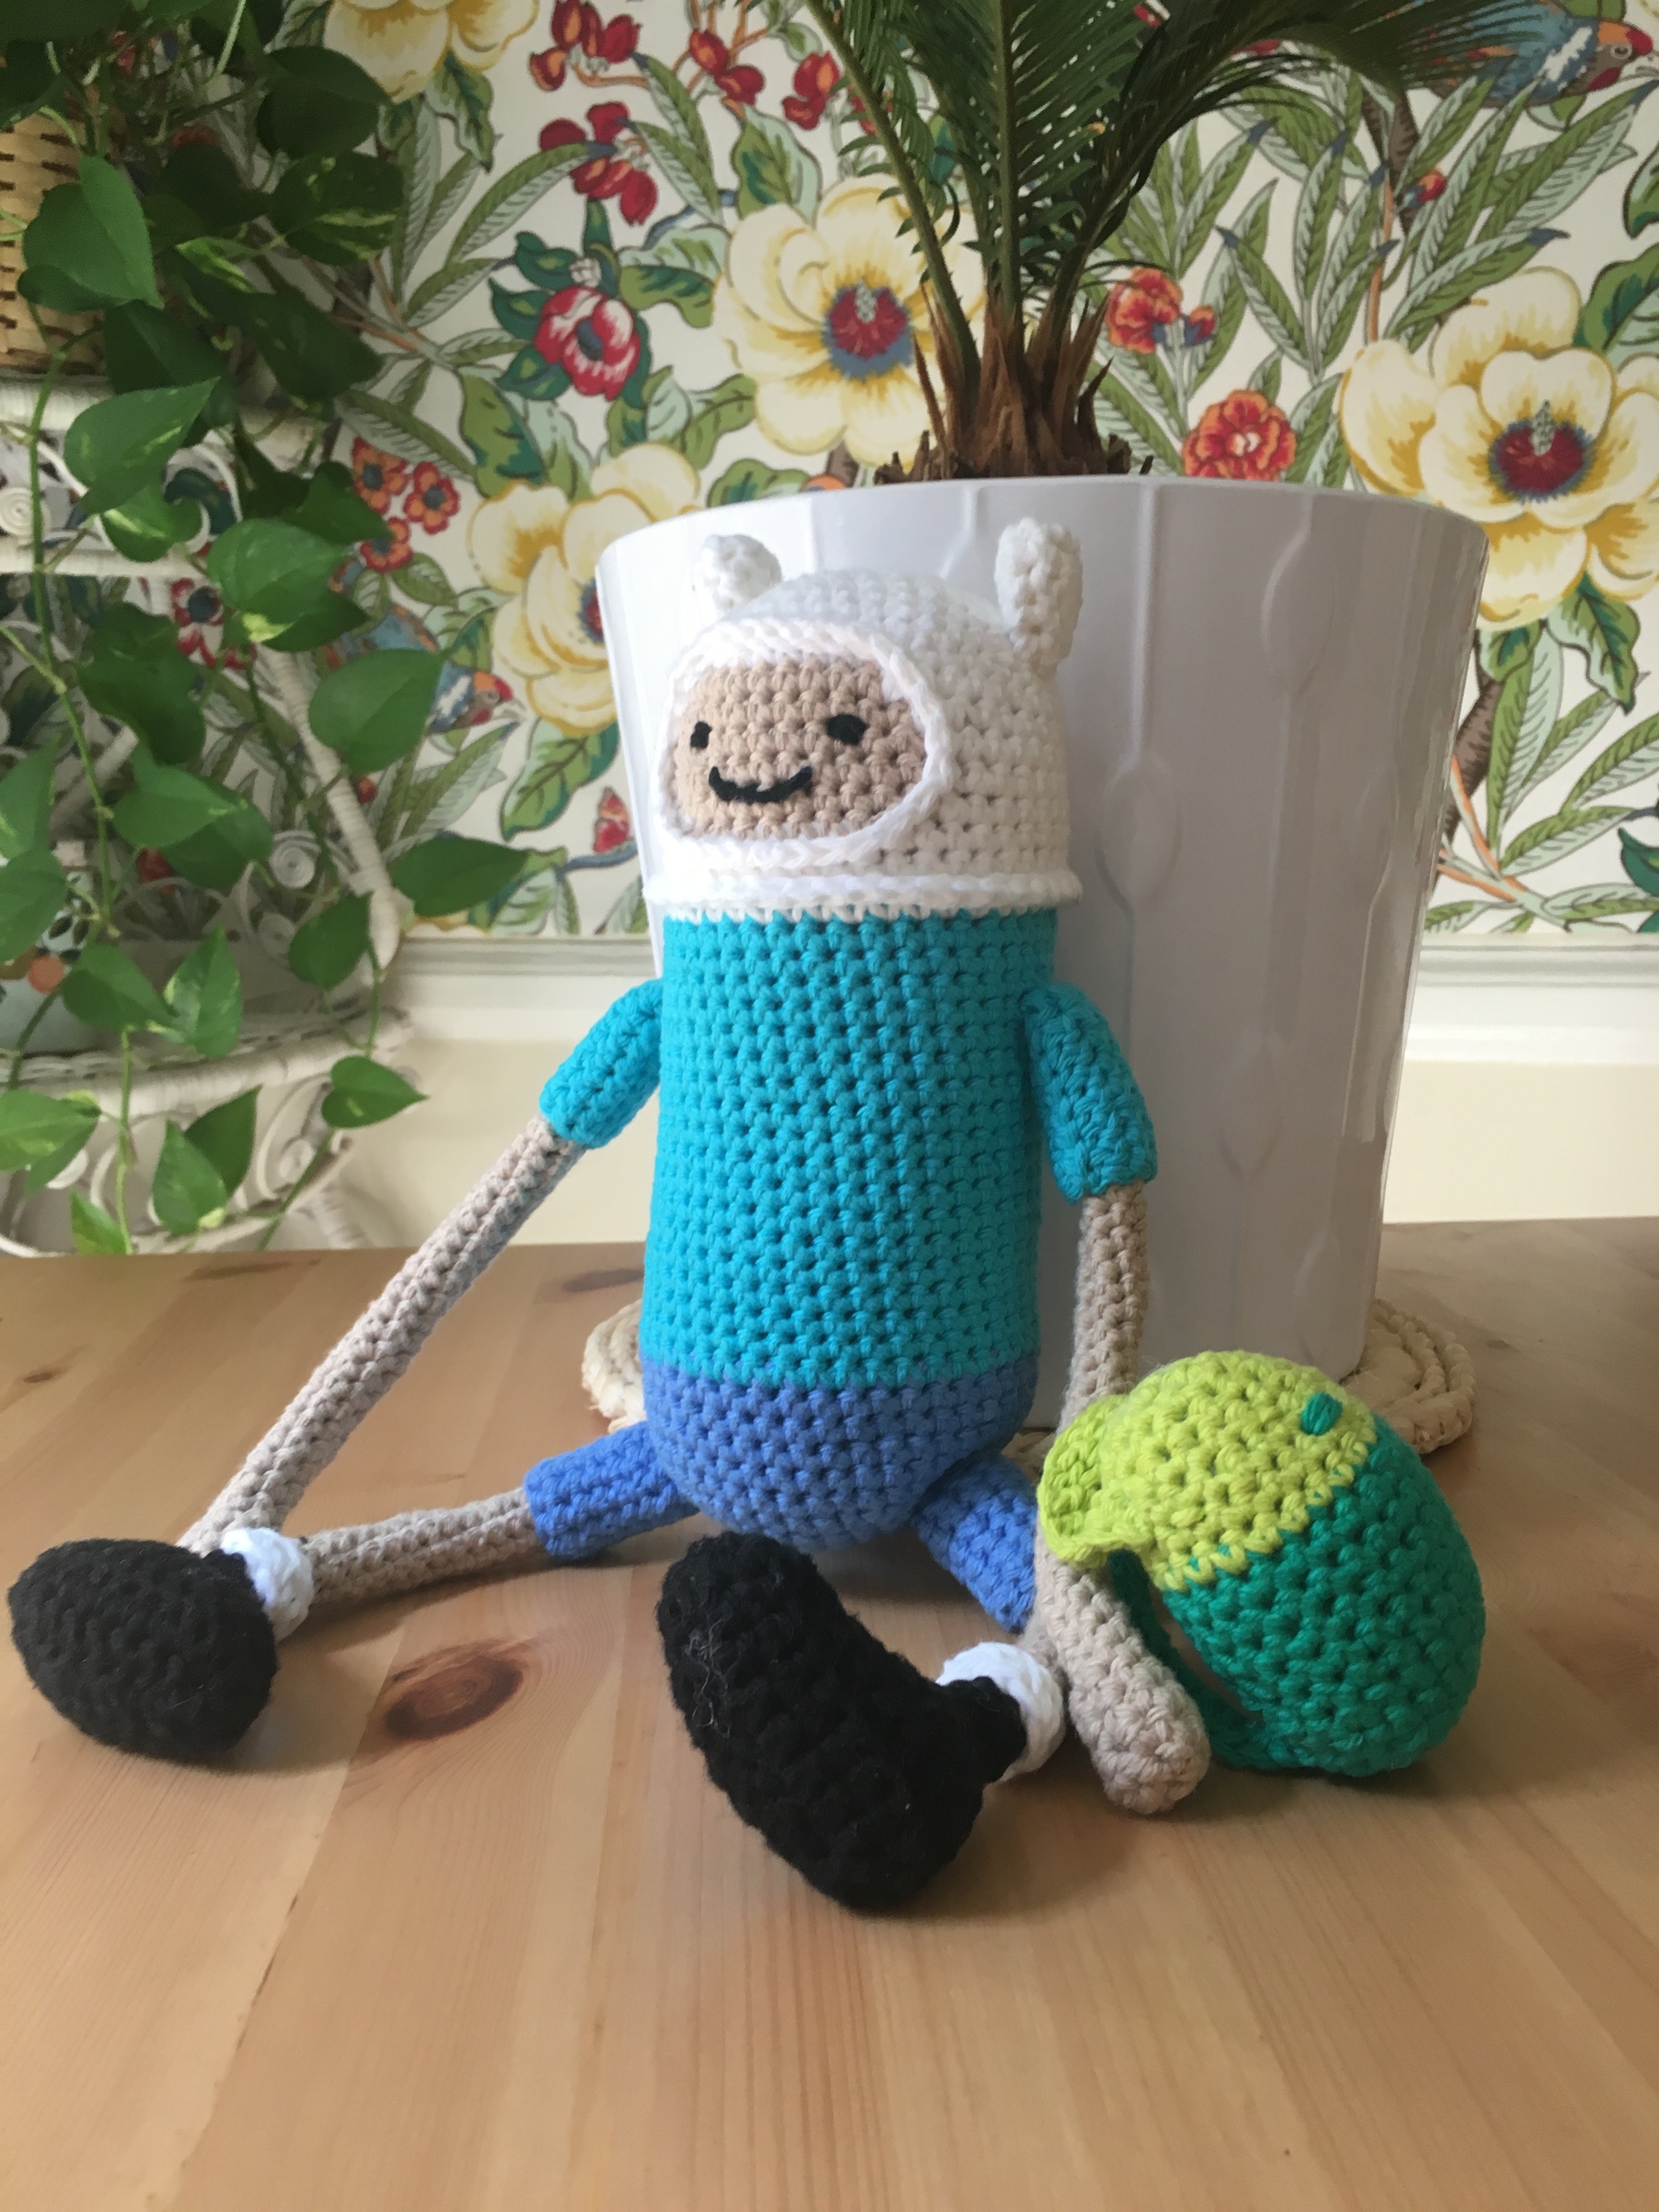
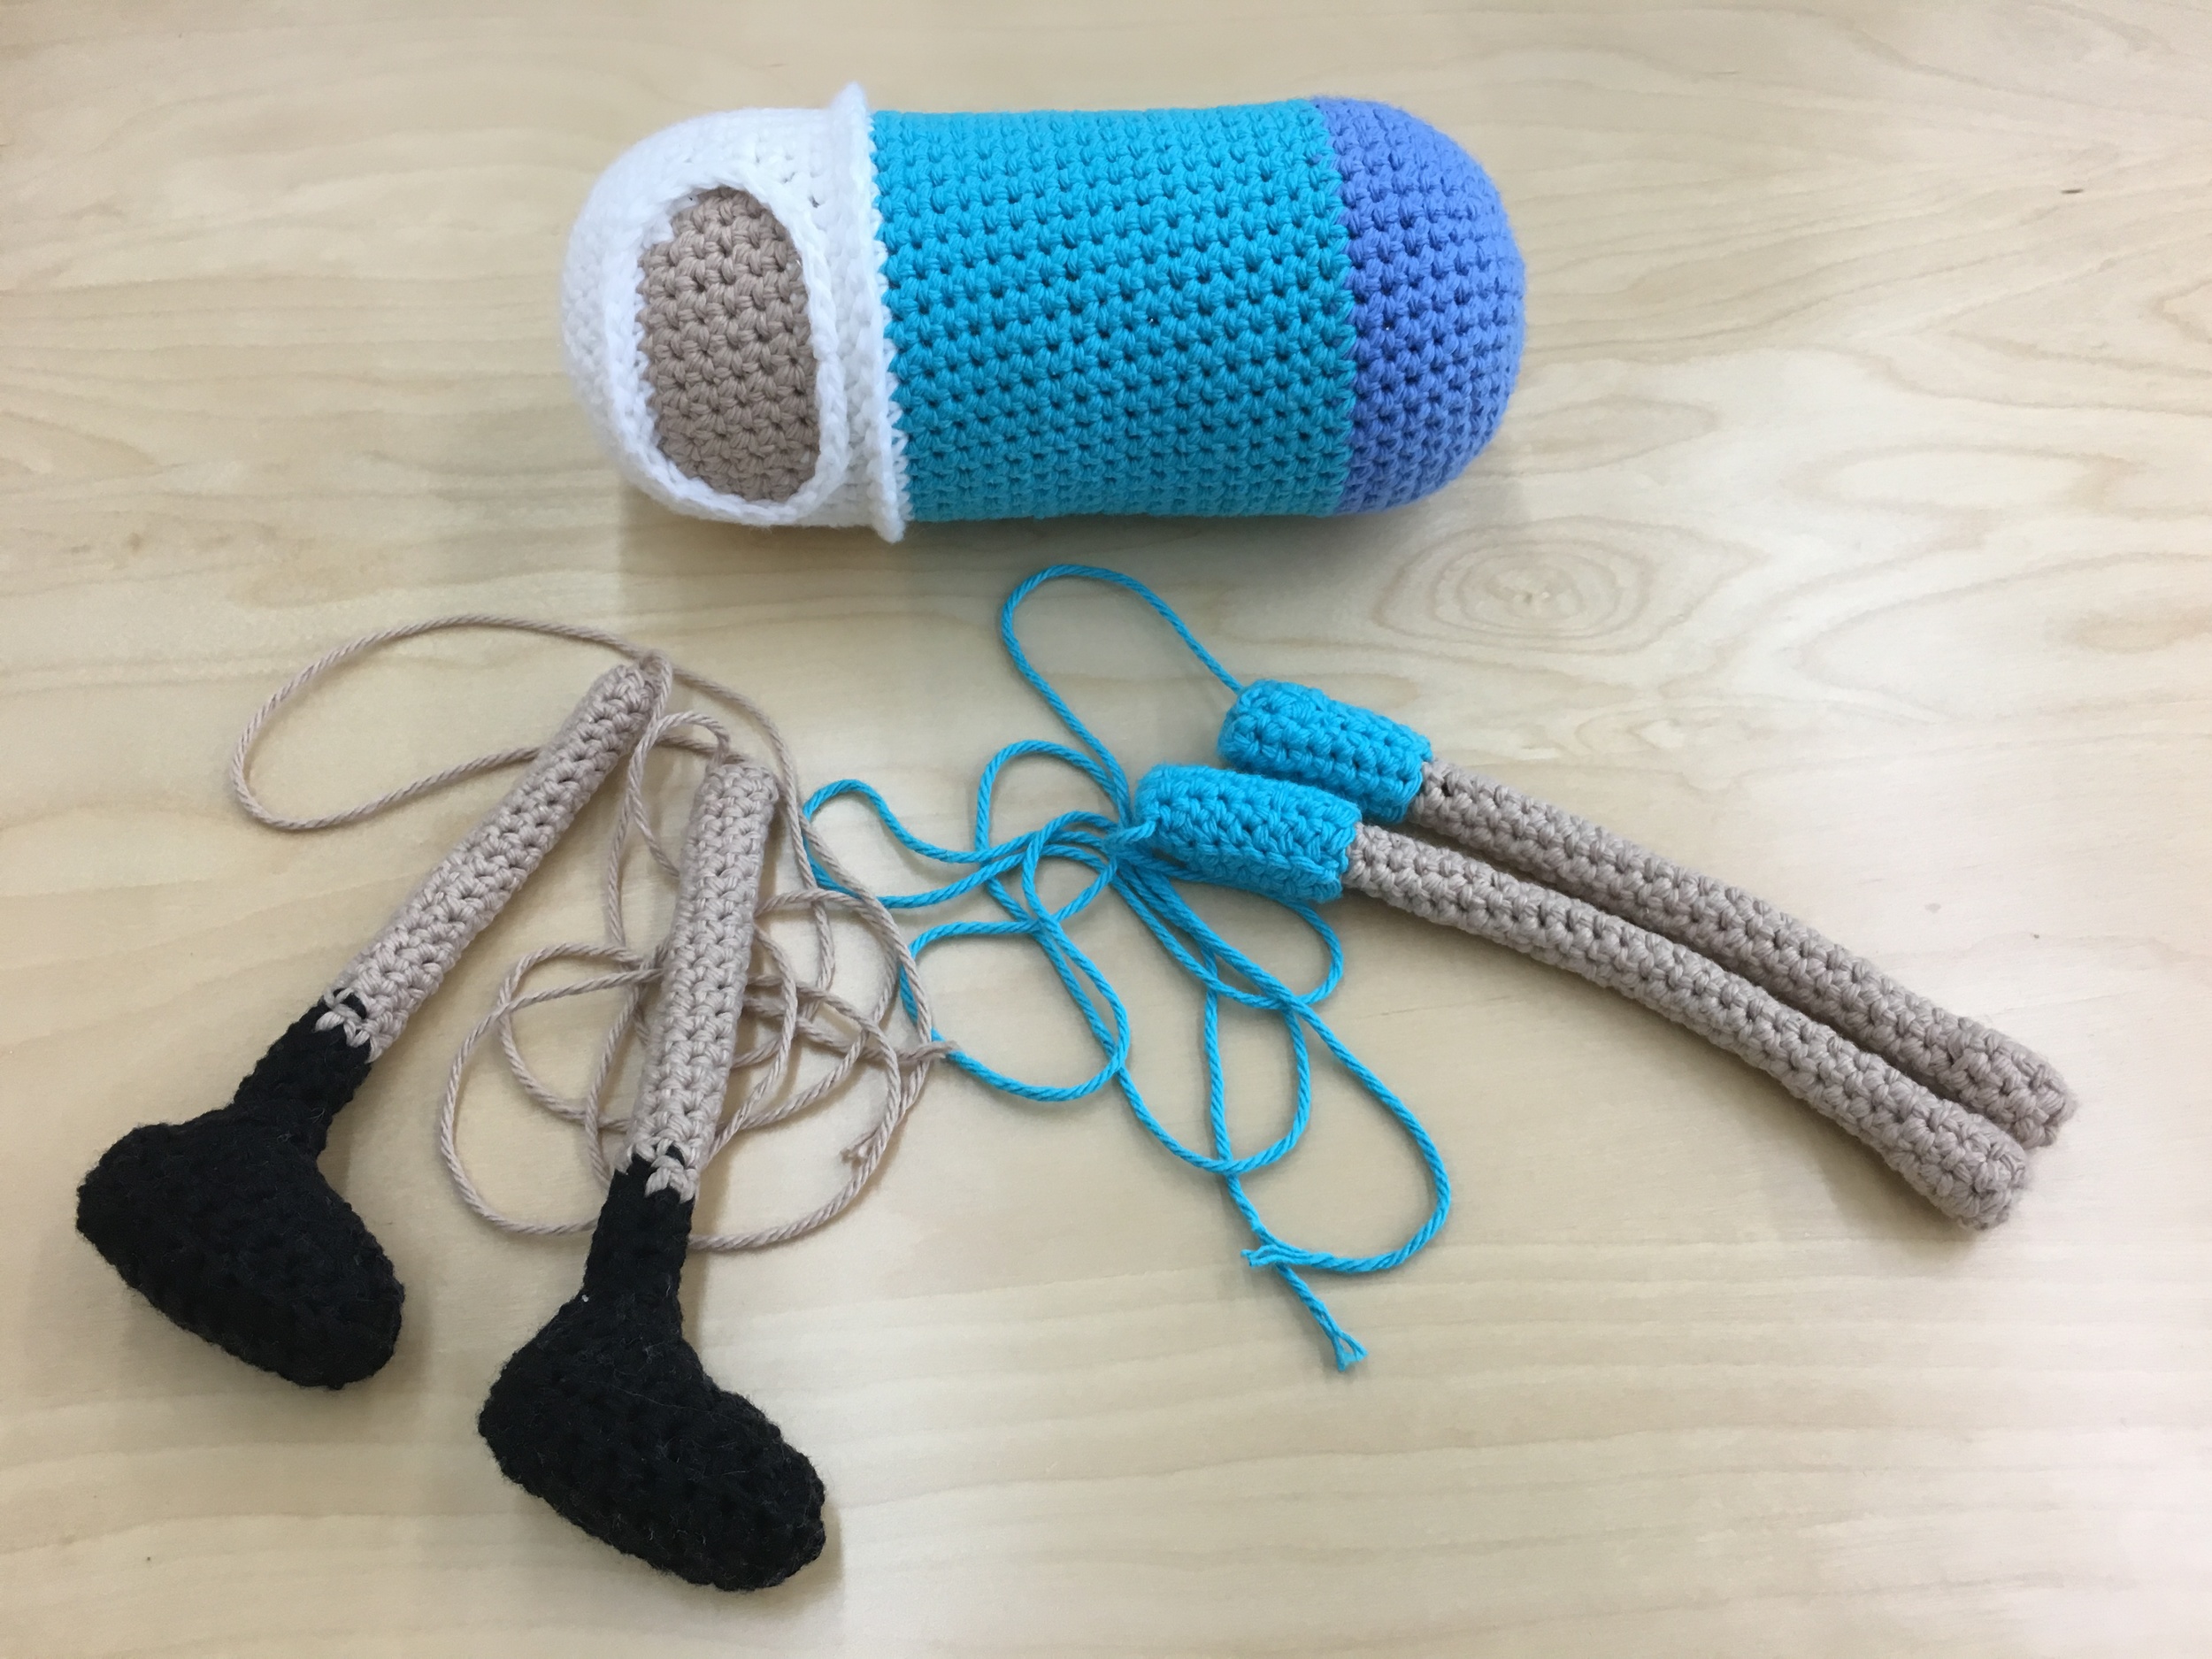
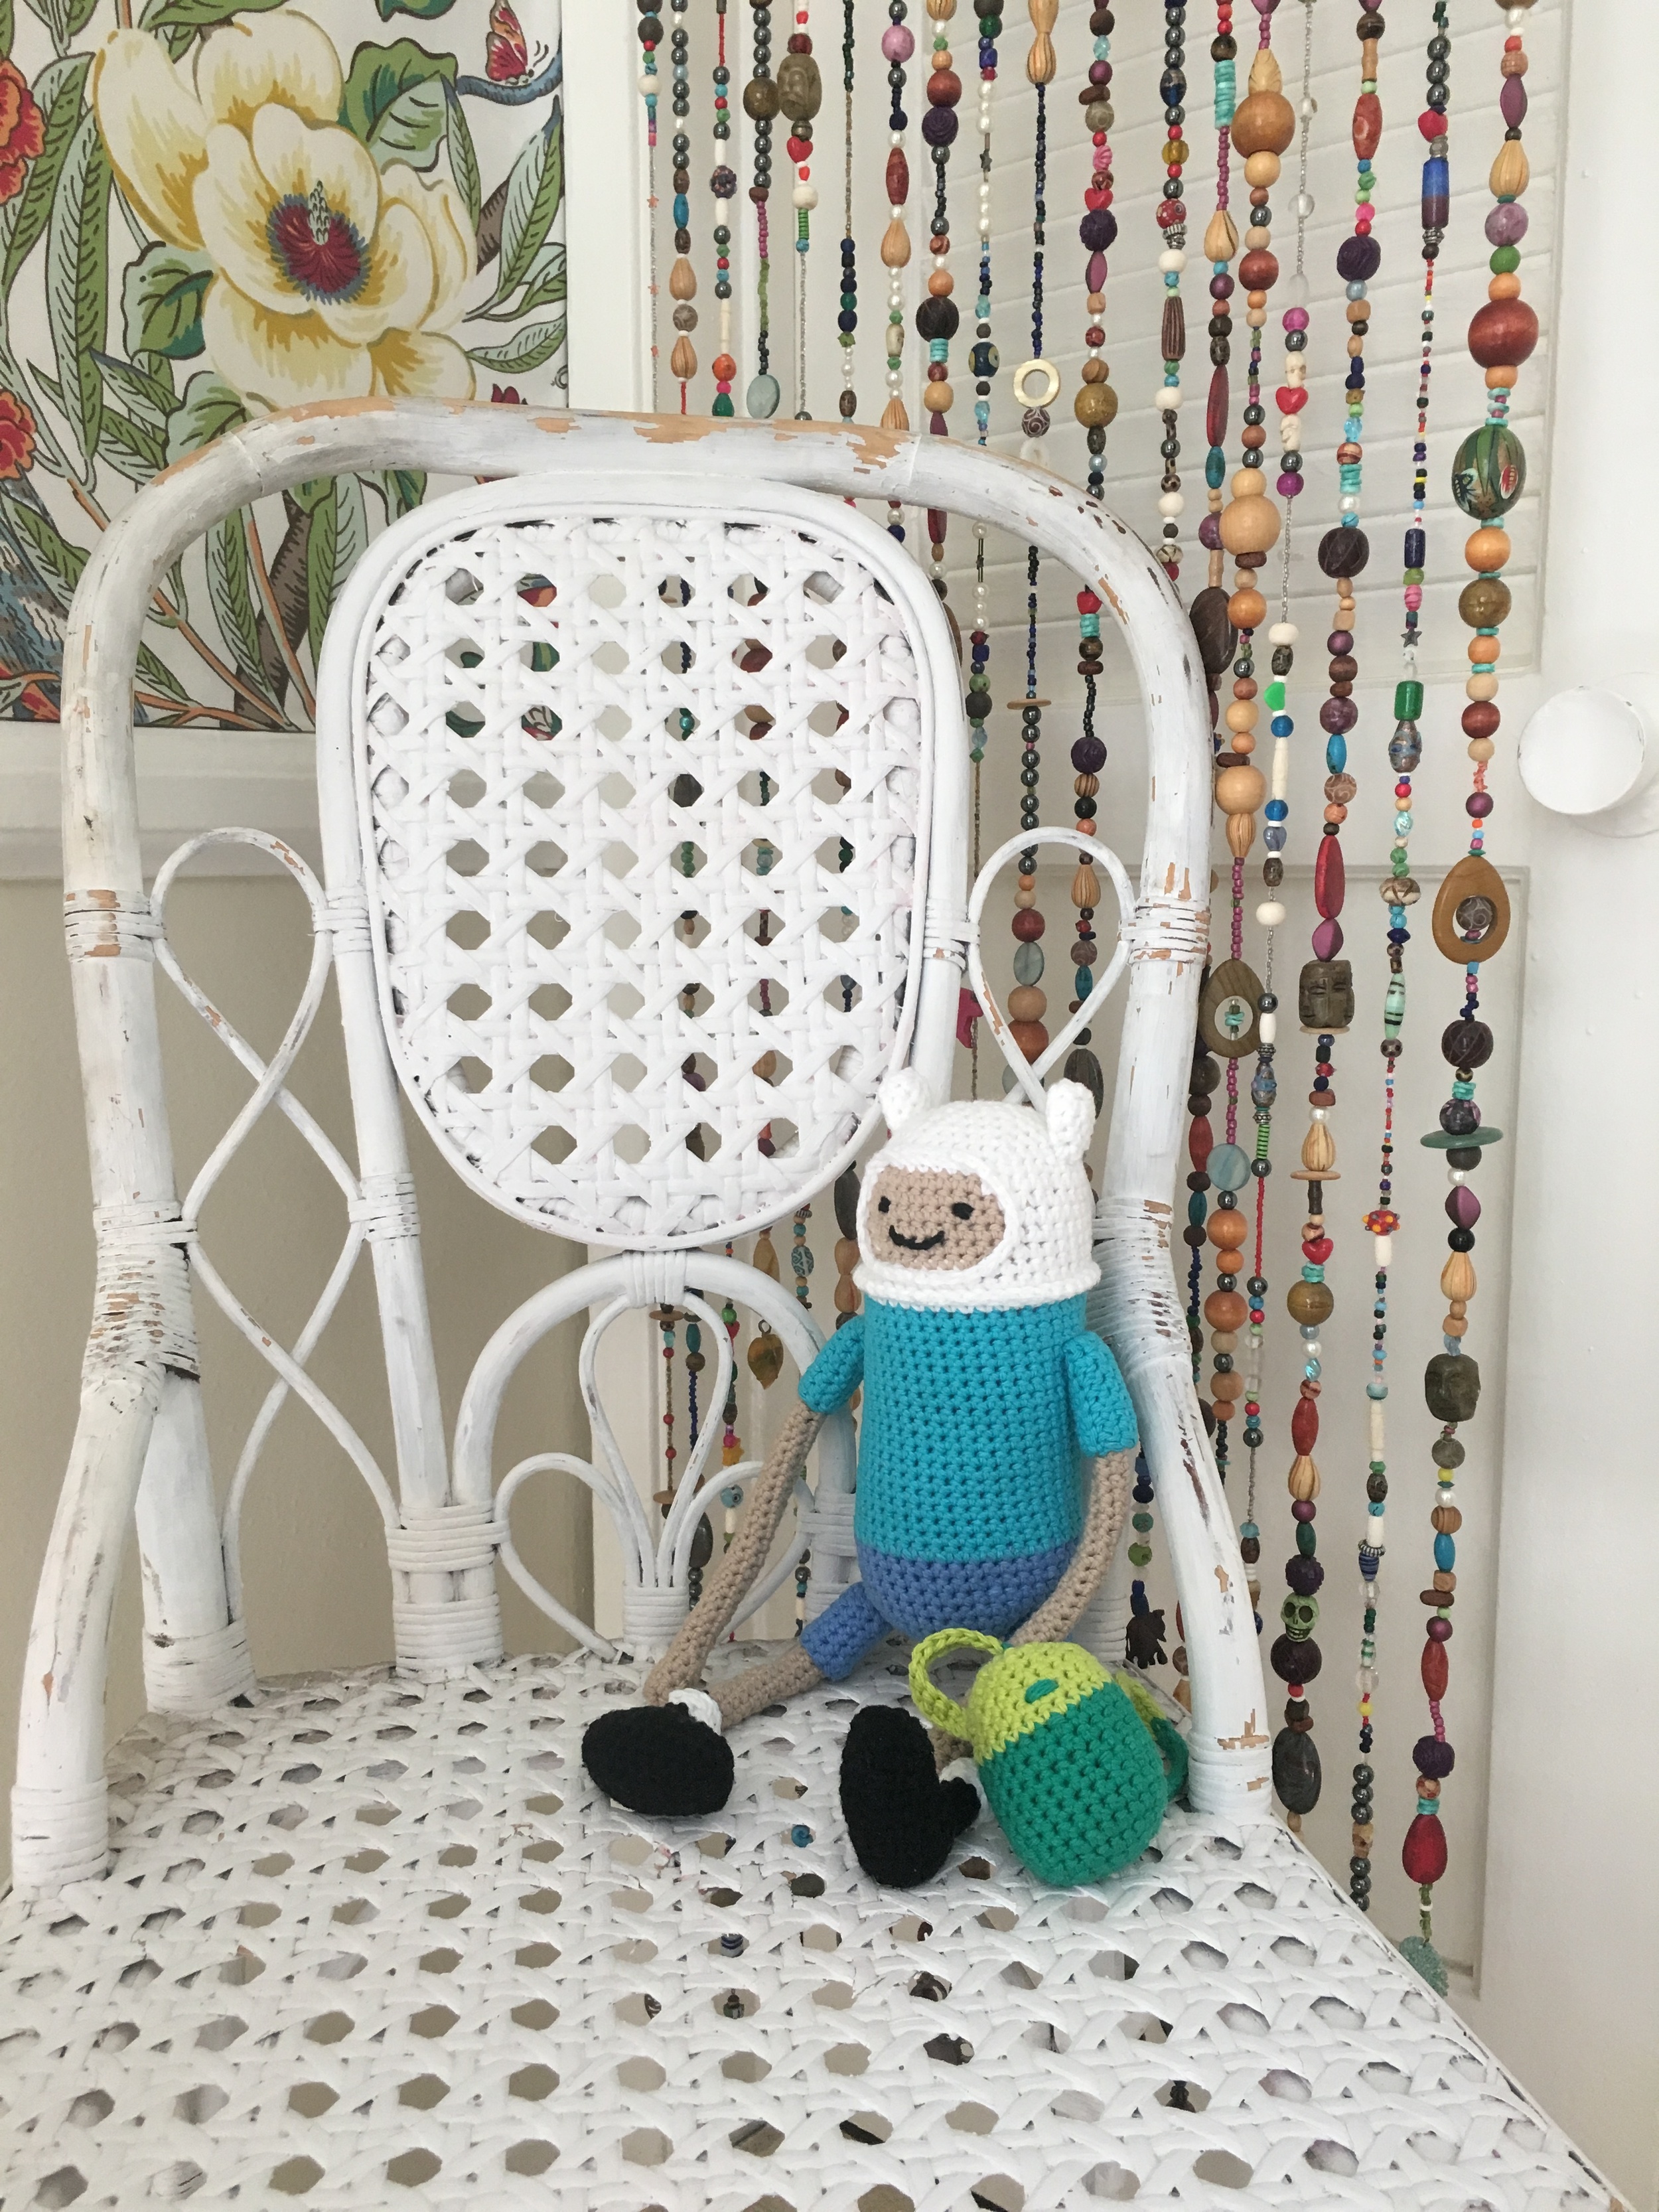
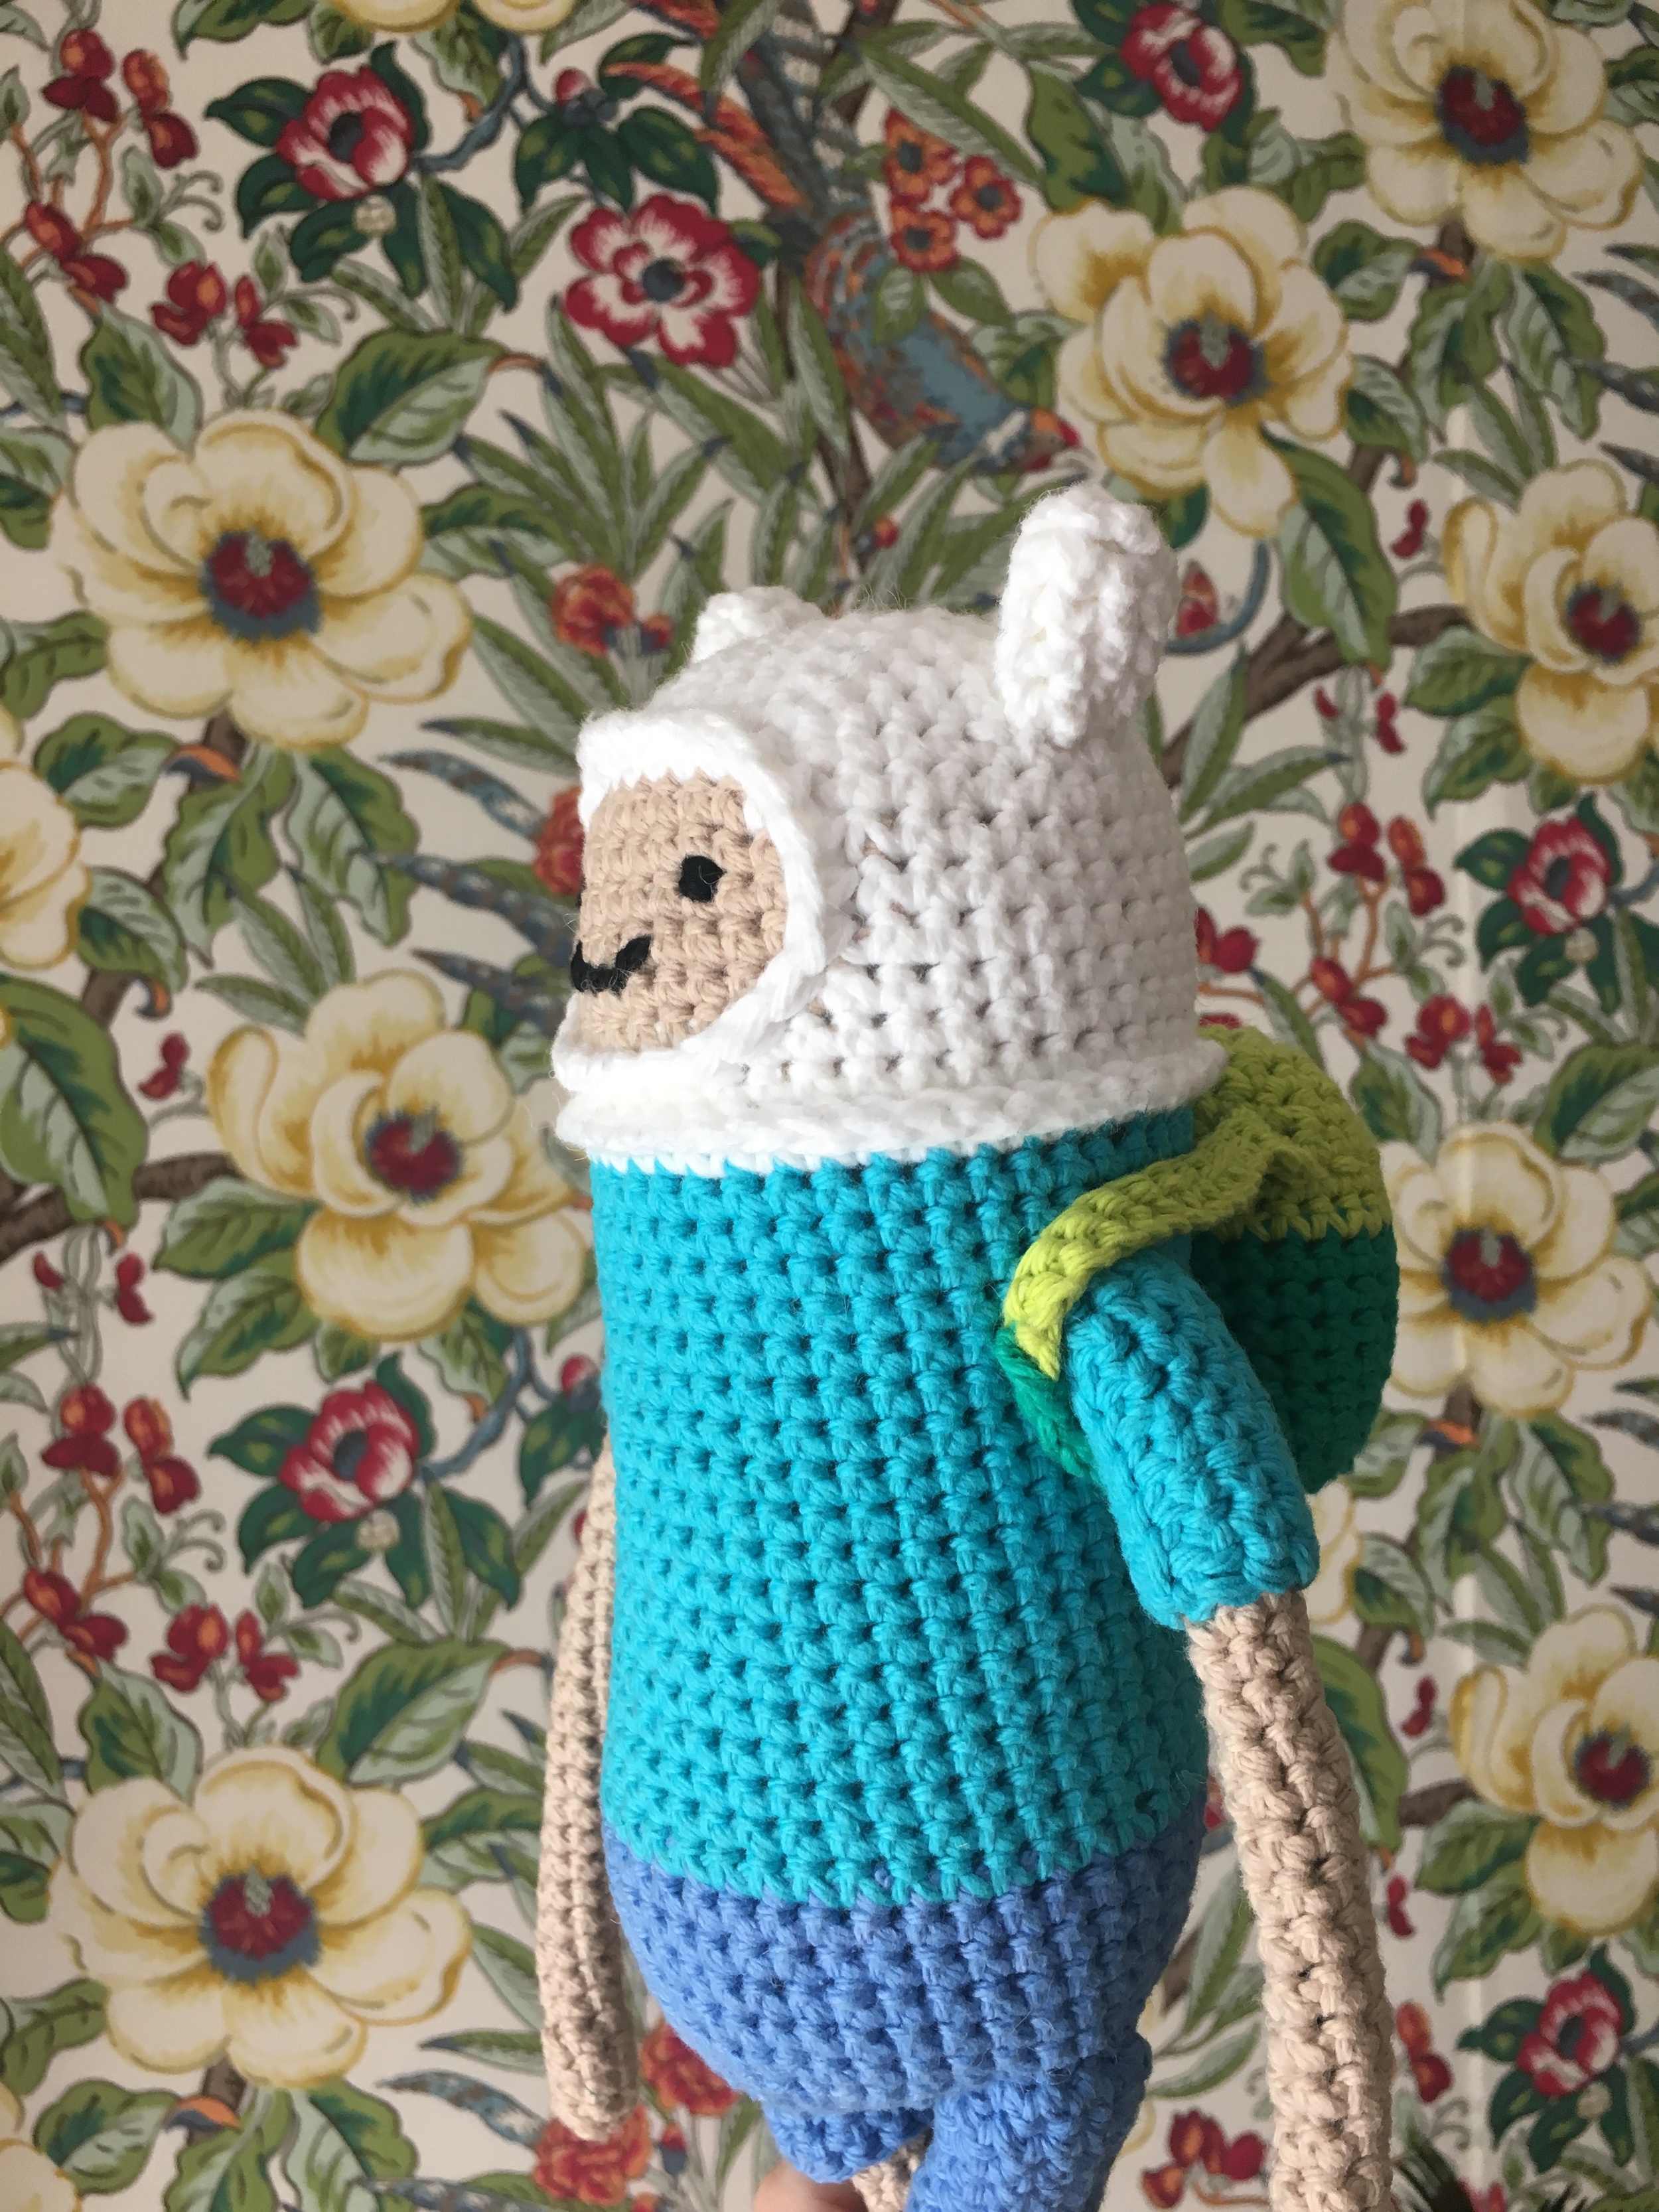
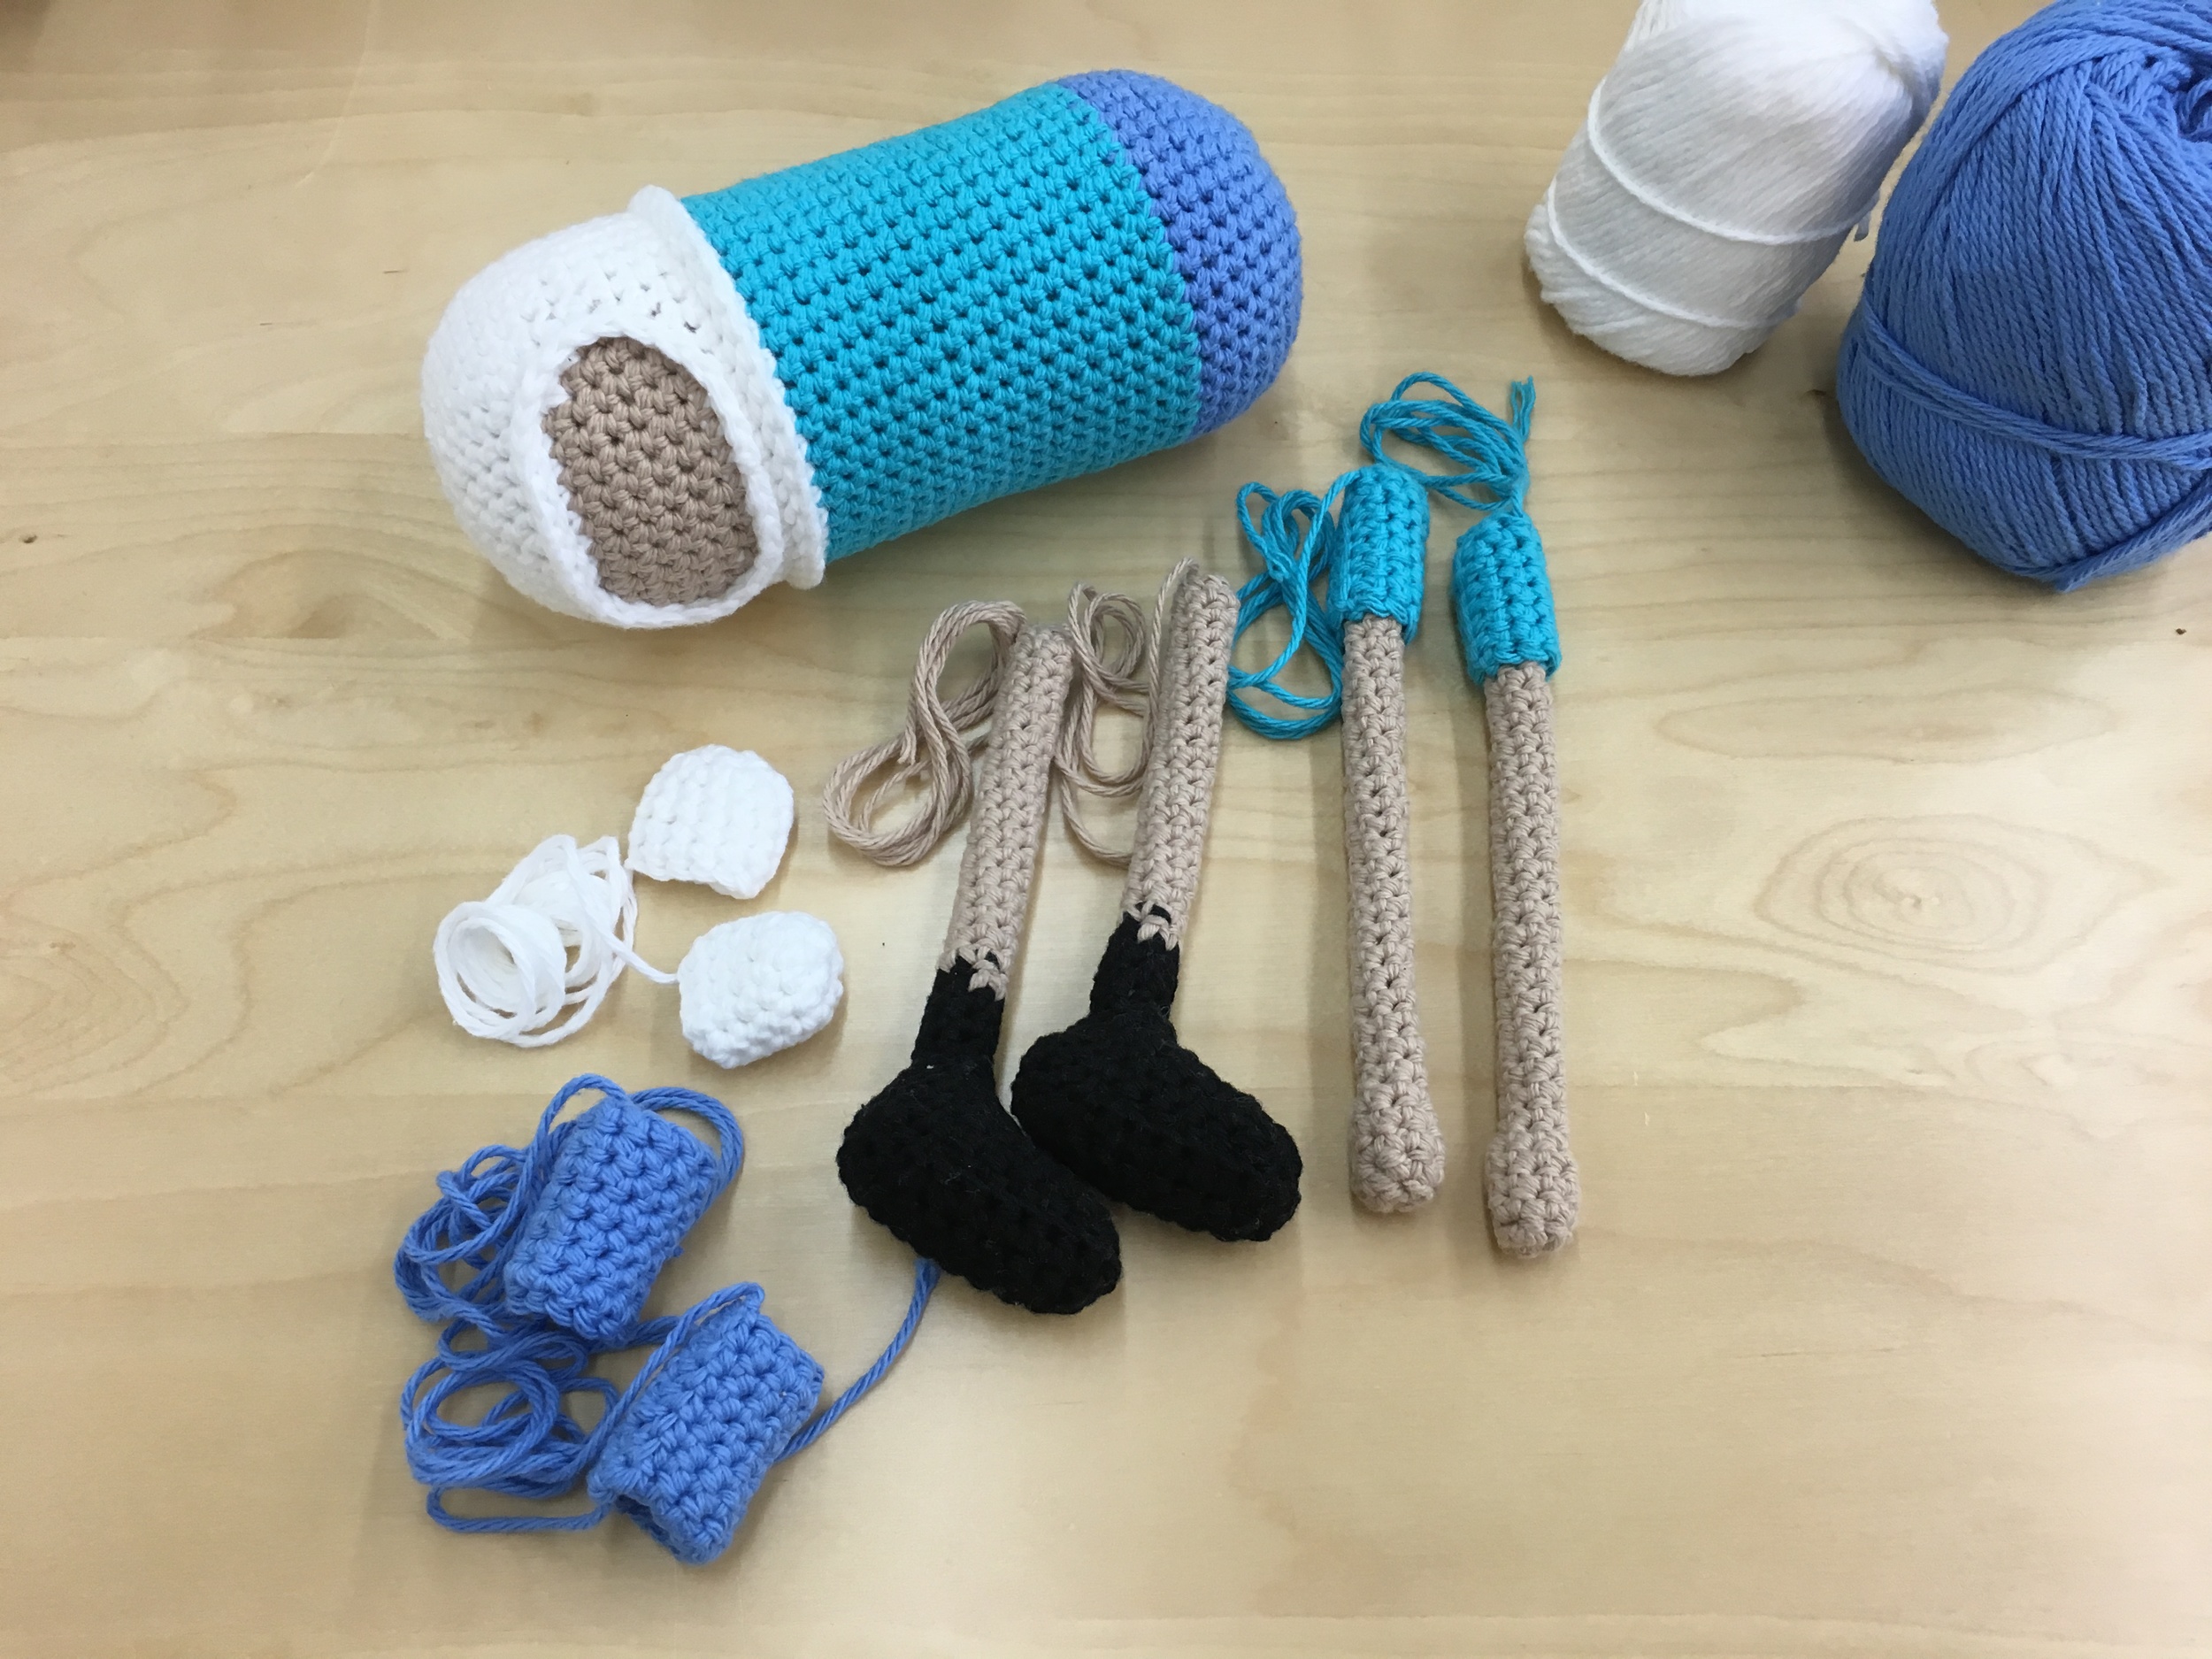
FINN DOLL : ADVENTURE TIME
HOOK SIZE: G
YARN: SUGAR ‘N CREAM COTTON 2.5oz. skein of each color:
BLUEBERRY(pants) MOD BLUE(skirt) JUTE(skin) WHITE(hoodie) BLACK(boots)
HOT GREEN(backpack top) MOD GREEN(backpack bottom)
You will also need: 1 tapestry needle & 1 bag of Fiberfill ((I suggest "A Touch of Silk" by Mountain Mist))
PATTERN TERMS
ch : chain
sc : single crochet
sp : space
2sc : increase- 2 single crochets worked in the same space
sc2tog : decrease- single crochet 2 spaces together
hdc2tog : decrease- half double crochet 2 spaces together
sl st : slip stitch
finish off : slip stitch into next space, cut yarn leaving a long enough tail to stitch parts together, and pull yarn completely through loop to make knot.
* * : pattern instructions written between two star bursts should be repeated the amount of times specified
(( )) : indicates important pattern instructions or yarn color change
( # ) : numbers listed between single parenthesis after instructions indicate amount of total stitches for that round. For pattern rounds that begin with a ch1 (rounds worked non-continuously), the chain always counts as the first single crochet of that round and should be included in the total stitch count.
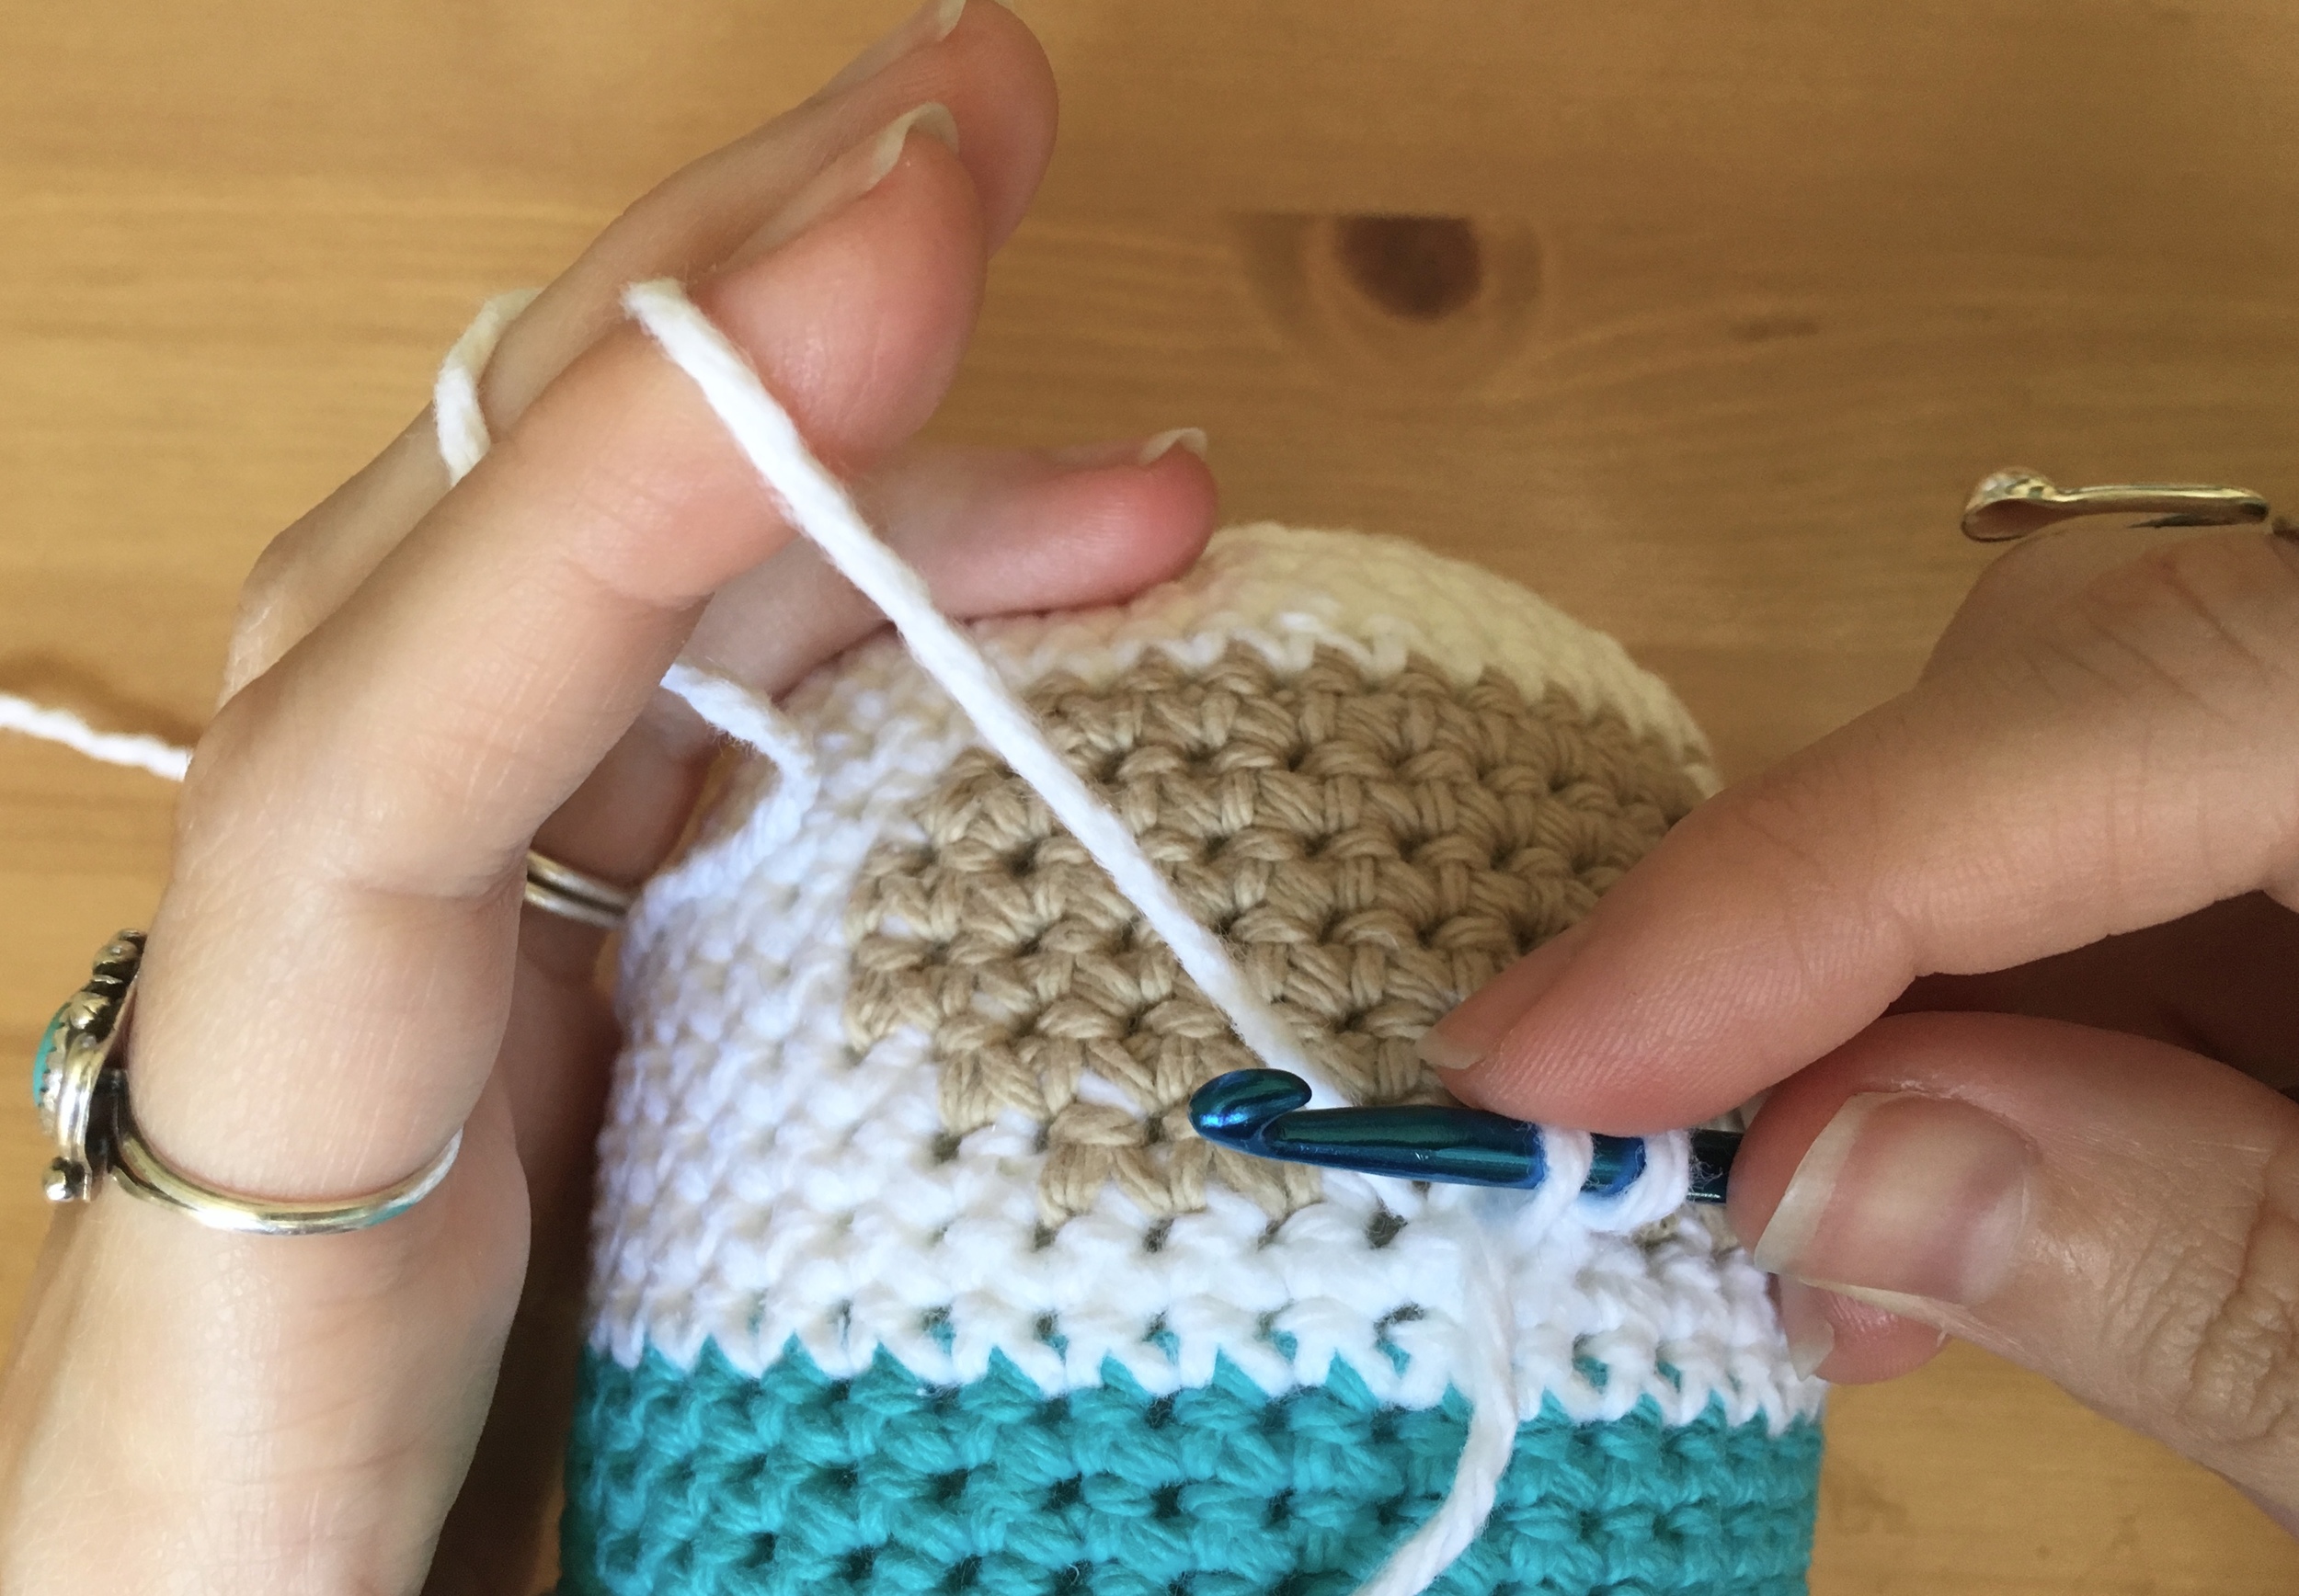
BODY : ((works in continuous rounds from bottom to top- begin with pants color))
RND 1 : ch 2. Work 6sc in 2nd ch from hook. (6)


RND 2 : 2sc in each sp around. (12)
RND 3 : * 2sc in next sp. sc in next sp. * around (18)
RND 4 : * 2sc in next sp. sc in next 2 sp. * around (24)
RND 5 : * 2sc in next sp. sc in next 3 sp. * around (30)
RND 6 : * 2sc in next sp. sc in next 4 sp. * around (36)
RND 7 : * 2sc in next sp. sc in next 5 sp. * around (42)

RNDS 8 – 12 : sc in each sp around. (42)
((CHANGE YARN TO SHIRT COLOR))
RNDS 13 – 30 : sc in each sp around. (42)
((CHANGE YARN TO HOODIE COLOR))
RNDS 31 – 32 : sc in each sp around. (42)
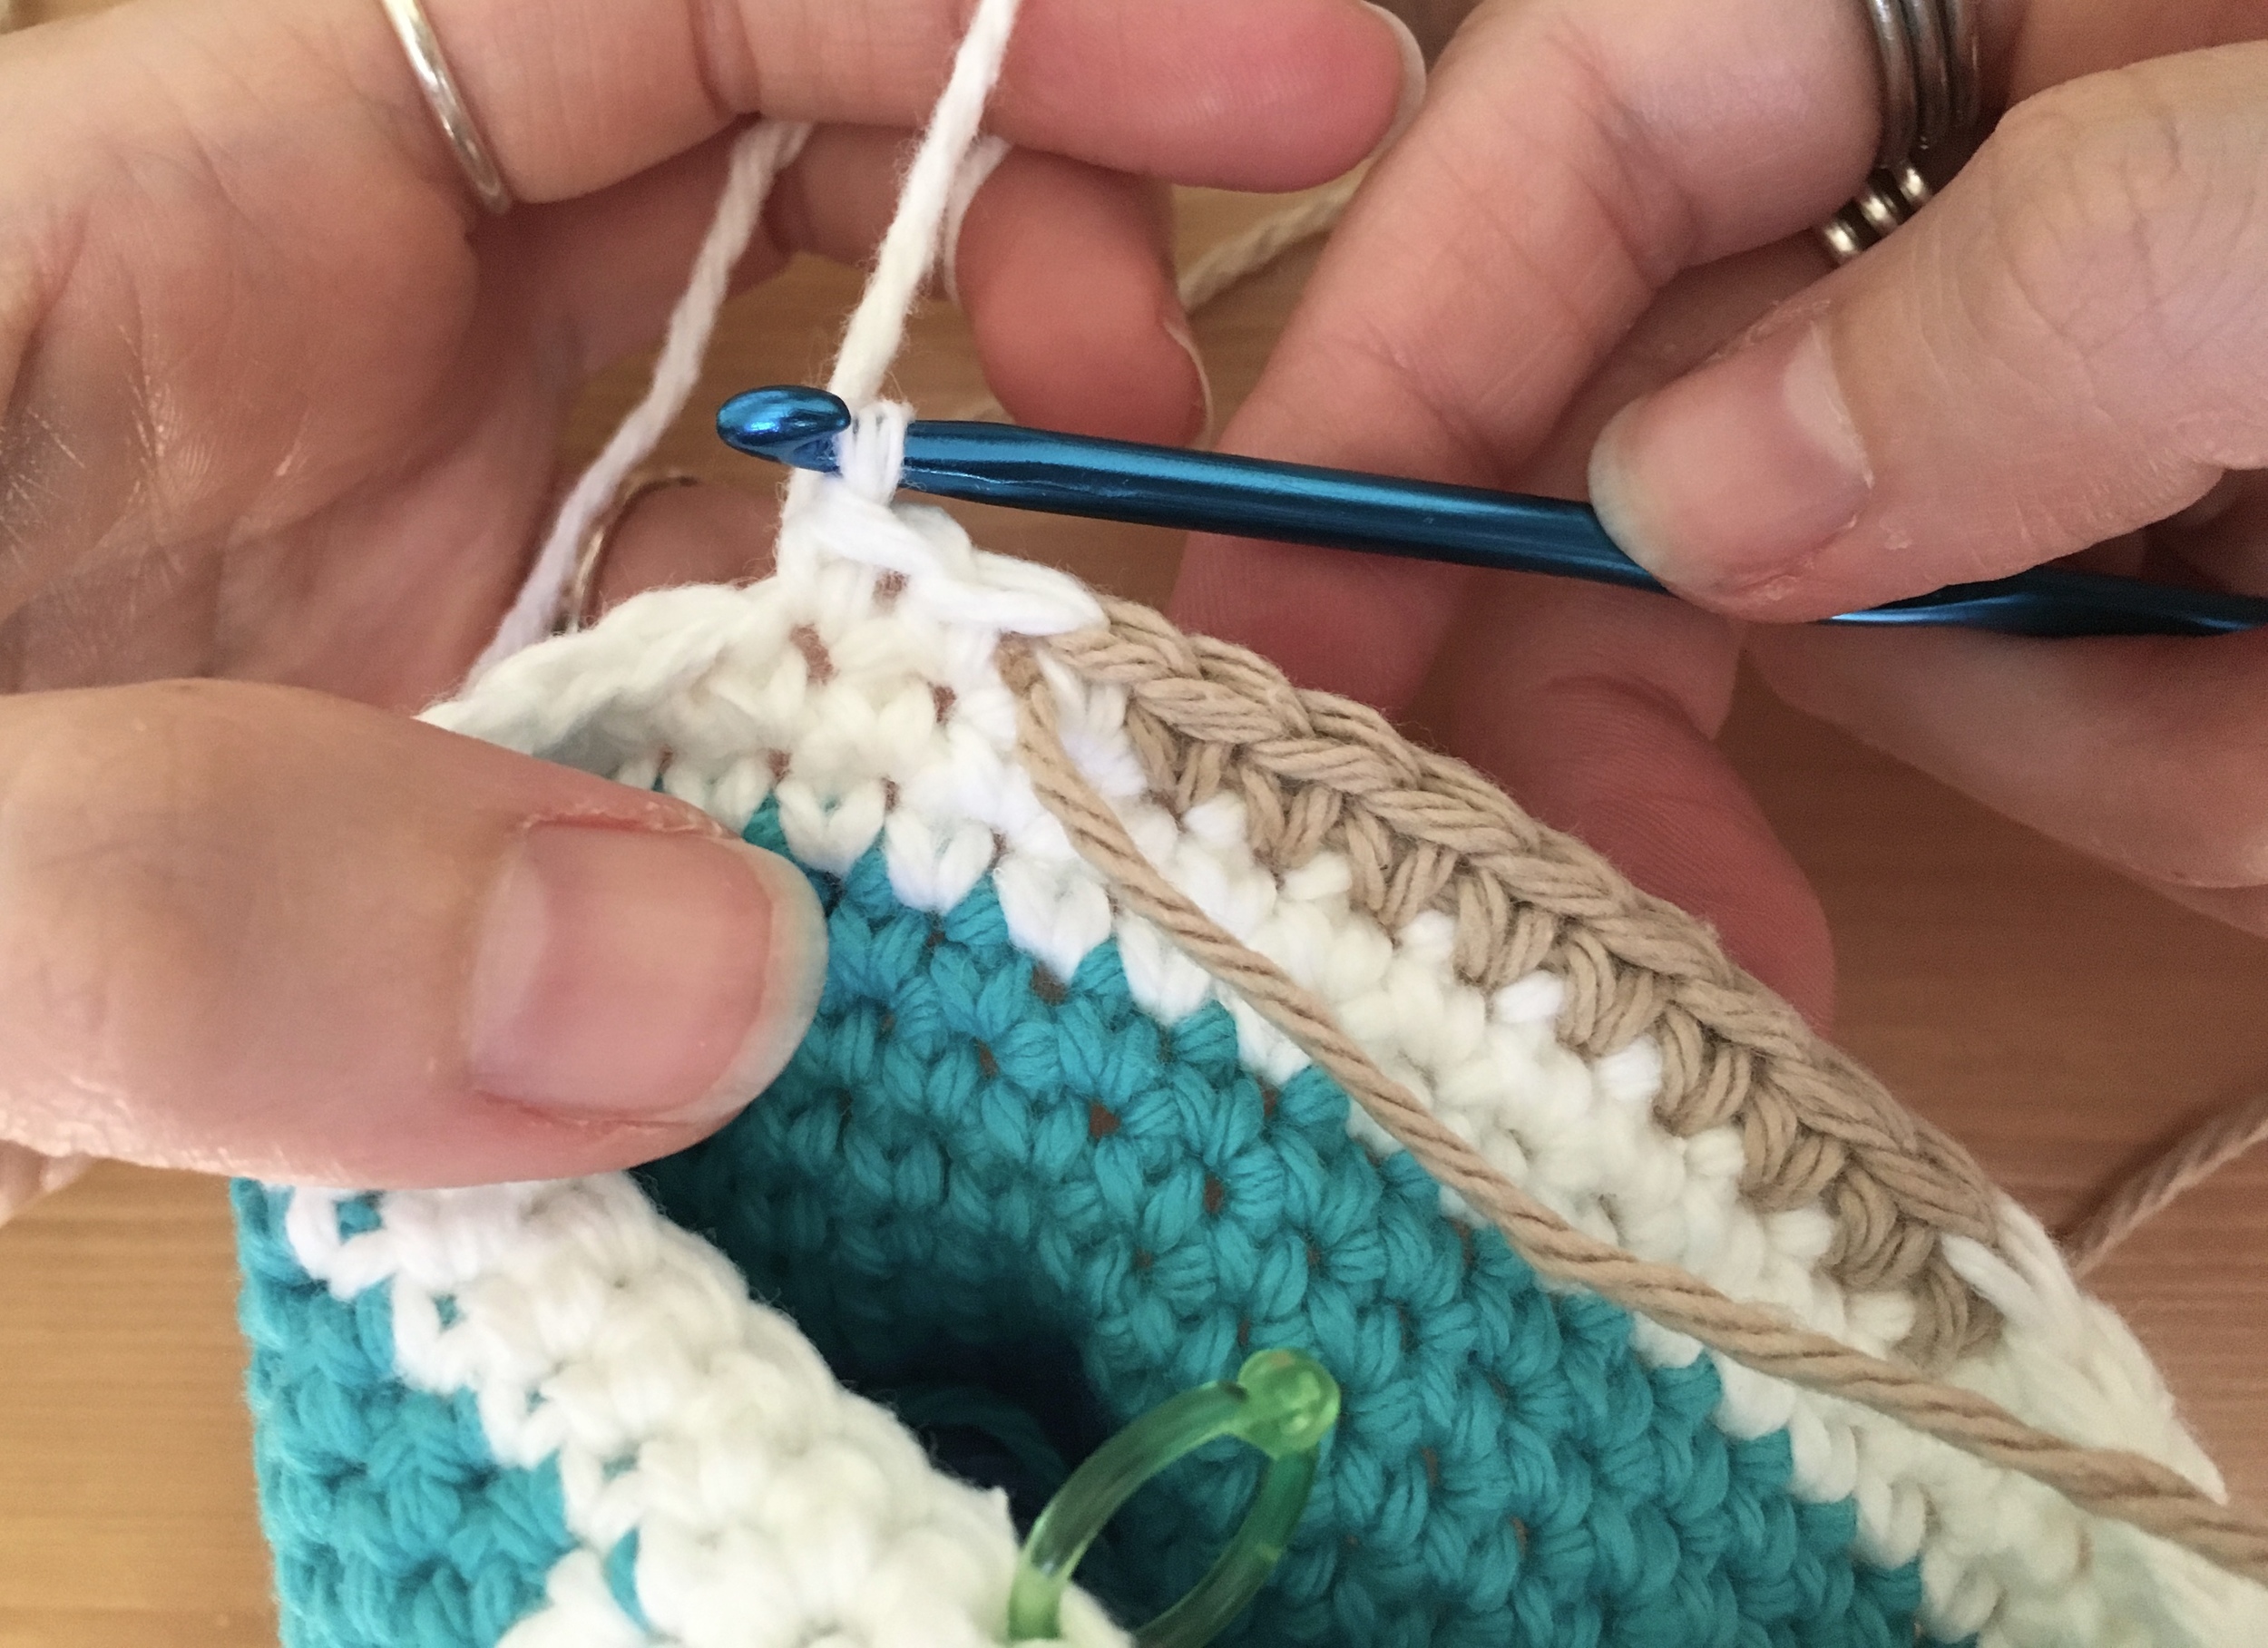
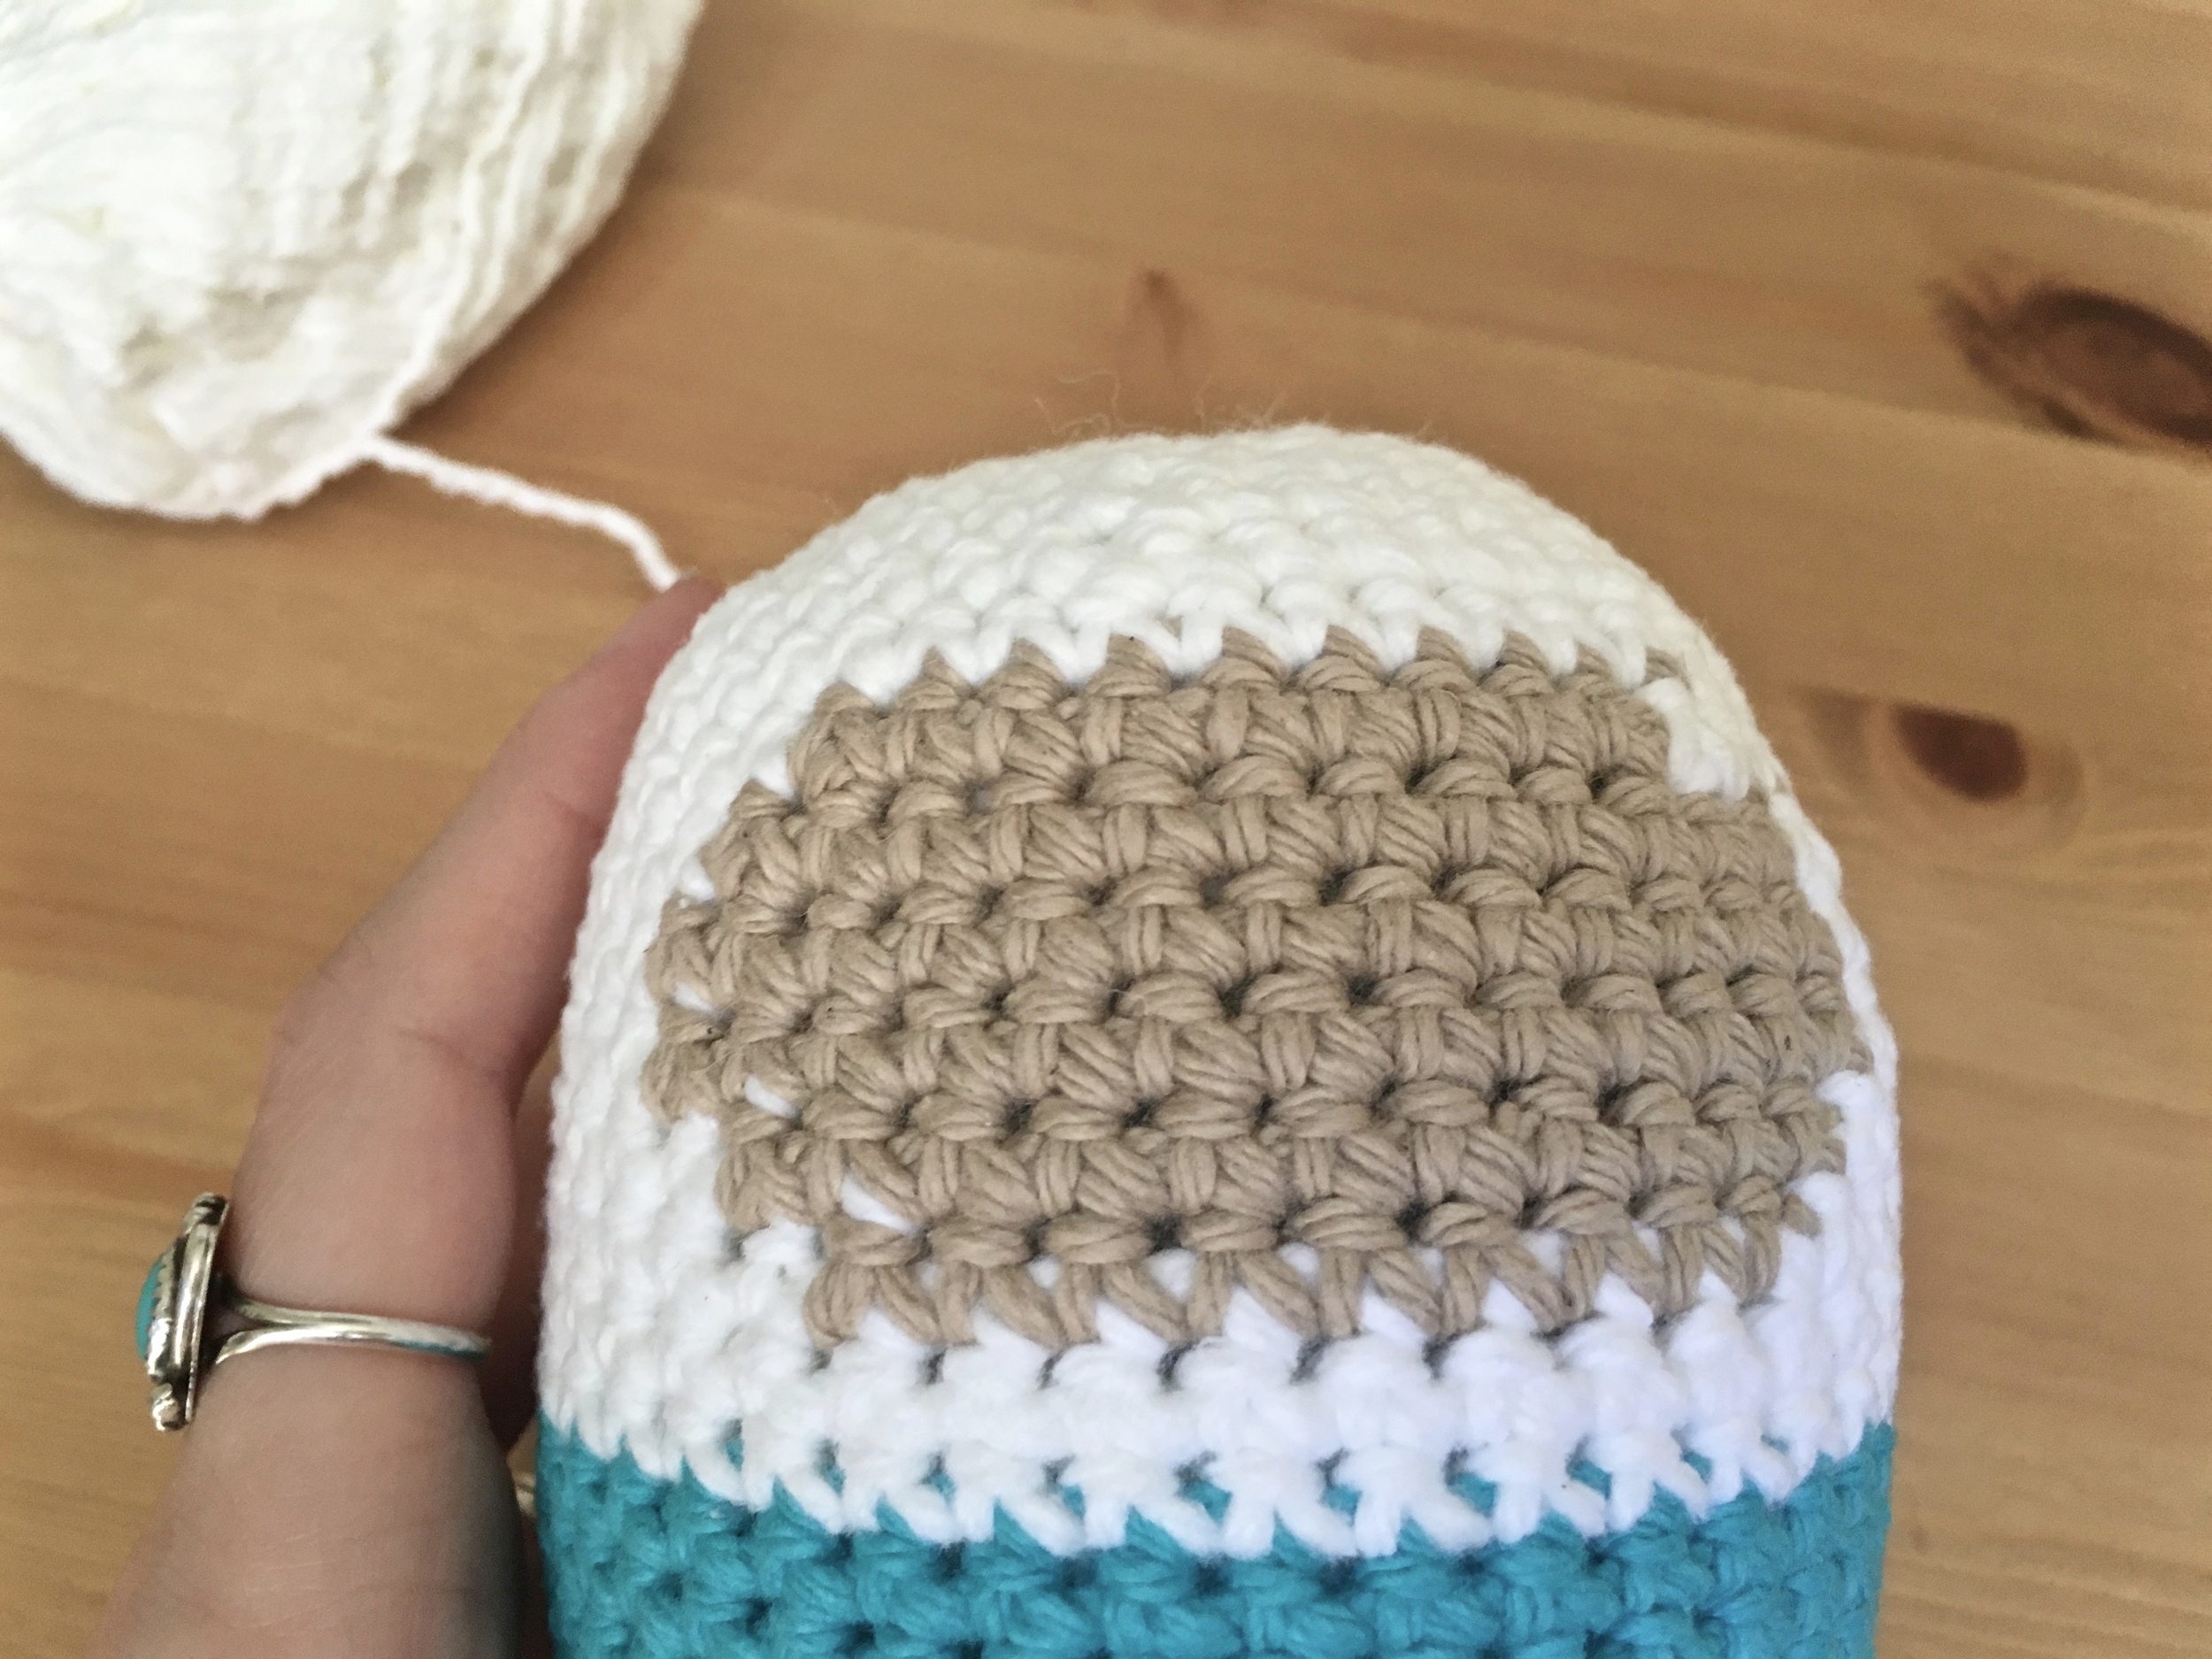
((RND 33 BEGINS TO WORK IN THE FACE))
RND 33 : sc in next 18 sp. ((CHANGE YARN TO SKIN COLOR)) sc in next 9 sp. ((CHANGE YARN TO HOODIE COLOR)) sc in remaining 15 sp. (42)


RND 34 : sc in next 17 sp. ((CHANGE YARN TO SKIN COLOR)) sc in next 11 sp. ((CHANGE YARN TO HOODIE COLOR)) sc in remaining 14 sp. (42)
RNDS 35 – 36 : sc in next 16 sp. ((CHANGE YARN TO SKIN COLOR)) sc in next 13 sp. ((CHANGE YARN TO HOODIE COLOR)) sc in remaining 13 sp. (42)
RND 37 : repeat RND 34
RND 38 : repeat RND 33
RND 39 : sc in each sp around. (42)

RND 40 : * sc2tog. sc in next 5 sp. * around (36)
RND 41 : * sc2tog. sc in next 4 sp. * around (30)
RND 42 : * sc2tog. sc in next 3 sp. * around (24)
RND 43 : * sc2tog. sc in next 2 sp. * around (18)
RND 44 : * sc2tog. * around (9)
((FINISH OFF. WEAVE YARN TAIL AROUND SMALL OPENING & PULL TIGHT TO CLOSE REMAINING GAP))
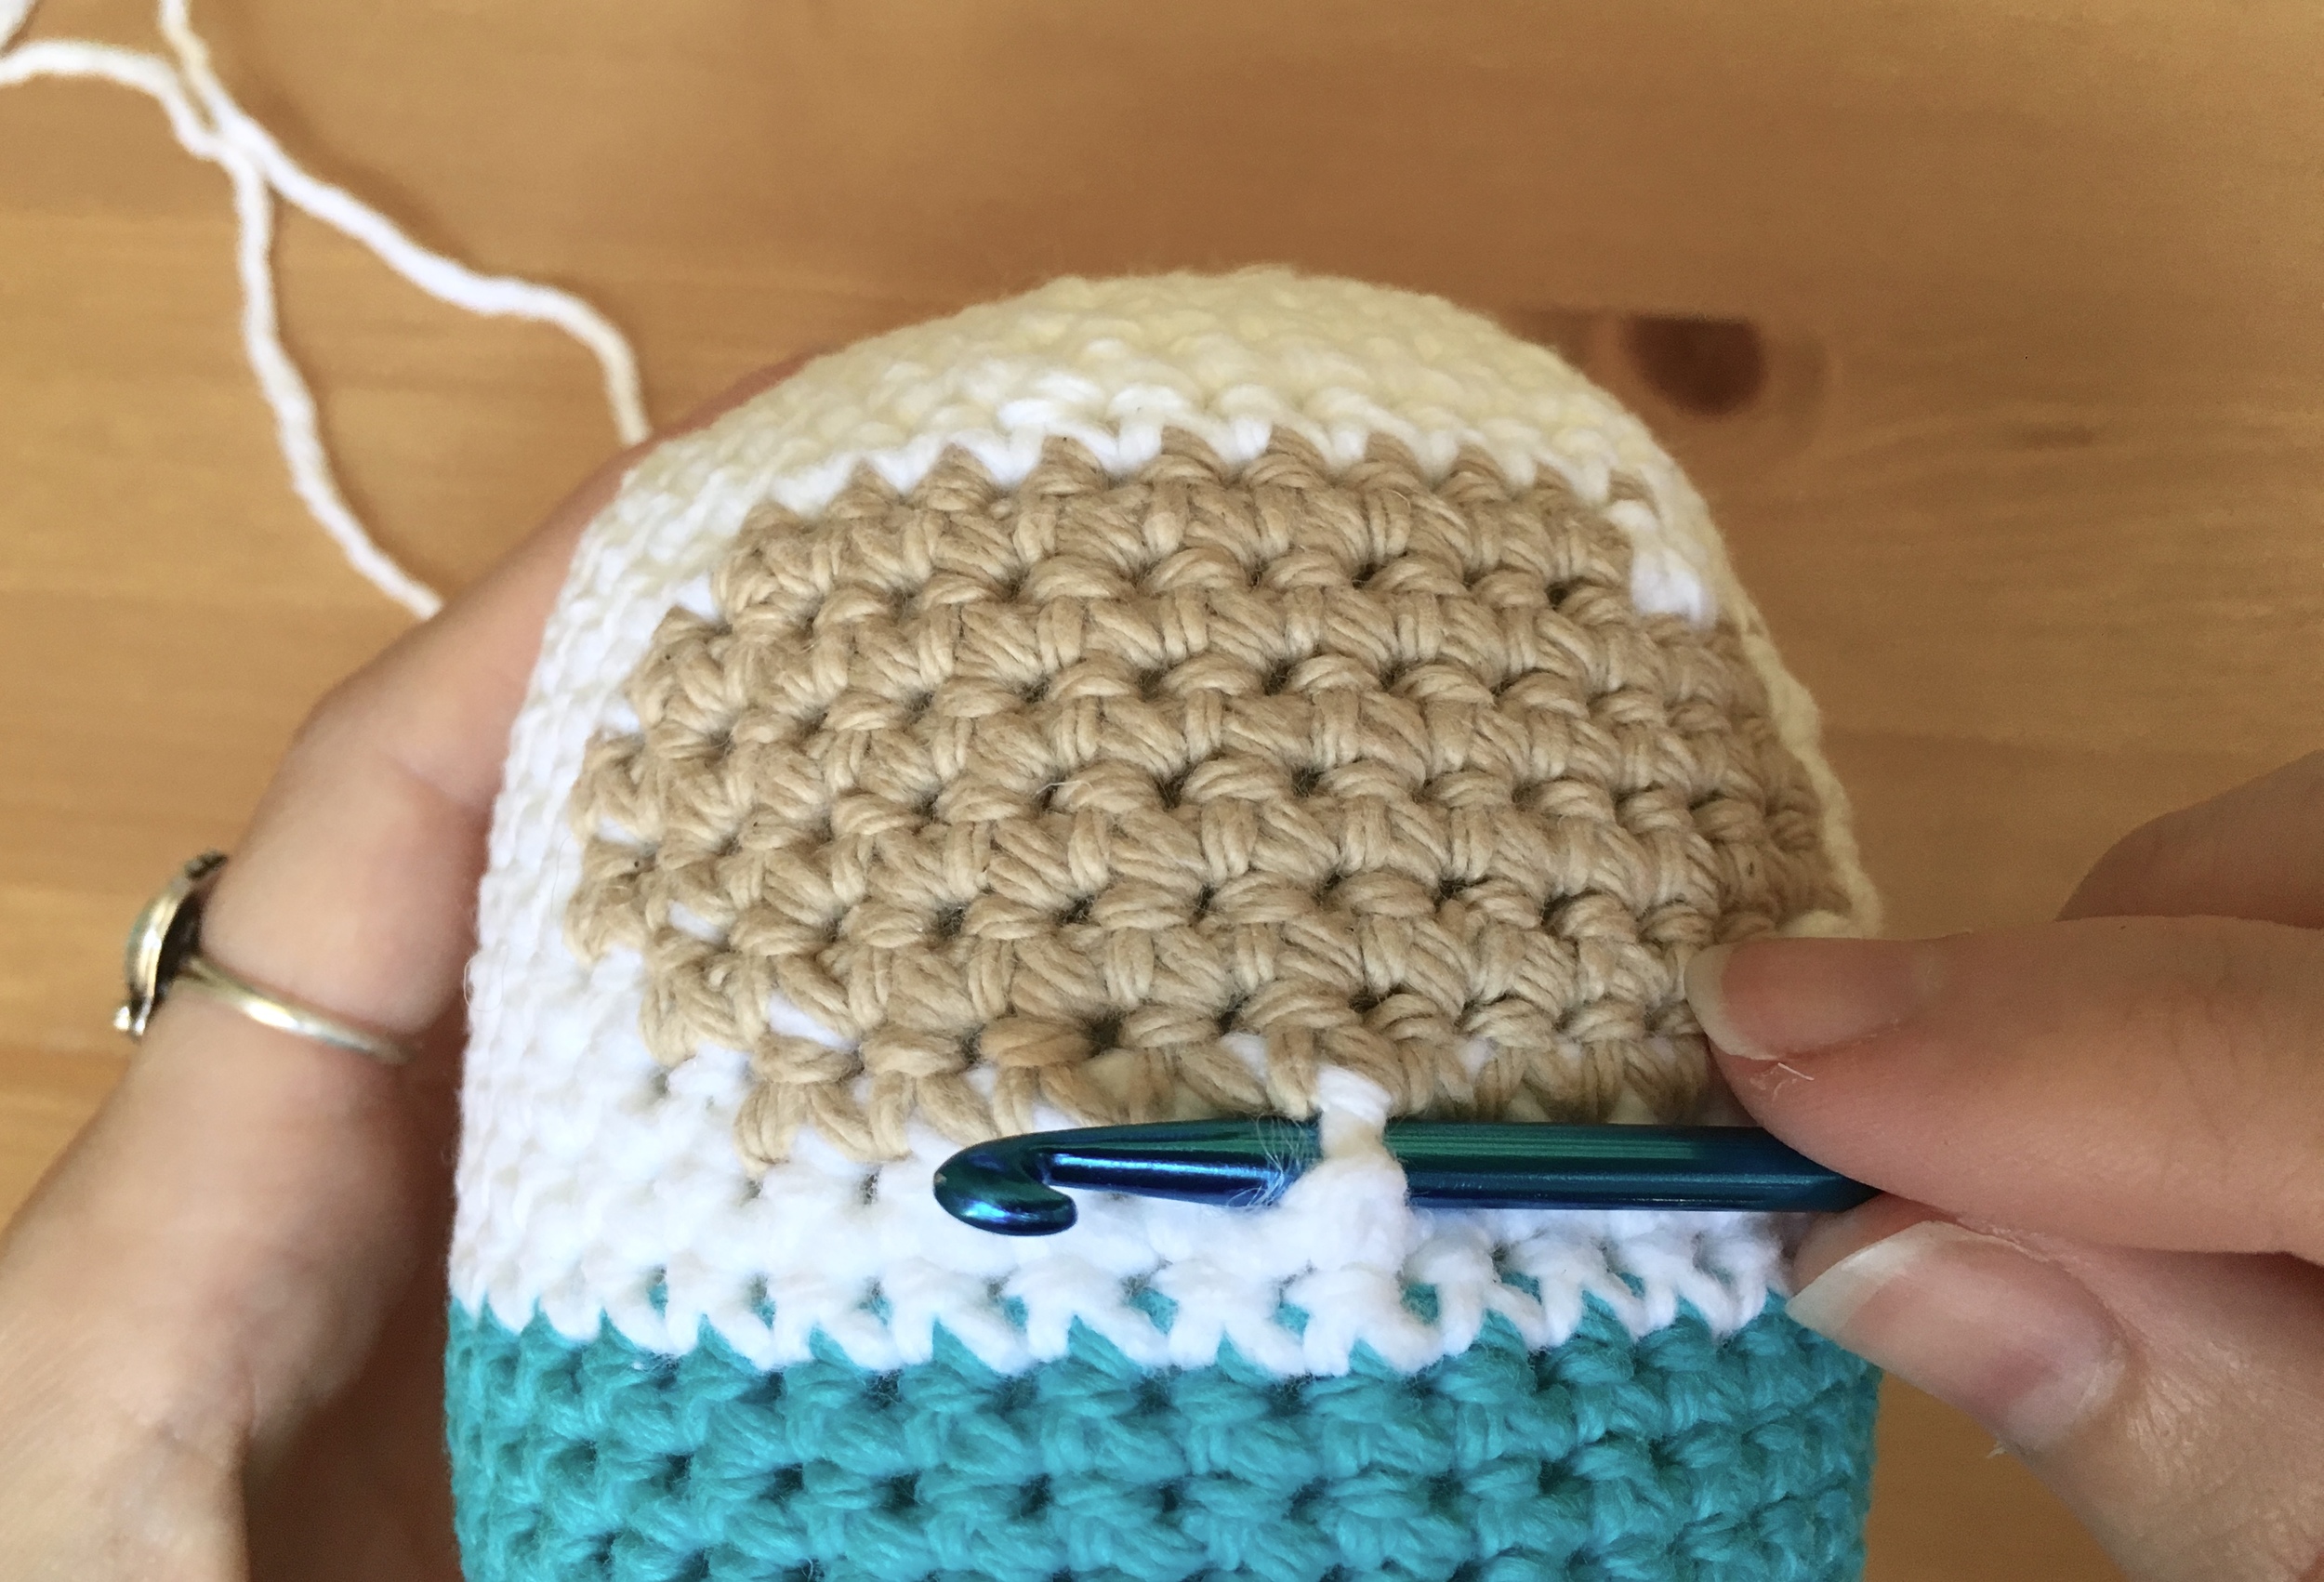
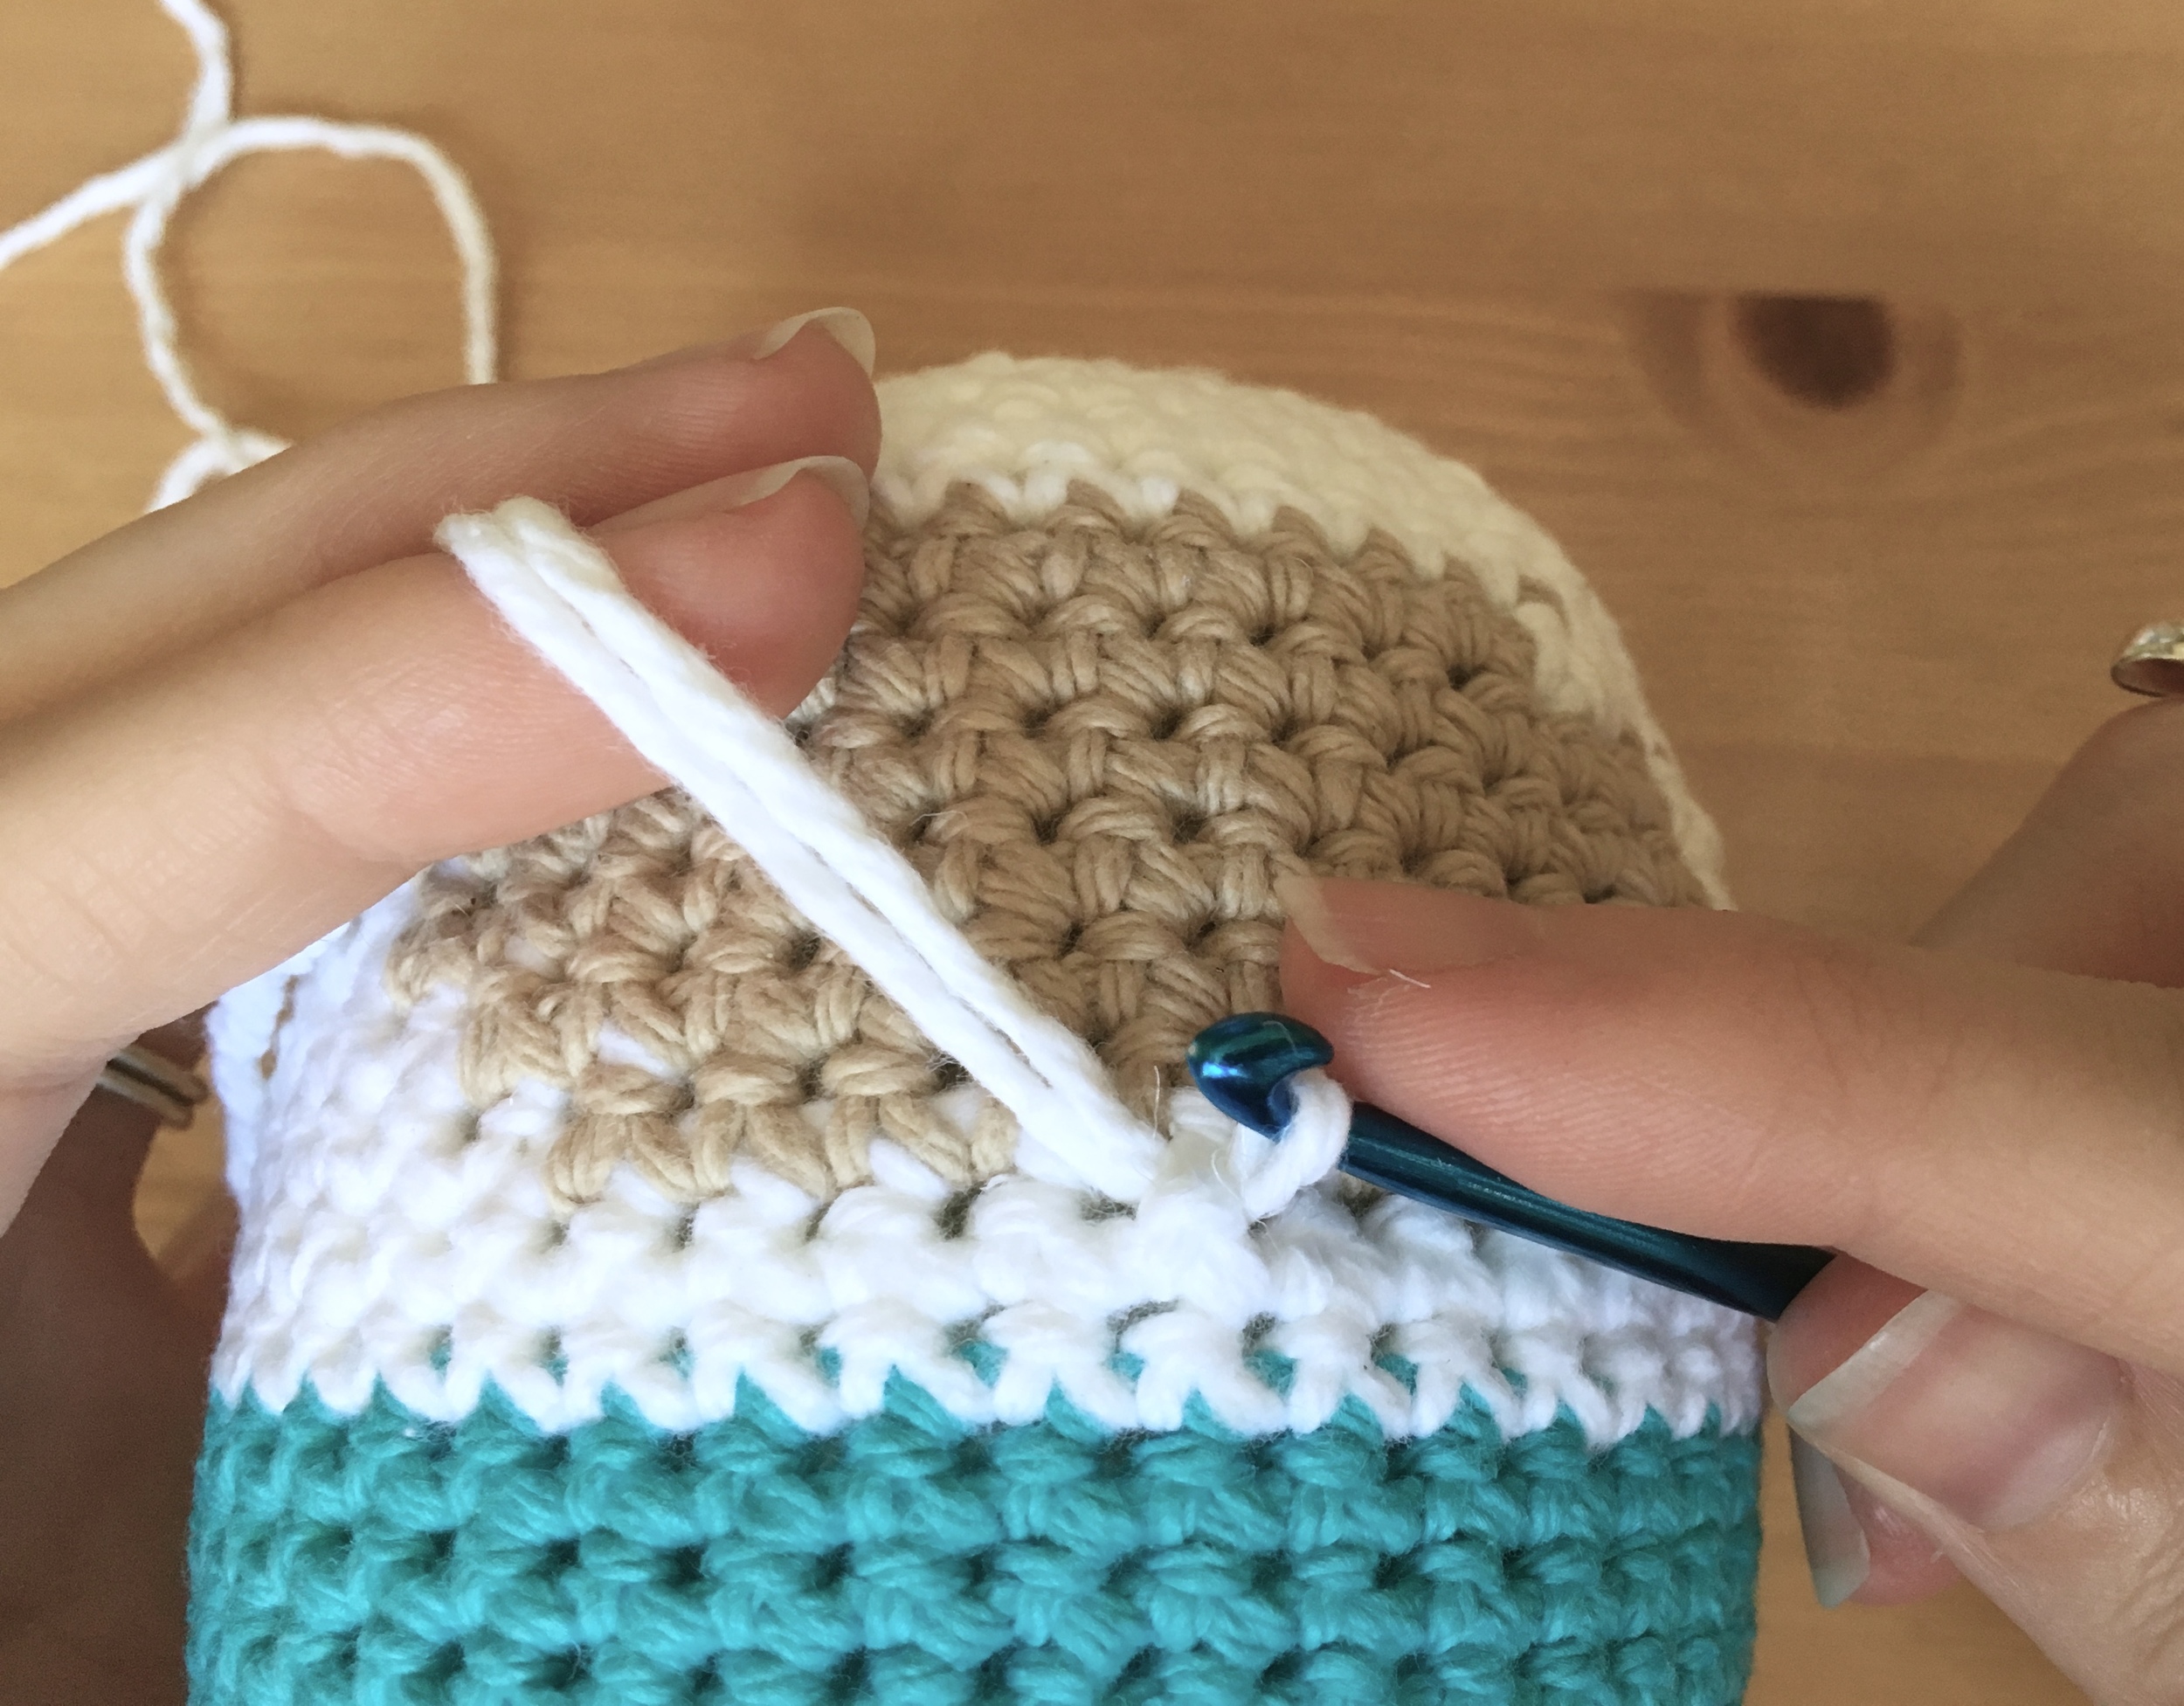
((make a single crochet track around face - use hoodie color - begin by sl st into center bottom of hoodie opening, where hoodie color meets skin color. ch 1. sc around posts of face creating a track. work your way around the hoodie opening once, until you meet up with the beginning ch 1. sl st into beginning ch 1. Finish Off.))
((make a single crochet track around neck - use hoodie color - begin by sl st into center back of hoodie where hoodie color meets shirt color. ch 1. sc around posts of body creating a track. work your way around bottom of hoodie once, until you meet up with beginning ch 1. sl st into beginning ch 1. Finish Off.))


HOODIE EARS : ((make 2. works in continuous rounds from top to bottom- use hoodie color))
RND 1 : ch 2. work 4sc in 2nd ch from hook (4)
RND 2 : 2sc in each sp around. (8)
RNDS 3 – 5 : sc in each sp around. (8)
((FINISH OFF. STUFF EAR VERY LIGHTLY BEFORE ATTACHING TO BODY))


ARMS : ((make 2. works in continuous rounds from hands to shoulders- use skin color))
RND 1 : ch 2. work 4sc in 2nd ch from hook. (4)
RND 2 : * 2sc in next sp. sc in next sp. * around (6)
RND 3 : * 2 sc in next sp. sc in next 2 sp. * around (8)
RND 4 : sc in each sp around. (8)
RND 5 : * sc2tog. sc in next 2 sp. * around (6)
RNDS 6 – 31: sc in each sp around. (6)
((FINISH OFF. DO NOT STUFF ARM. ARM WILL ATTACH TO SLEEVE BEFORE ATTACHING TO BODY))
SLEEVES : ((make 2. works in non-continuous rounds from shoulder to sleeve hem- use shirt color))
RND 1 : ch 8. connect ends to form a ring by sl st to 1st ch.
RND 2 : ch 1. sc in next sp and each sp around. sl st to beginning ch 1. (8)
RND 3 : ch 1. sc in same sp and each sp around. sl st to beginning ch 1. (9)
RNDS 4 – 7: ch 1. sc in next sp and each sp around. sl st to beginning ch 1. (9)
((FINISH OFF. DO NOT STUFF SLEEVE. INSERT ARM HALFWAY INTO SLEEVE. AT SLEEVE HEM, LIGHTLY ATTACH SLEEVE TO ARM. AT SHOULDER, ATTACH SLEEVE TO BODY))
LEGS : ((make 2. begins in non-continuous rounds to work foot and changes to continuous rounds at the ankle. works from boot to thigh- begin with boot color))
RND 1 : ch 8. ((WORKING DOWN ONE SIDE OF CHAIN LINK)) sc in next 6 sp. 3sc in end sp. ((WORKING UP OTHER SIDE OF CHAIN LINK)) sc in next 5 sp. 3sc in last sp. sl st to beginning ch 1. (17)
RND 2 : ch 1. sc in next 5 sp. 2sc in next 3 sp. sc in next 6 sp. 2 sc in next 2 sp. sc in last sp. st st to beginning ch 1. (23)
RND 3 : ((WORKING IN FRONT LOOPS ONLY)) ch 1. sc in next 5 sp. sc2tog. sc in next 2 sp. sc2tog. sc in remaining 11 sp. sl st to beginning ch 1. (21)

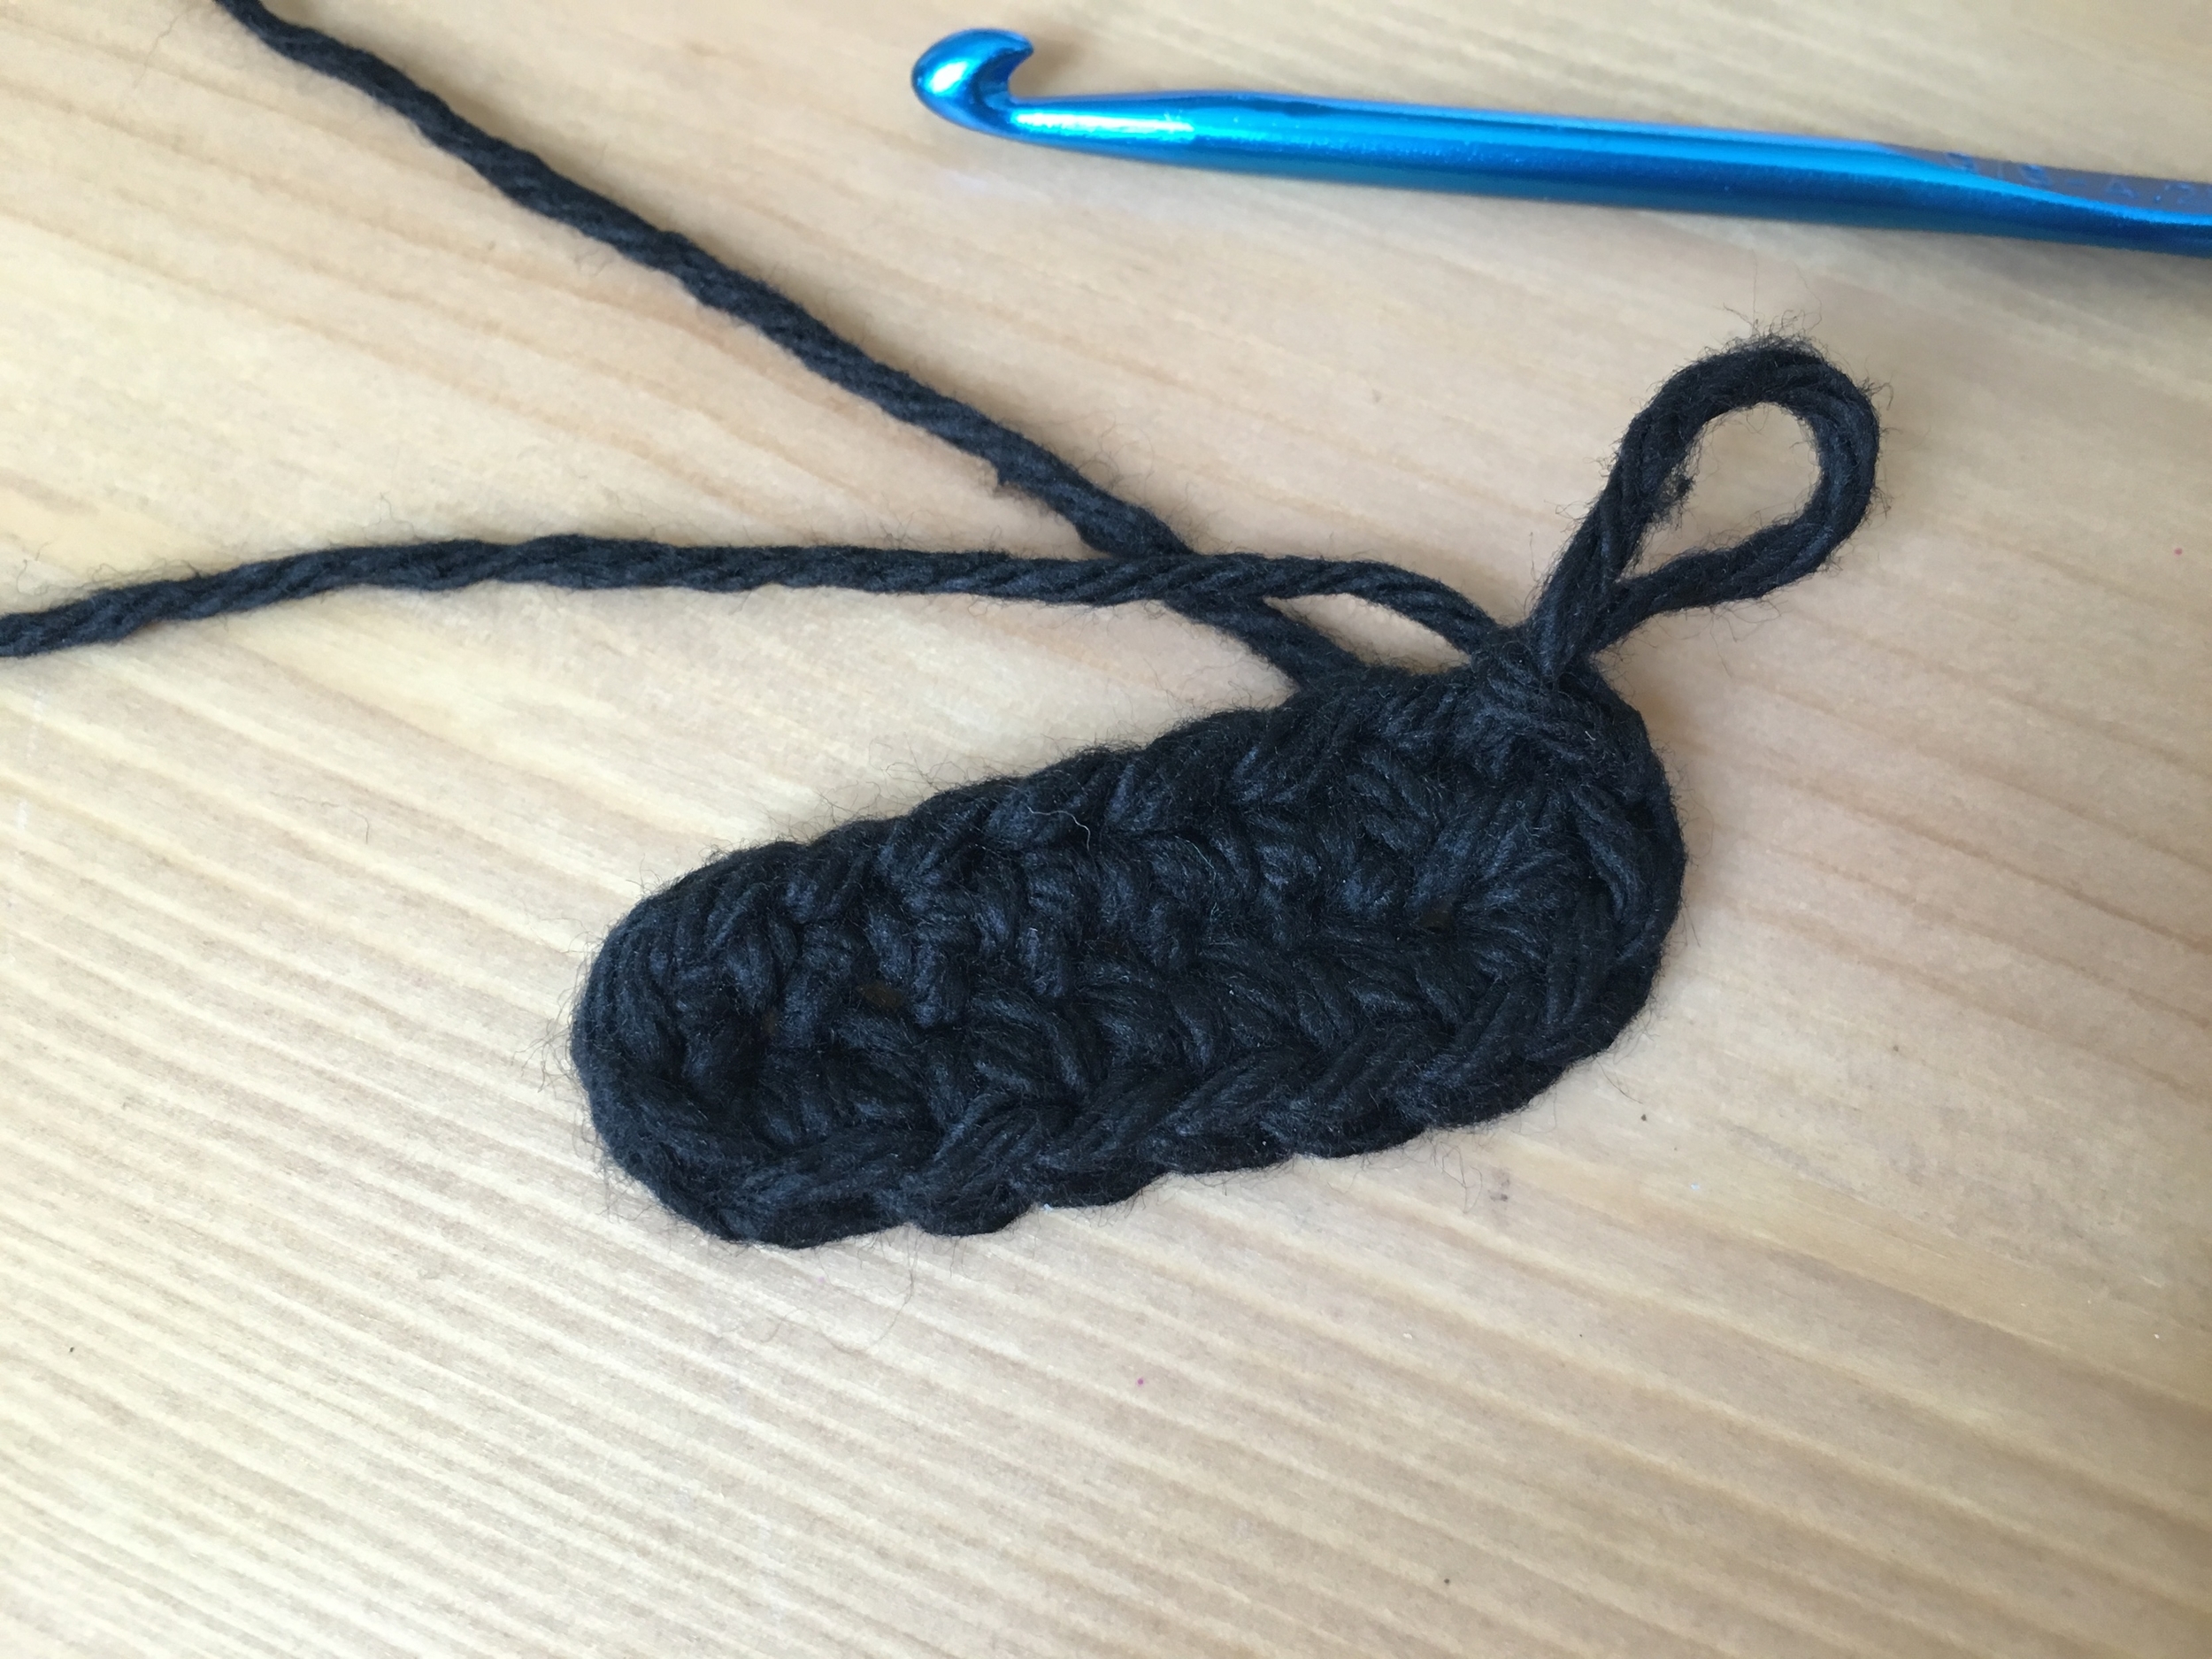


RND 4 : ch 1. sc in next 4 sp. * hdc2tog * 3 times. sc in remaining 10 sp. sl st to beginning ch 1. (18)
RND 5 : ch 1. sc in next 2 sp. * sc2tog * 4 times. sc in remaining 7 sp. sl st to beginning ch 1. (14)
RND 6 : ch 1. sc in next sp. * sc2tog * 3 times. sc in remaining 6 sp. sl st to beginning ch 1. (11)
RND 7 : ch 1. sc in next sp. * sc2tog * 2 times. sc in remaining 5 sp. sl st to beginning ch 1. (9)
RND 8 : ((WORKING IN BACK LOOPS ONLY)) * sc2tog * 2 times. sc in remaining 5 sp. (7)
((STUFF FOOT PORTION OF LEG BEFORE MOVING FORWARD WITH RND 9))
RNDS 9 – 11 : sc in each sp around. (7)
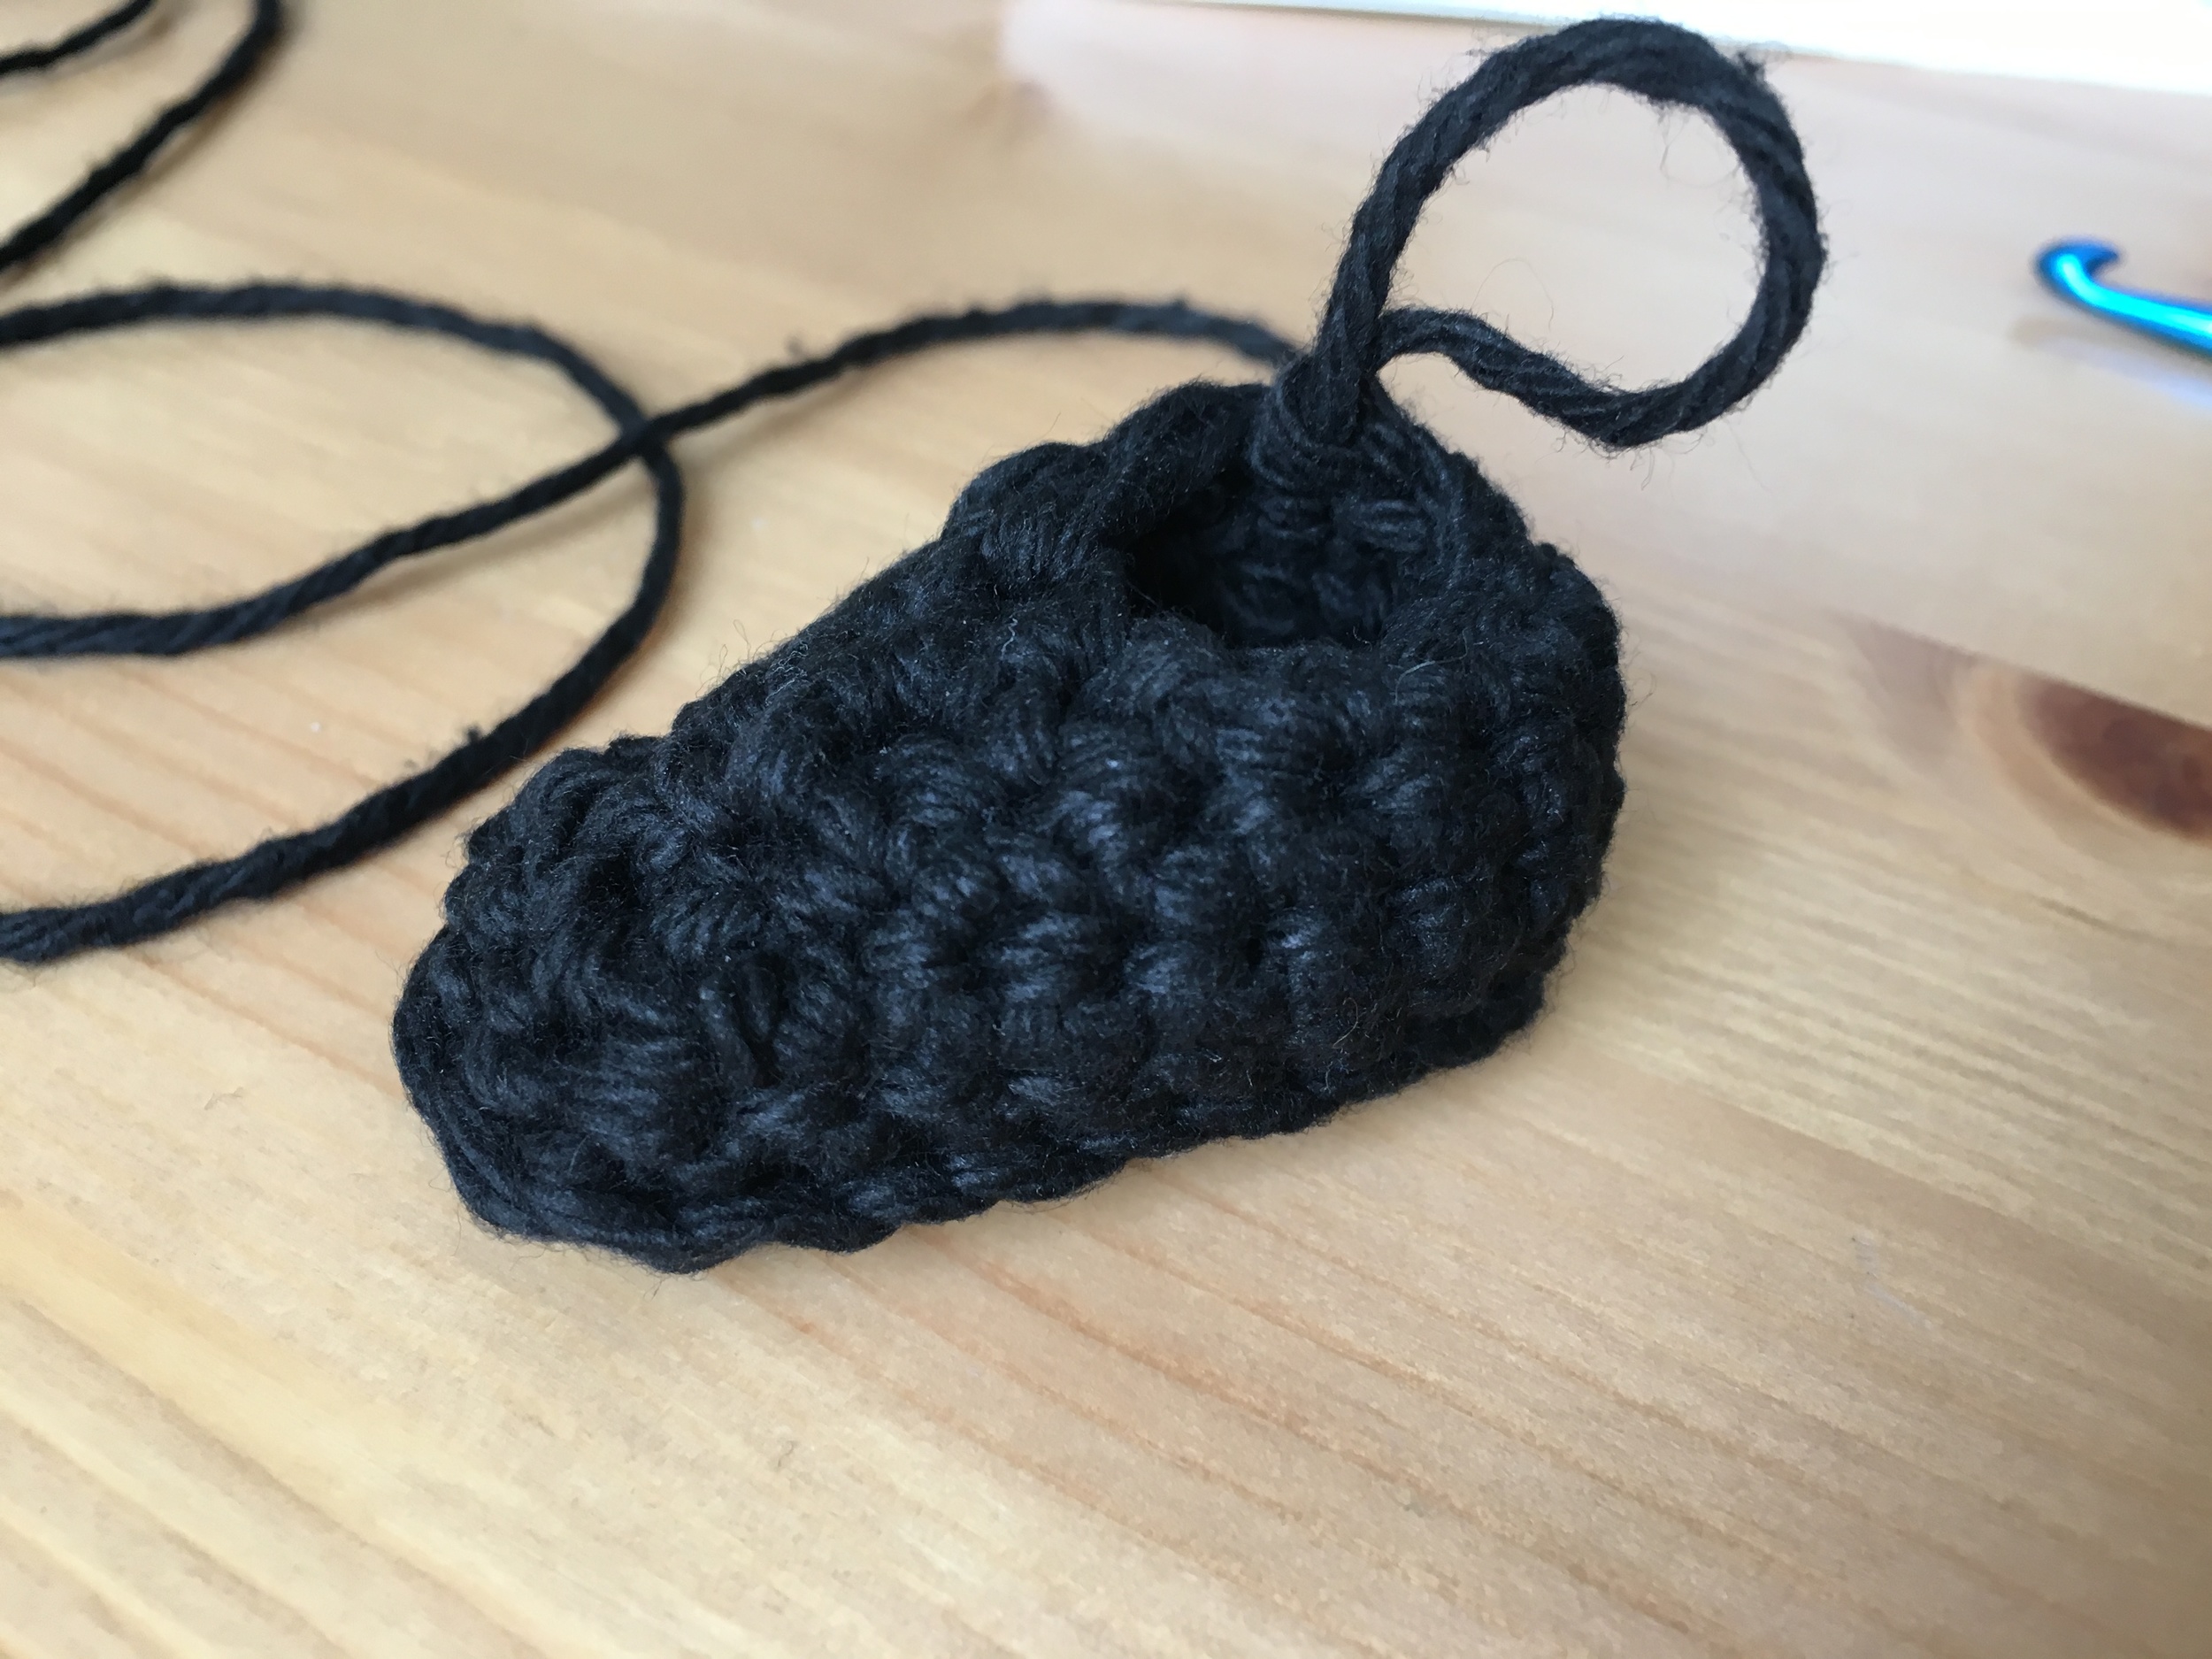
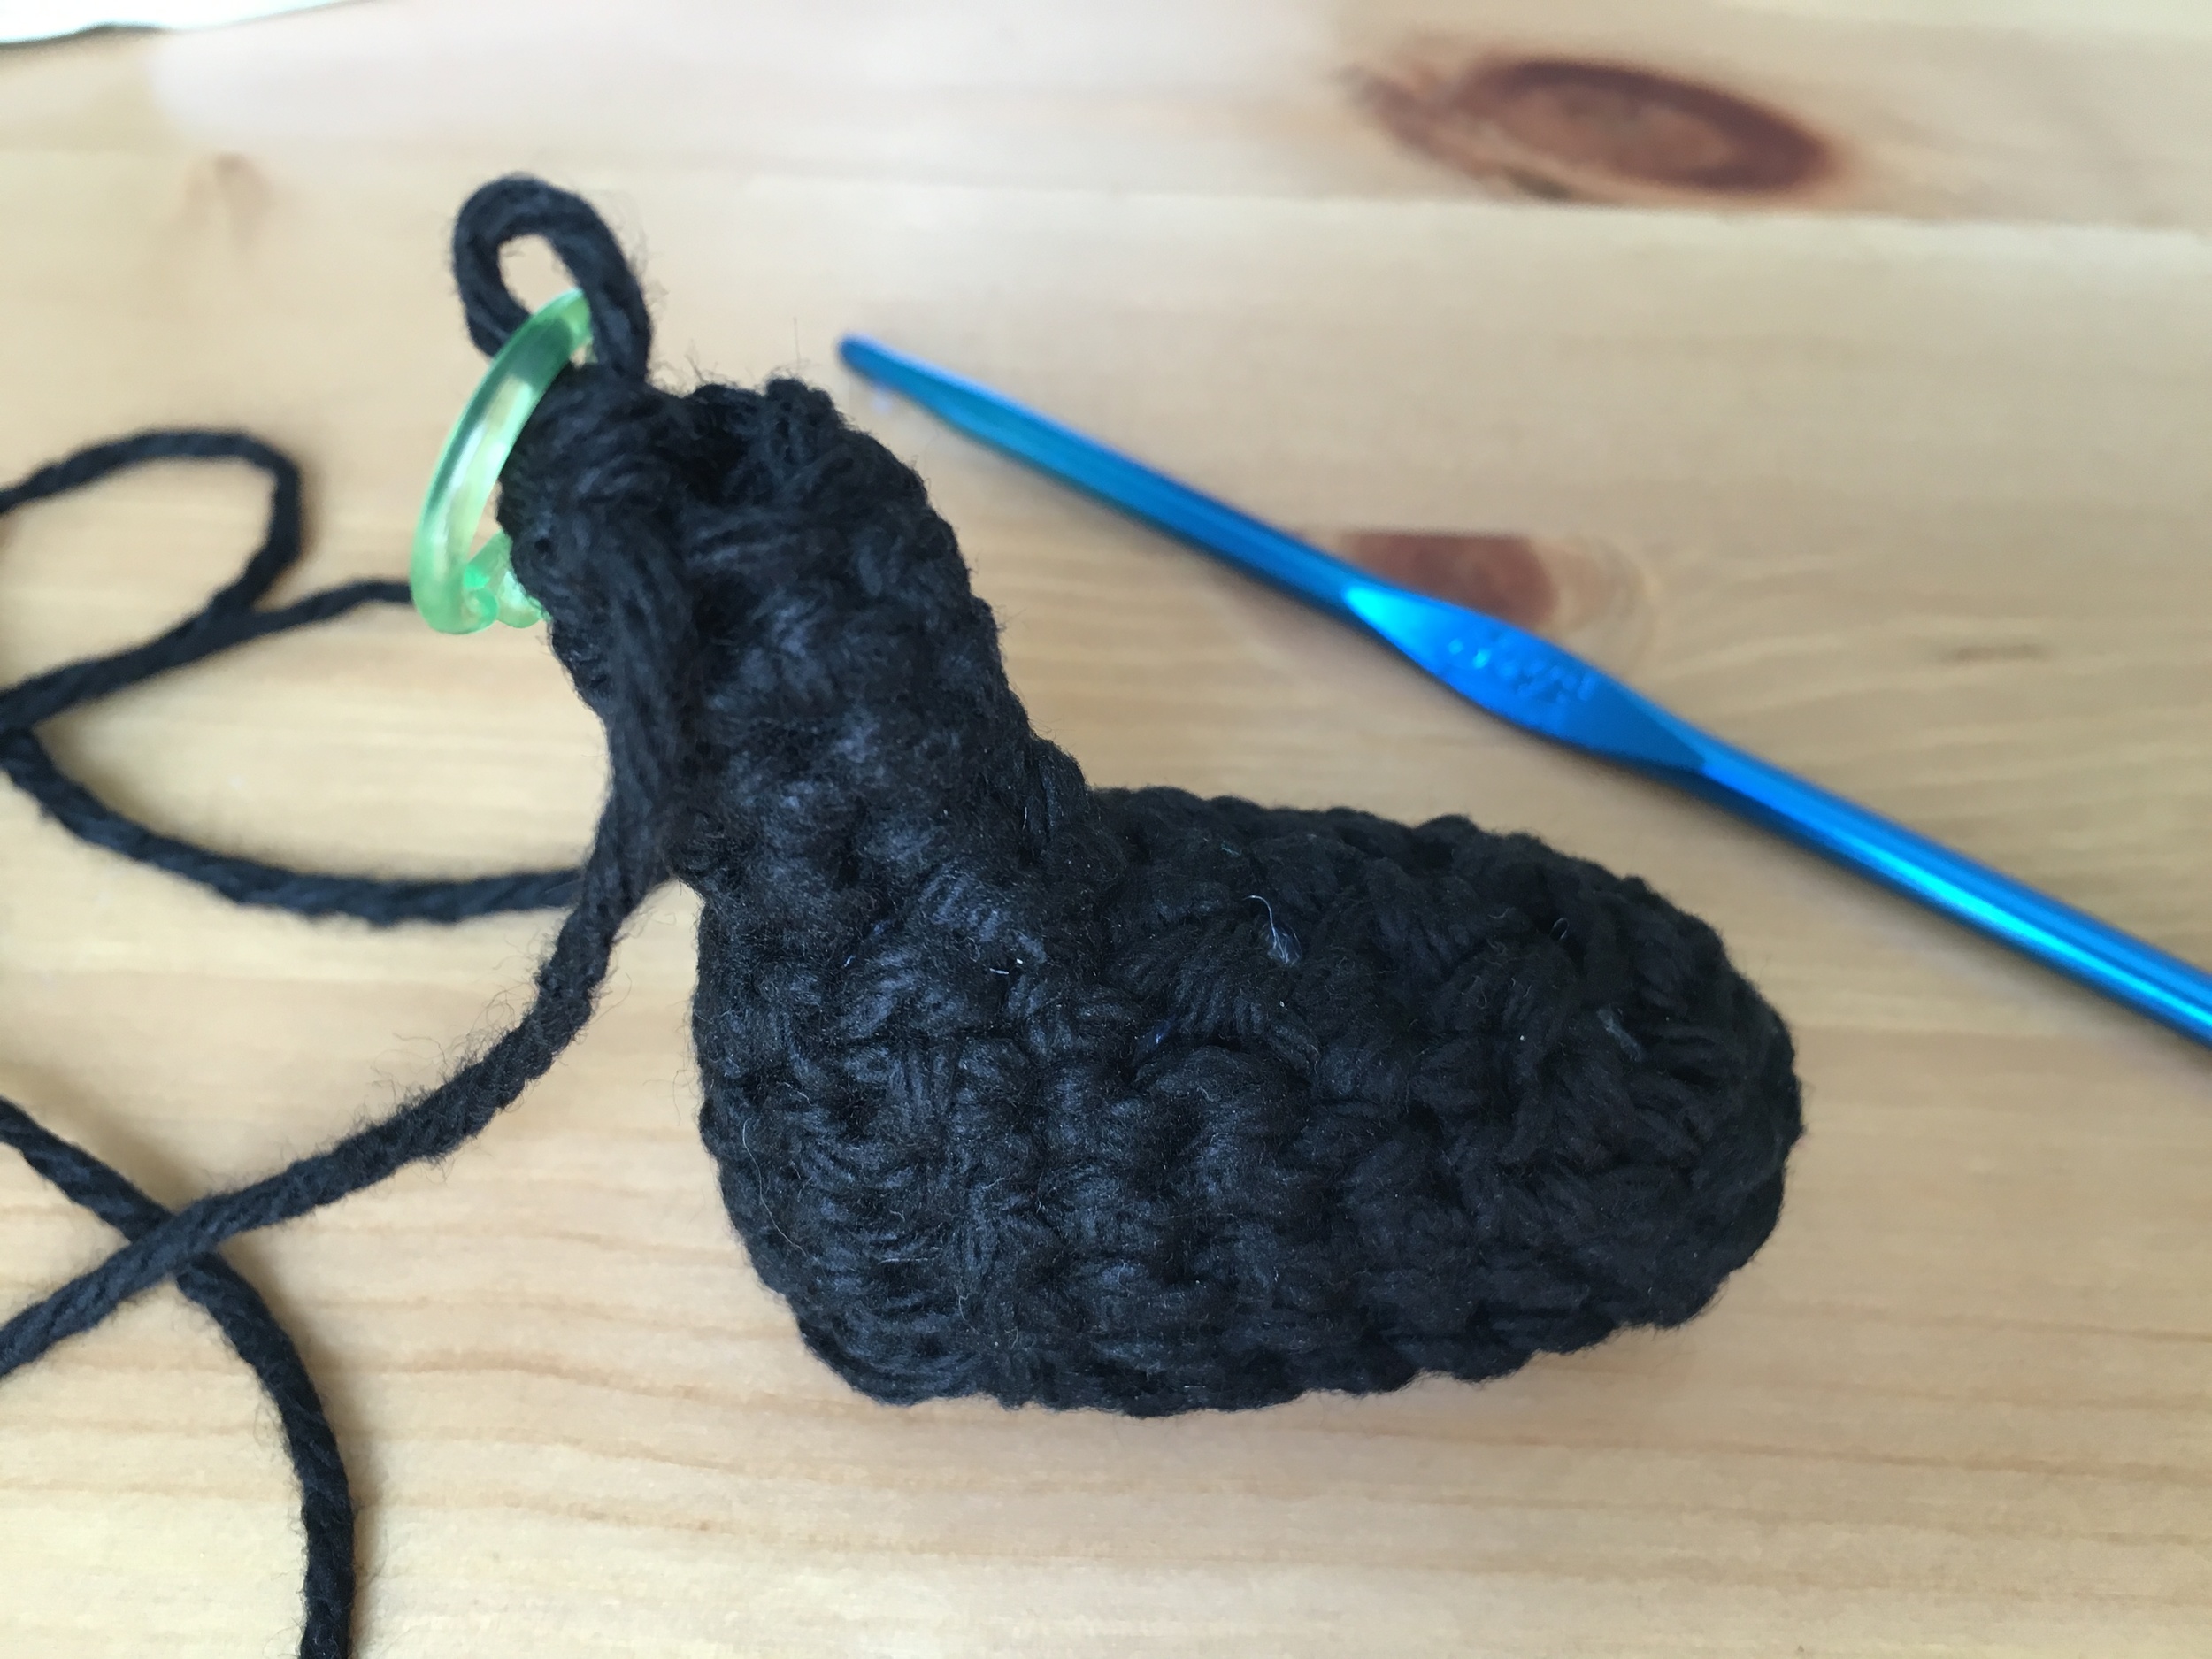
((CHANGE YARN TO SKIN COLOR))
RNDS 12 – 29 : sc in each sp around. (7)
((FINISH OFF. DO NOT STUFF LEG. LEG WILL ATTACH TO SHORTS BEFORE ATTACHING TO BODY))
SOCK DETAIL : ((create a single crochet track around leg at top of boot - use white yarn))
begin by sl st into leg where boot color meets skin color. sc around posts of leg rounds creating a track. work your way around leg twice, from top of boot towards foot, to form a double track.
either leave as is, or whip stitch tracks together to close gap - stitcher's choice!


SHORTS : ((make 2. works in non-continuous rounds from top to bottom hem- use pants color))
RND 1 : ch 11. connect ends to form a ring by sl st to 1st ch.
RNDS 2 – 8 : ch 1. sc in next sp and each sp around. sl to to beginning ch 1. (11)
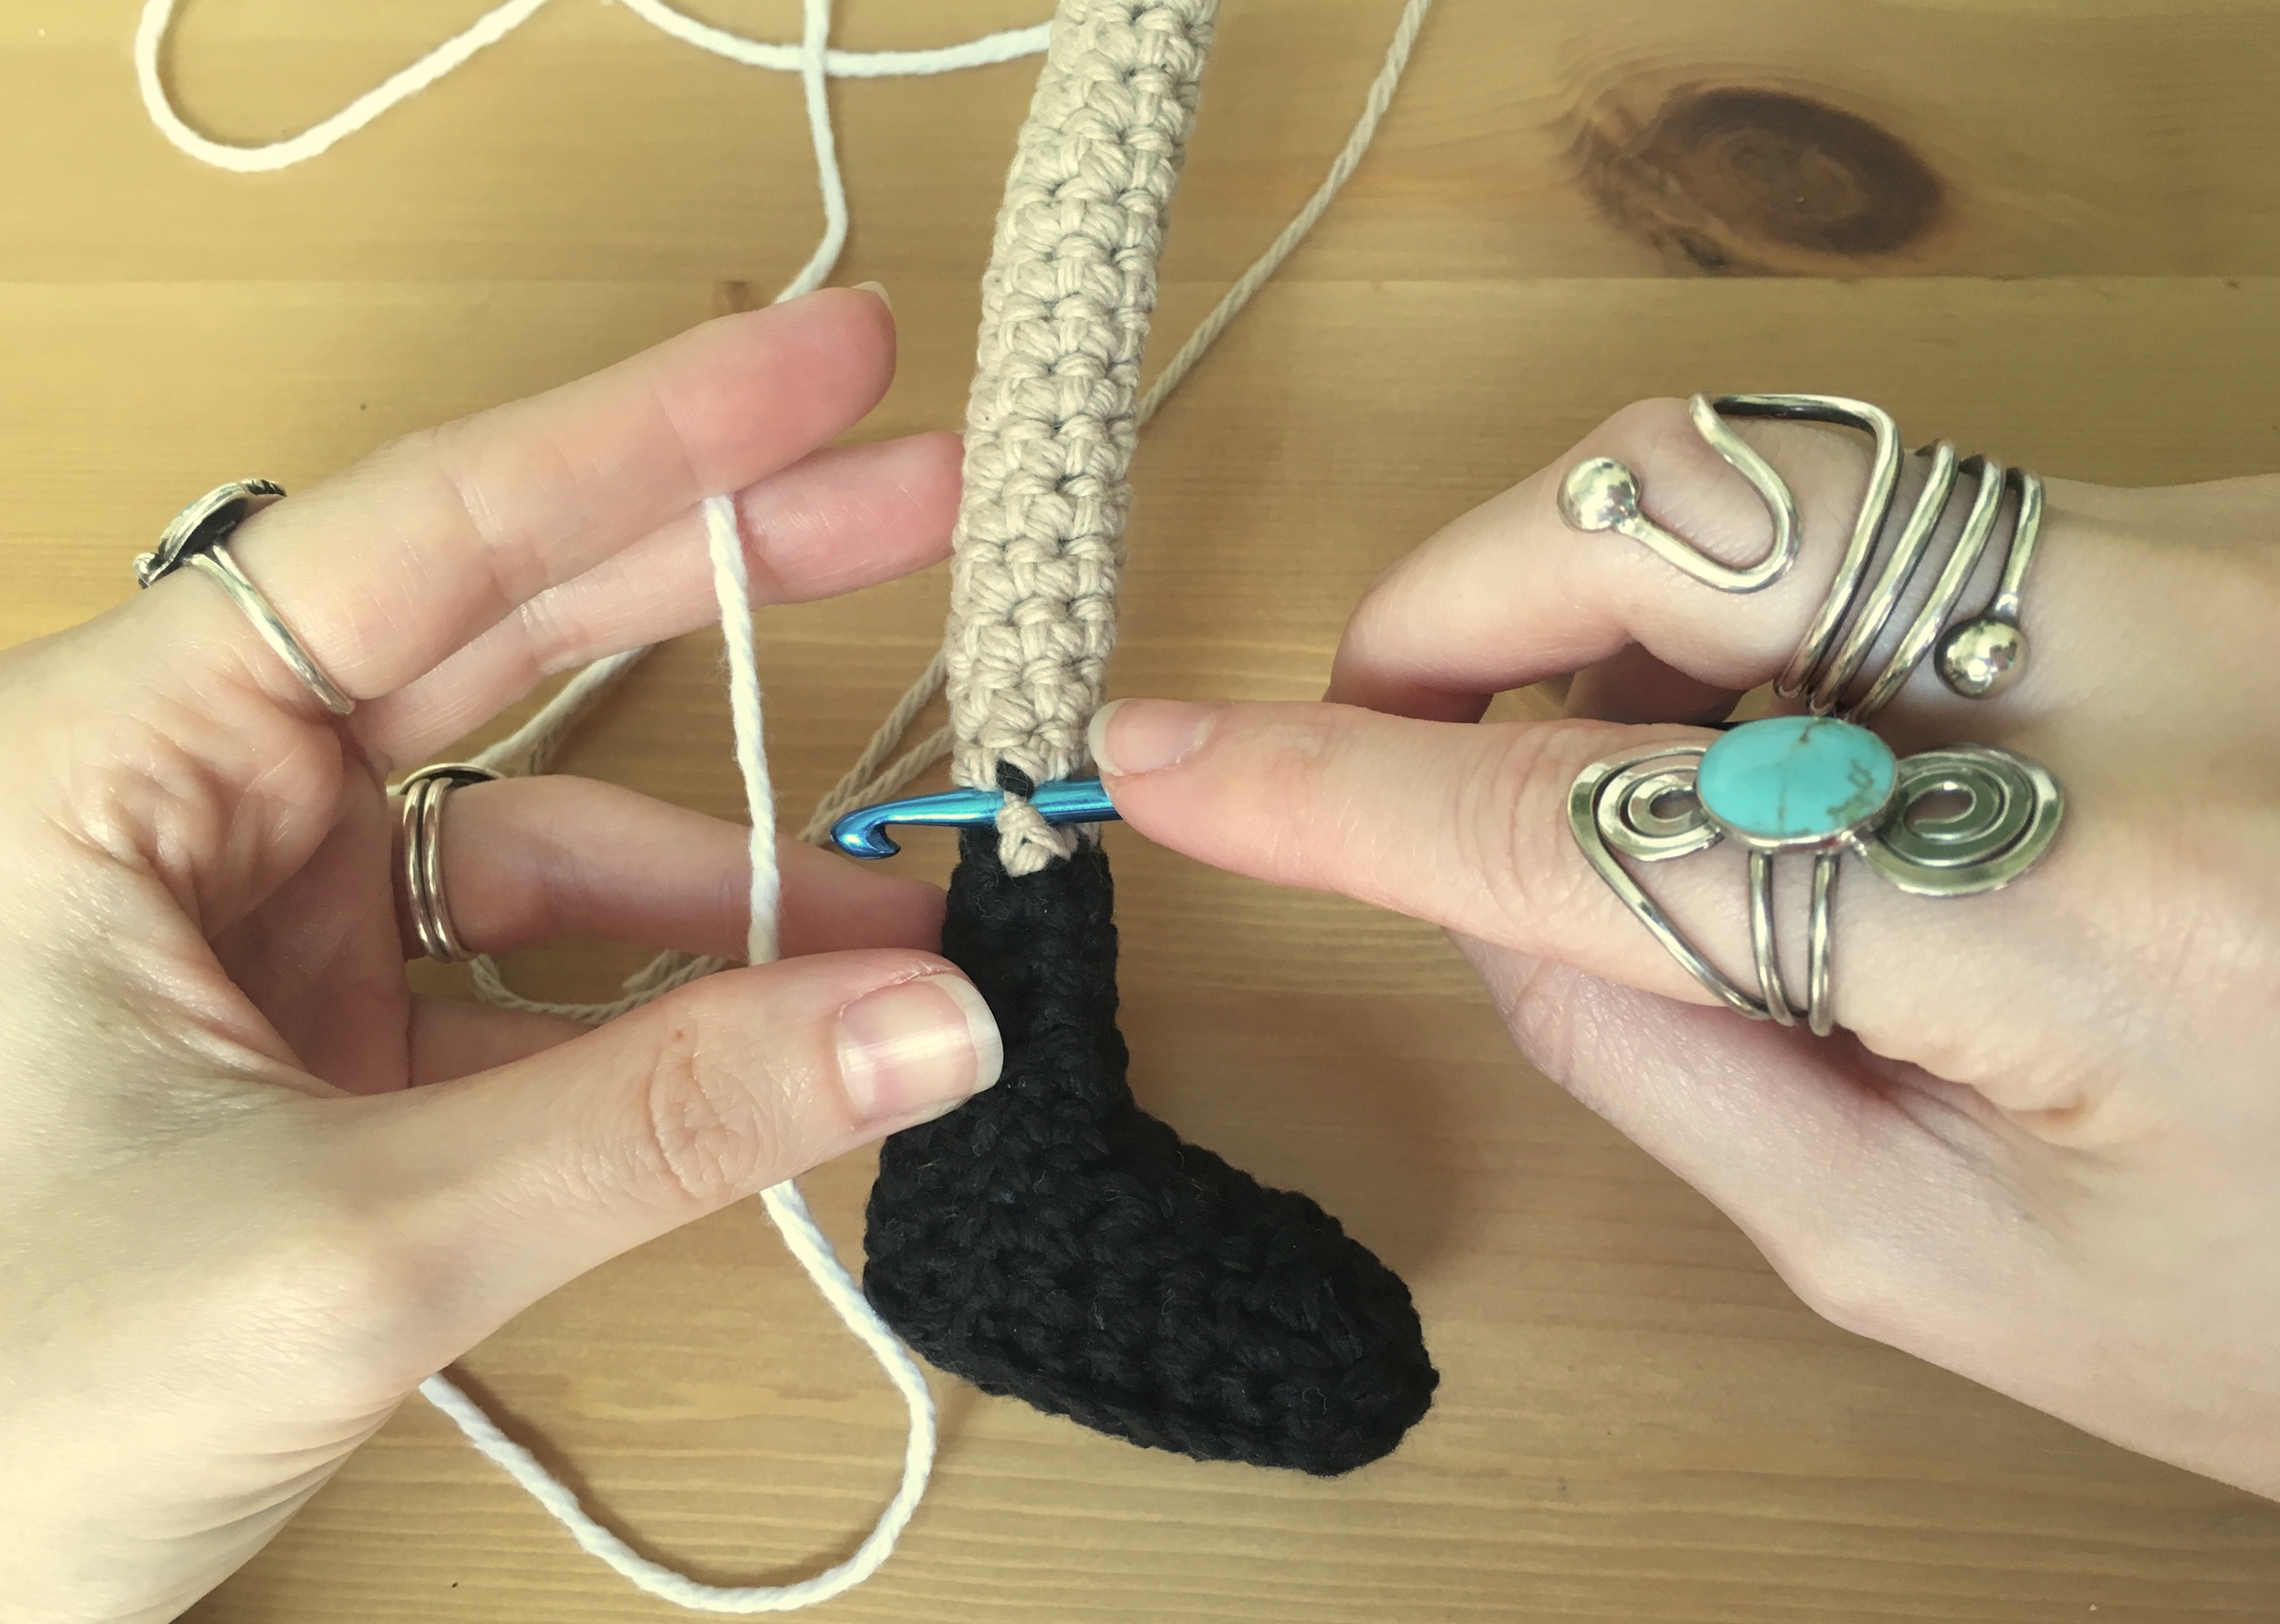
((FINISH OFF. INSERT LEG INTO SHORTS AND ATTACH PIECES TOGETHER AT TOP EDGE BEFORE STITCHING SHORTS TO BODY))


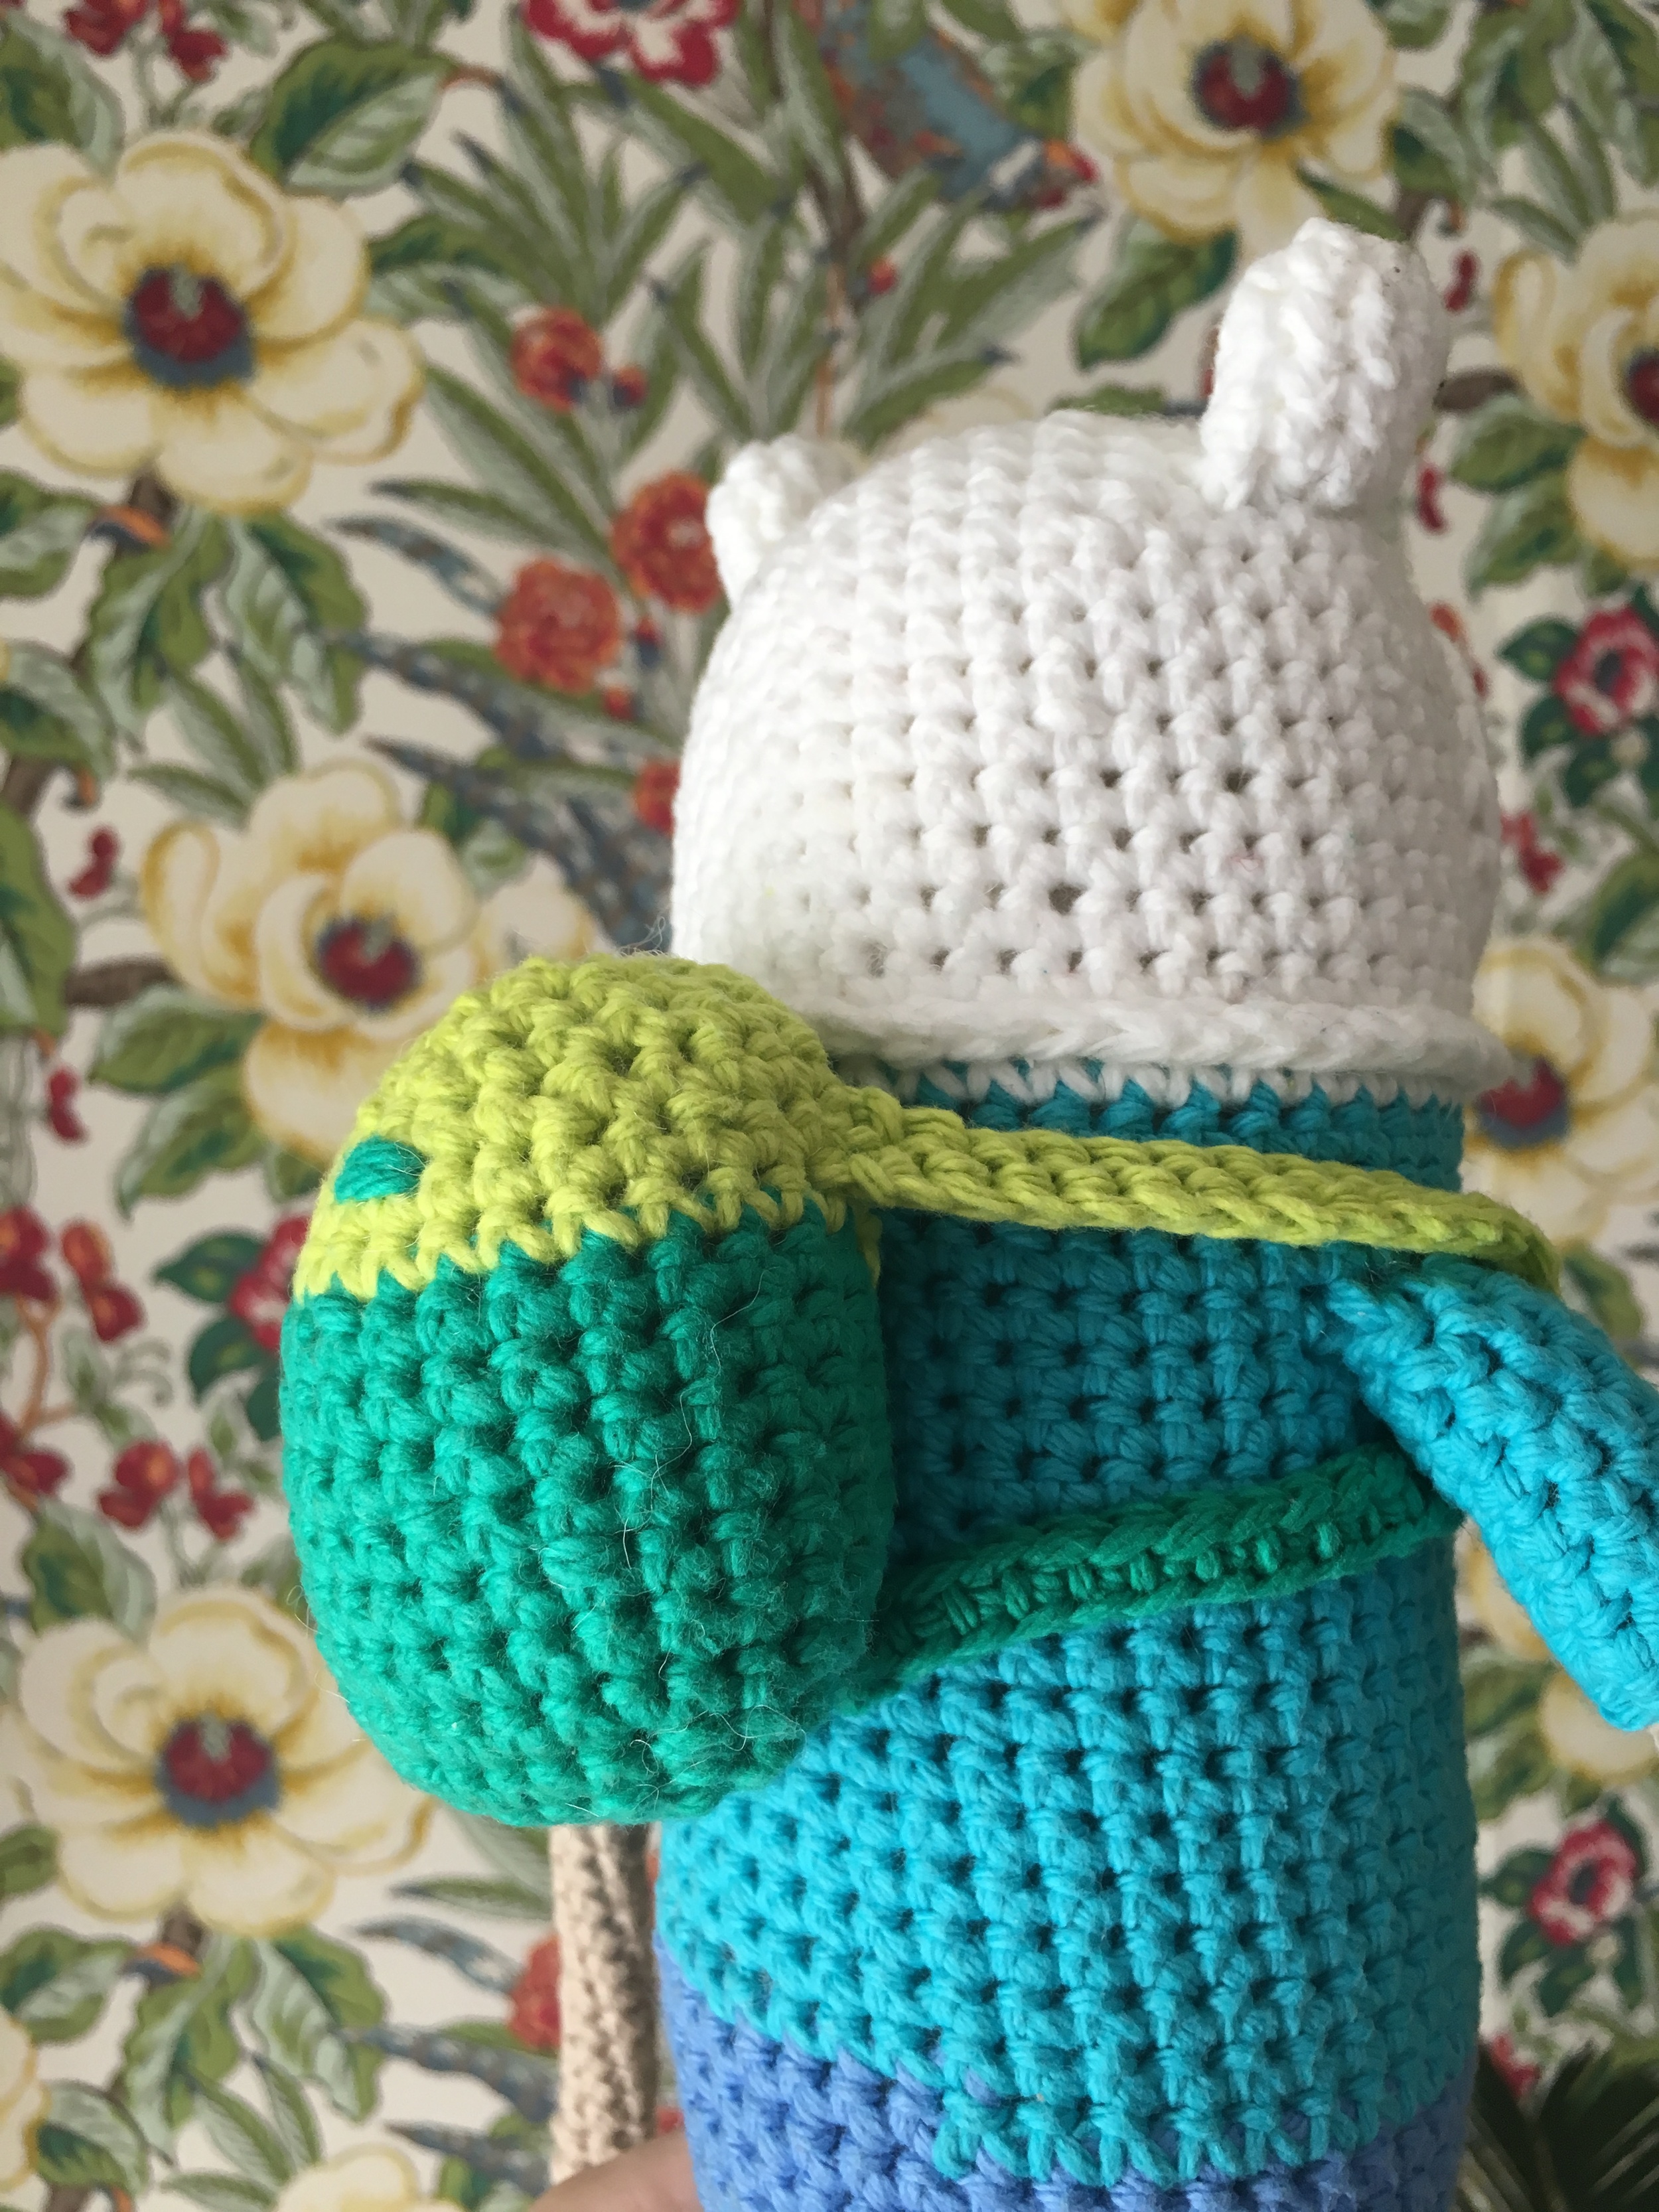
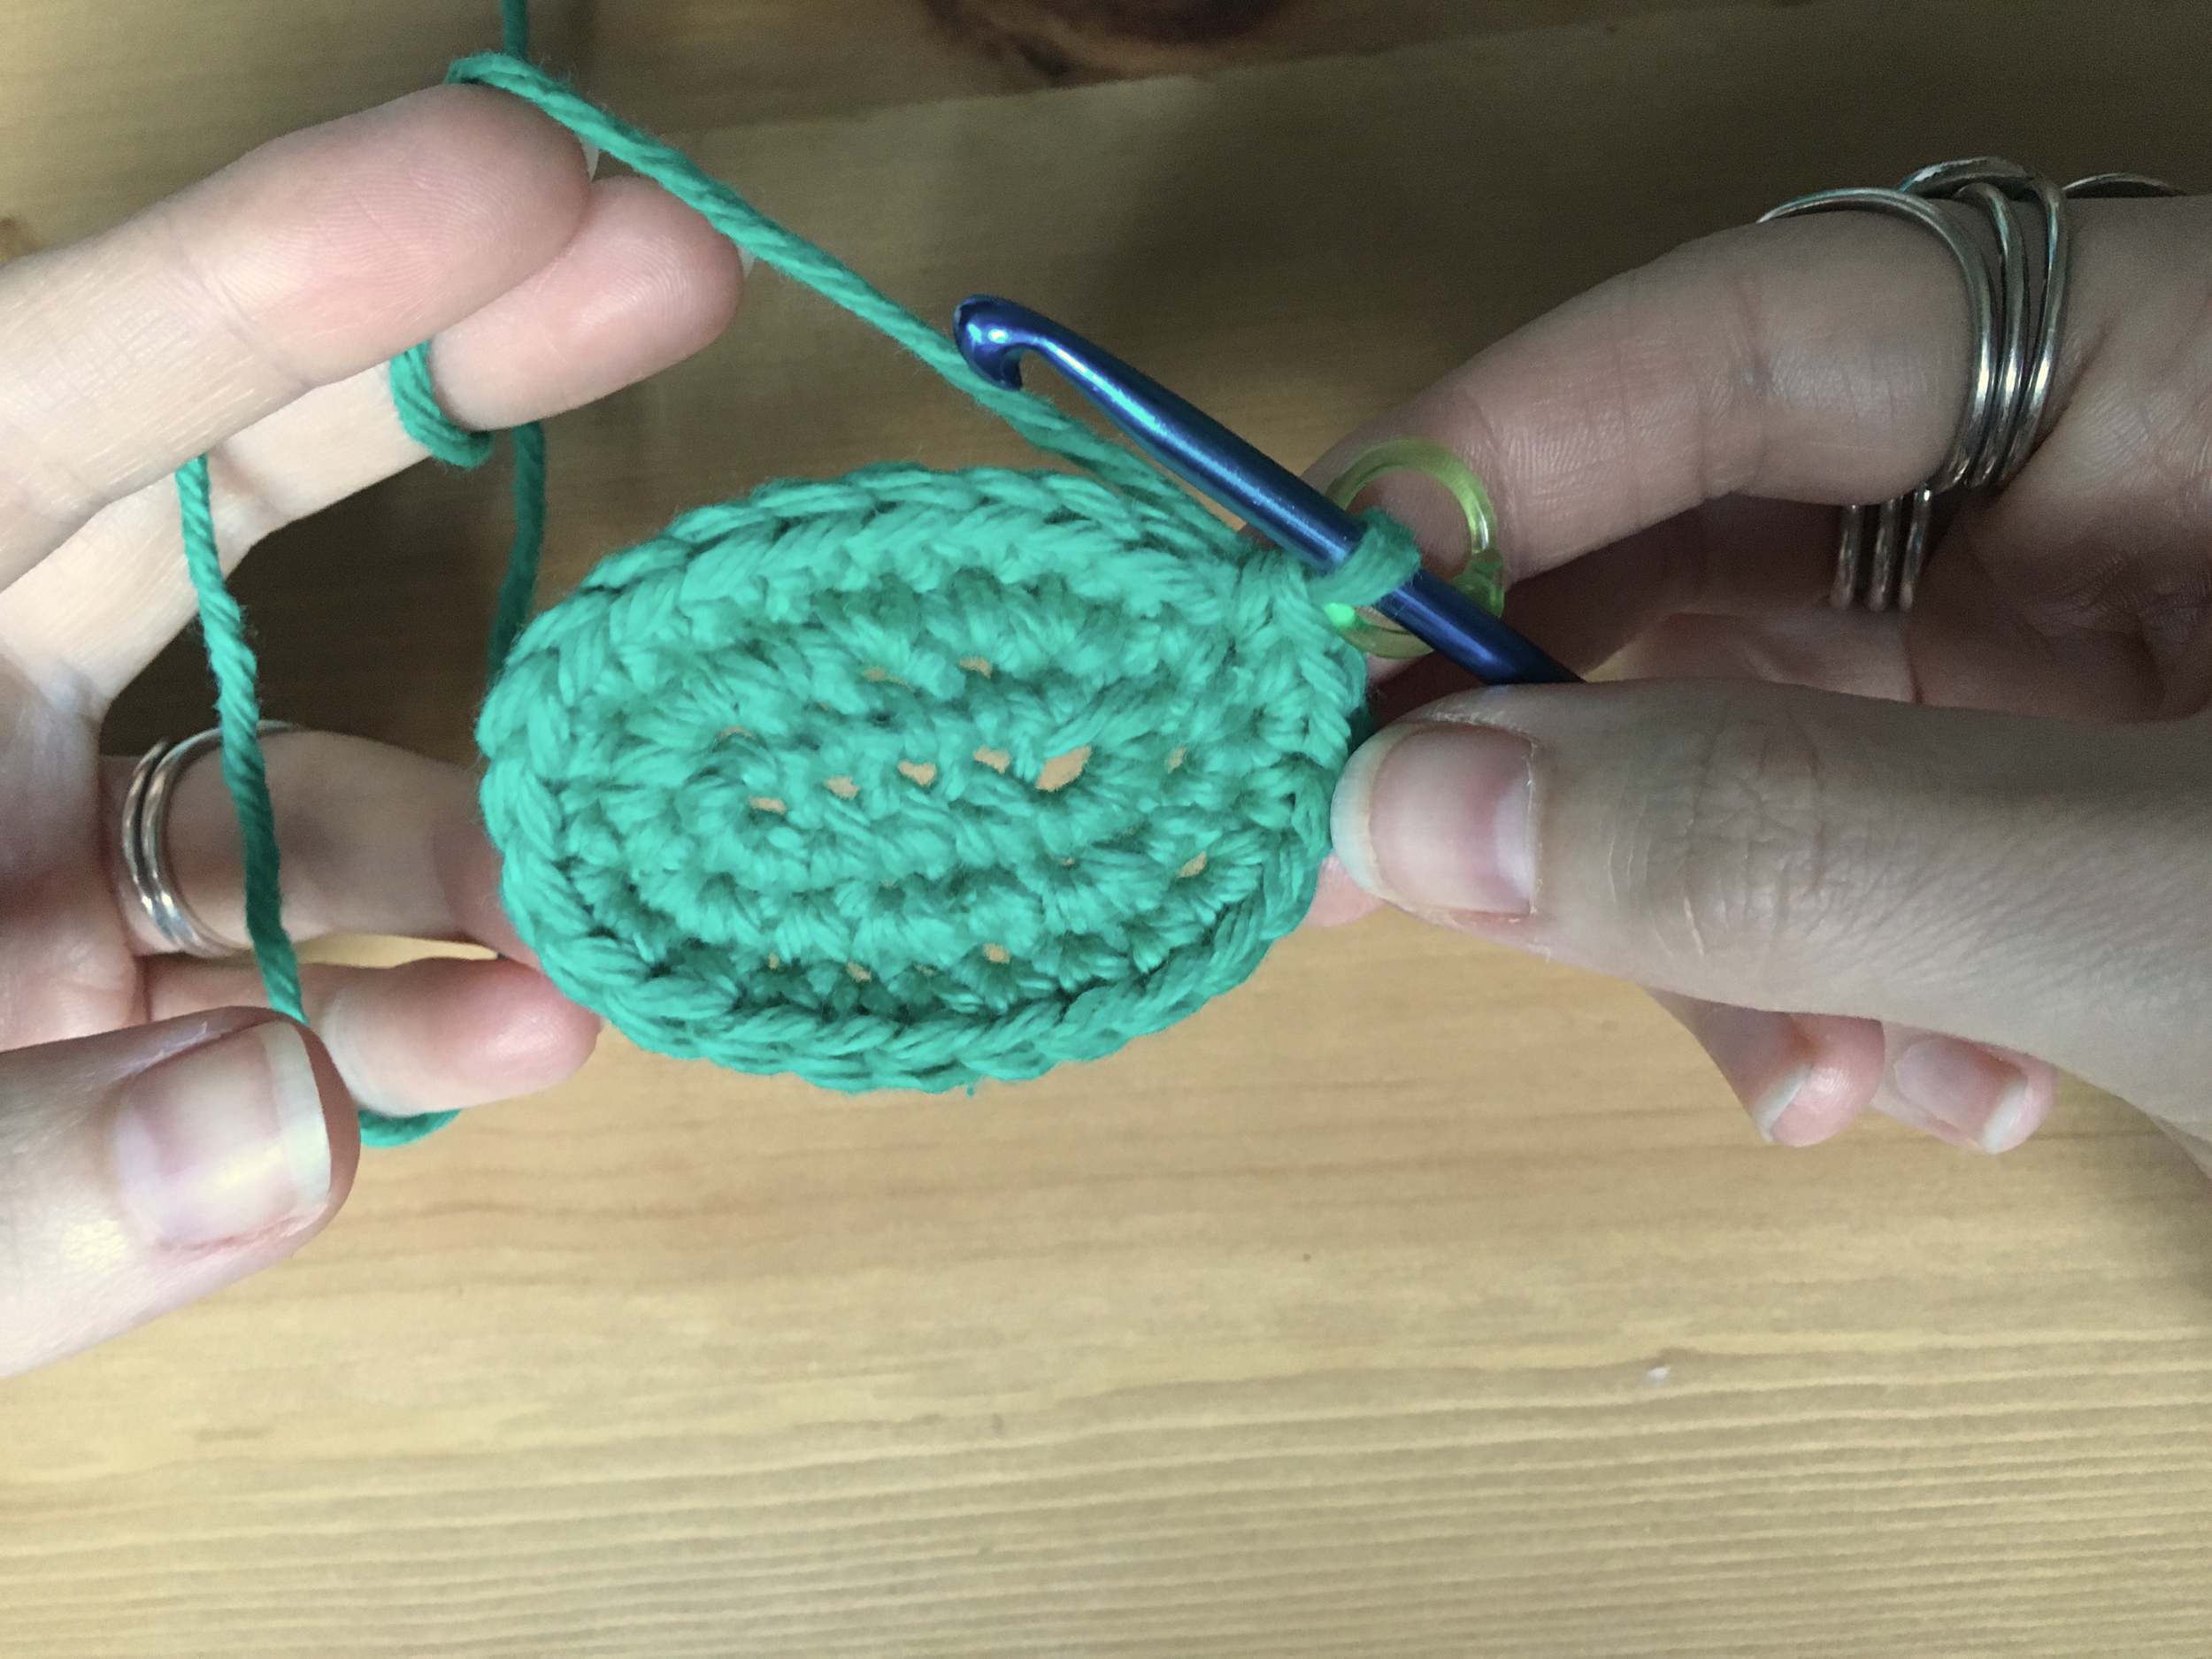
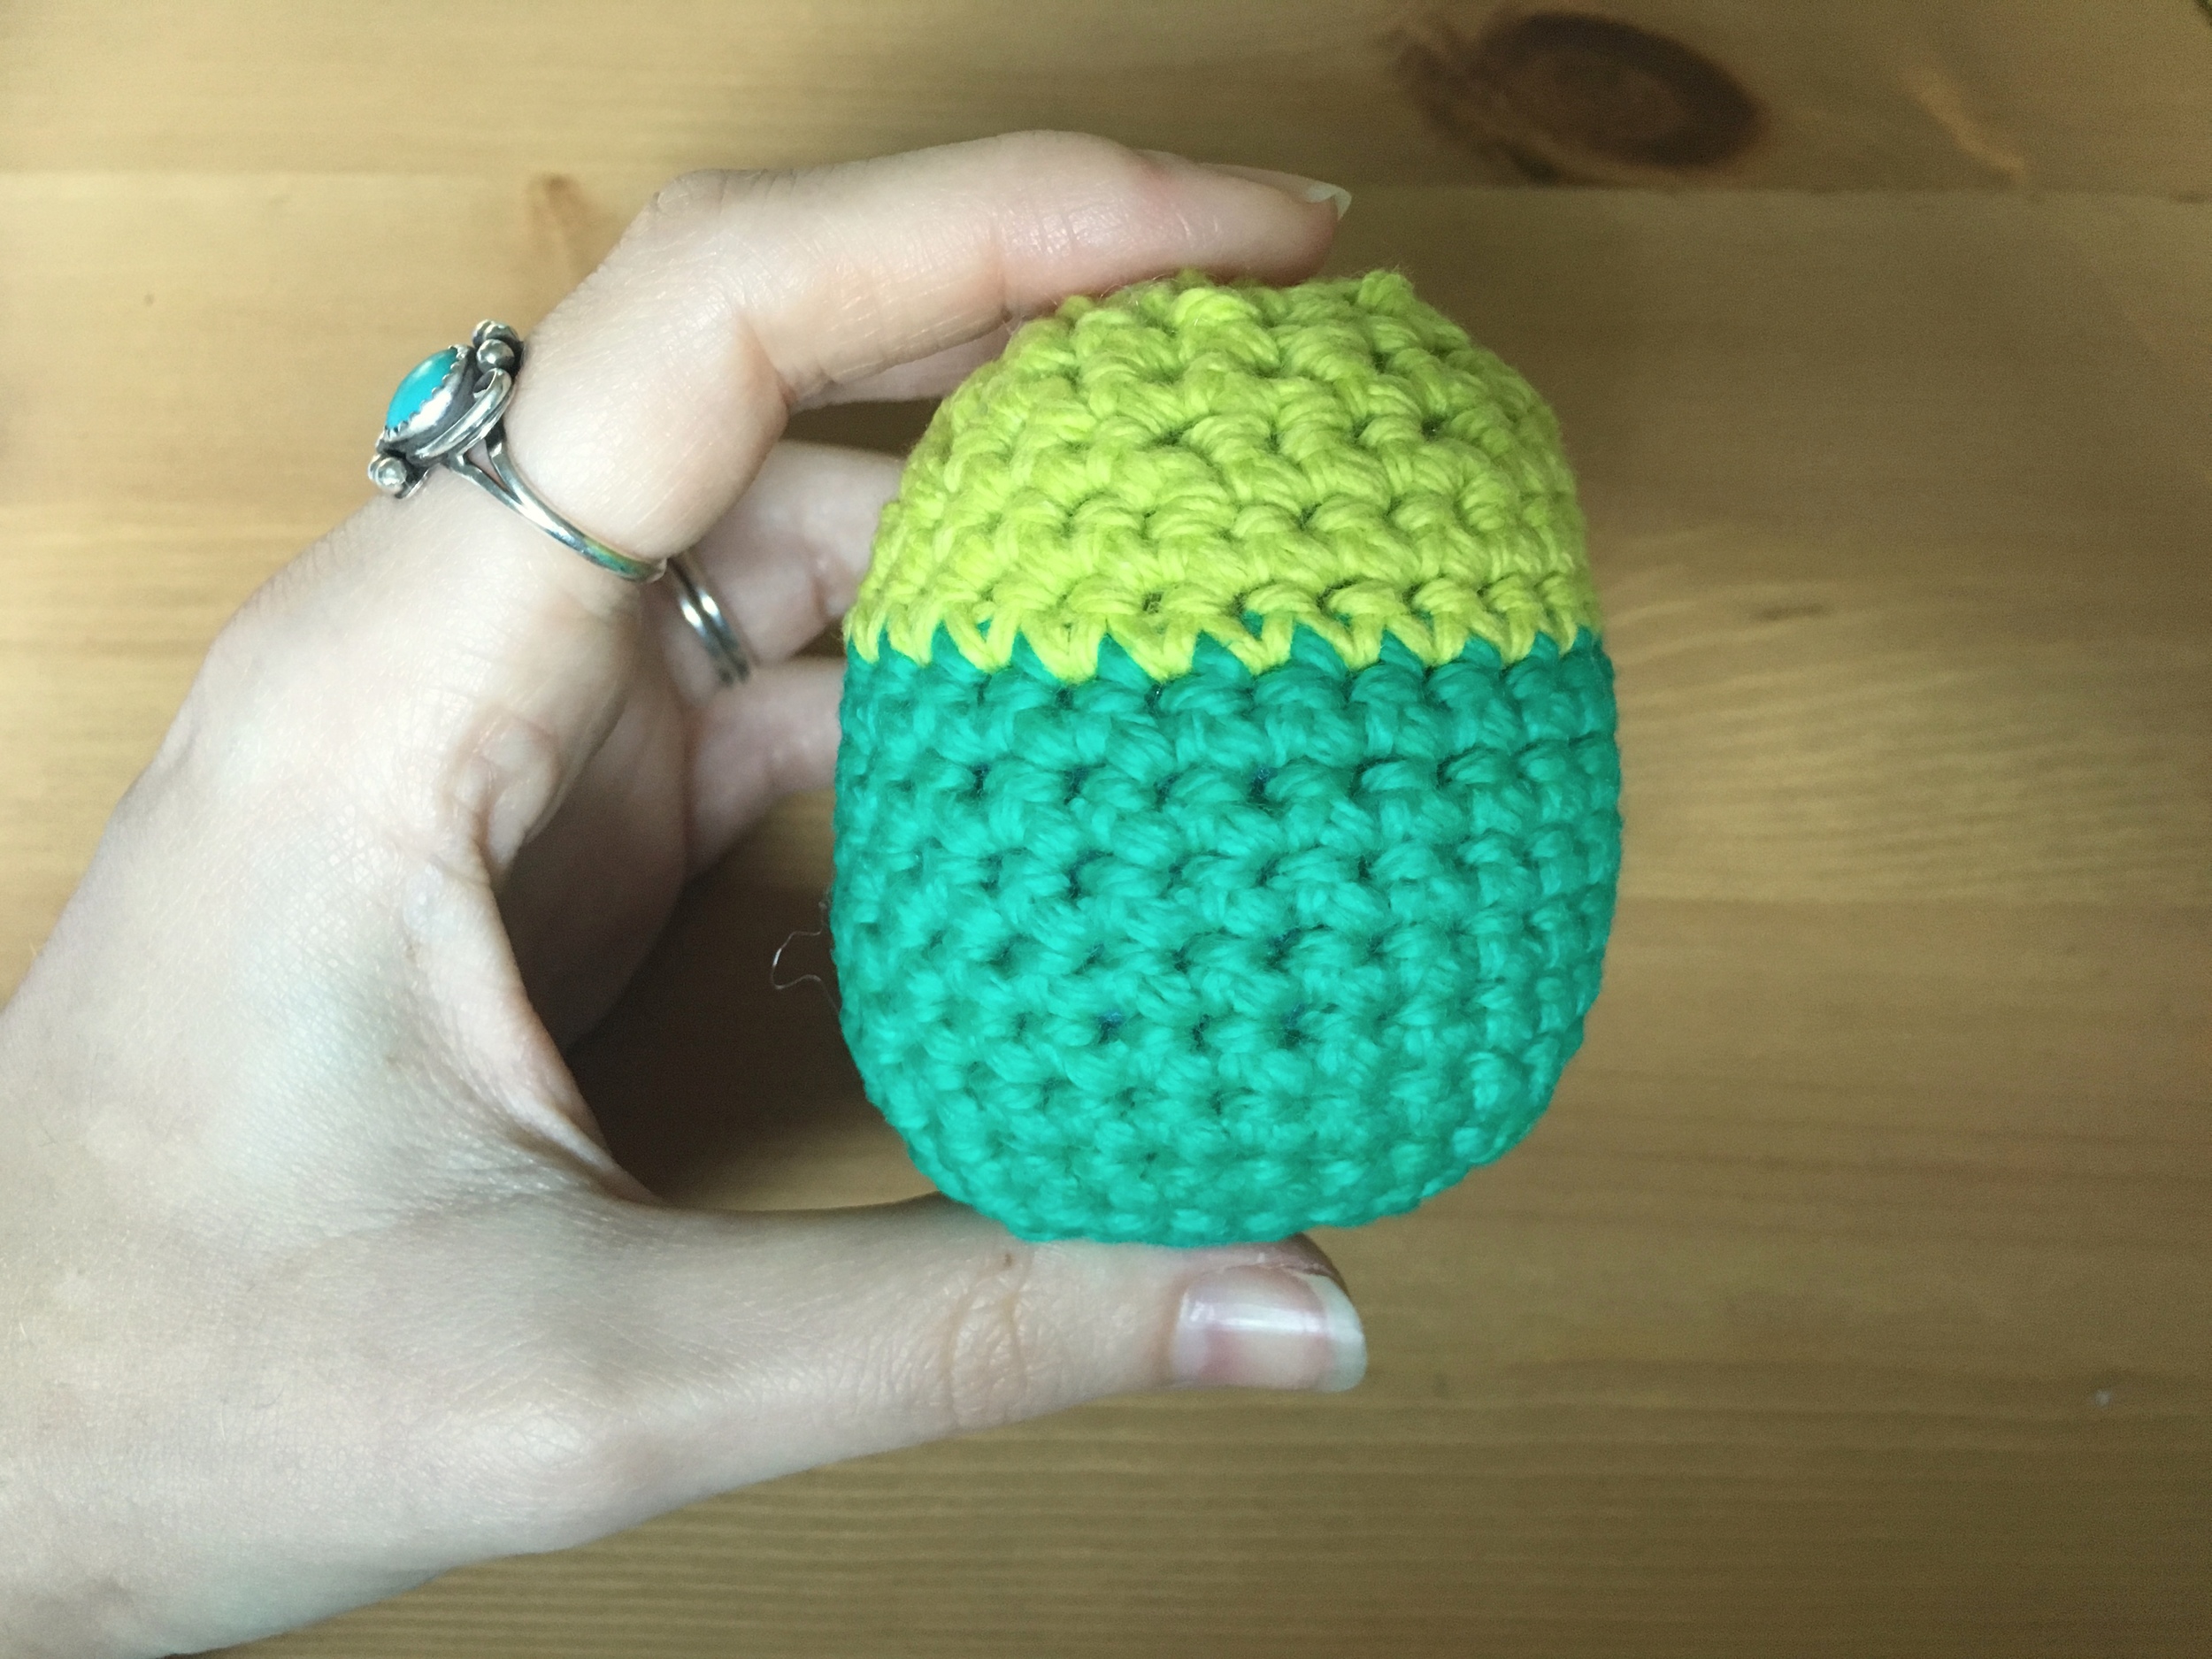
BACKPACK : ((works in continuous rounds from bottom to top- begin with bottom backpack color))
RND 1 : ch 6. ((WORKING UP ONE SIDE OF CH LINK)) sc in next 4 sp. 3sc in next sp. ((WORKING DOWN OTHER SIDE OF CH LINK)) sc in next 3 sp. 3sc in last sp. (14)
RND 2 : * 2 sc in next sp. sc in next sp. * around (21)
RND 3 : * sc in next 7 sp. 2sc in next sp. sc in next sp. 2sc in next sp. * 2 times. sc in last sp. (25)
RNDS 4 – 9 : sc in each sp around. (25)
((CHANGE YARN TO TOP BACKPACK COLOR))


RNDS 10 – 11 : sc in each sp around. (25)
RND 12 : sc in next 12 sp. * sc2tog. sc in next 2 sp. * 2 times. sc2tog. sc in remaining 3 sp. (22)
RND 13 : sc in next 9 sp. sc2tog. sc innext 2 sp. sc2tog. sc in next sp. sc2tog. sc in next 2 sp. sc2tog. (18)
RND 14 : sc2tog. sc in next 5 sp. sc2tog. sc in next 2 sp. sc2tog. sc in next sp. sc2tog. sc in remaining 2 sp. (14)
RND 15 : * sc2tog * 7 times. (7)
((FINISH OFF. WEAVE YARN TAIL AROUND SMALL OPENING REMAINING AT TOP OF BACKPACK AND PULL TIGHT TO CLOSE ANY GAP))
BACKPACK STRAPS : ((make 2. works in rows in 2 sections: from top to middle and up to top again, and then from bottom to middle and down to bottom again – begin with top backpack color – at beginning, leave a long yarn tail free for later))
SECTION 1 : ch 16. ((WORKING UP BACK BAR OF CH LINK)) sc in next 14 sp.
((FINISH OFF. LEAVE A SECOND LONG YARN TAIL))
((CHANGE YARN TO BOTTOM BACKPACK COLOR))
SECTION 2 : ch 15. ((WORKING THROUGH THE END OF SECTION 1 THAT DOES NOT HAVE ANY YARN TAILS)) sl st through 2 times connecting the two sections. ((WORKING UP BACK BAR OF SECTION 2 CH LINK)) sc in next 14 sp.
((FINISH OFF. LEAVE A SECOND LONG YARN TAIL))
((you now have a finished strap that is half mod green and half hot green, each end should have 2 long yarn tails, use these to attach strap to backpack))

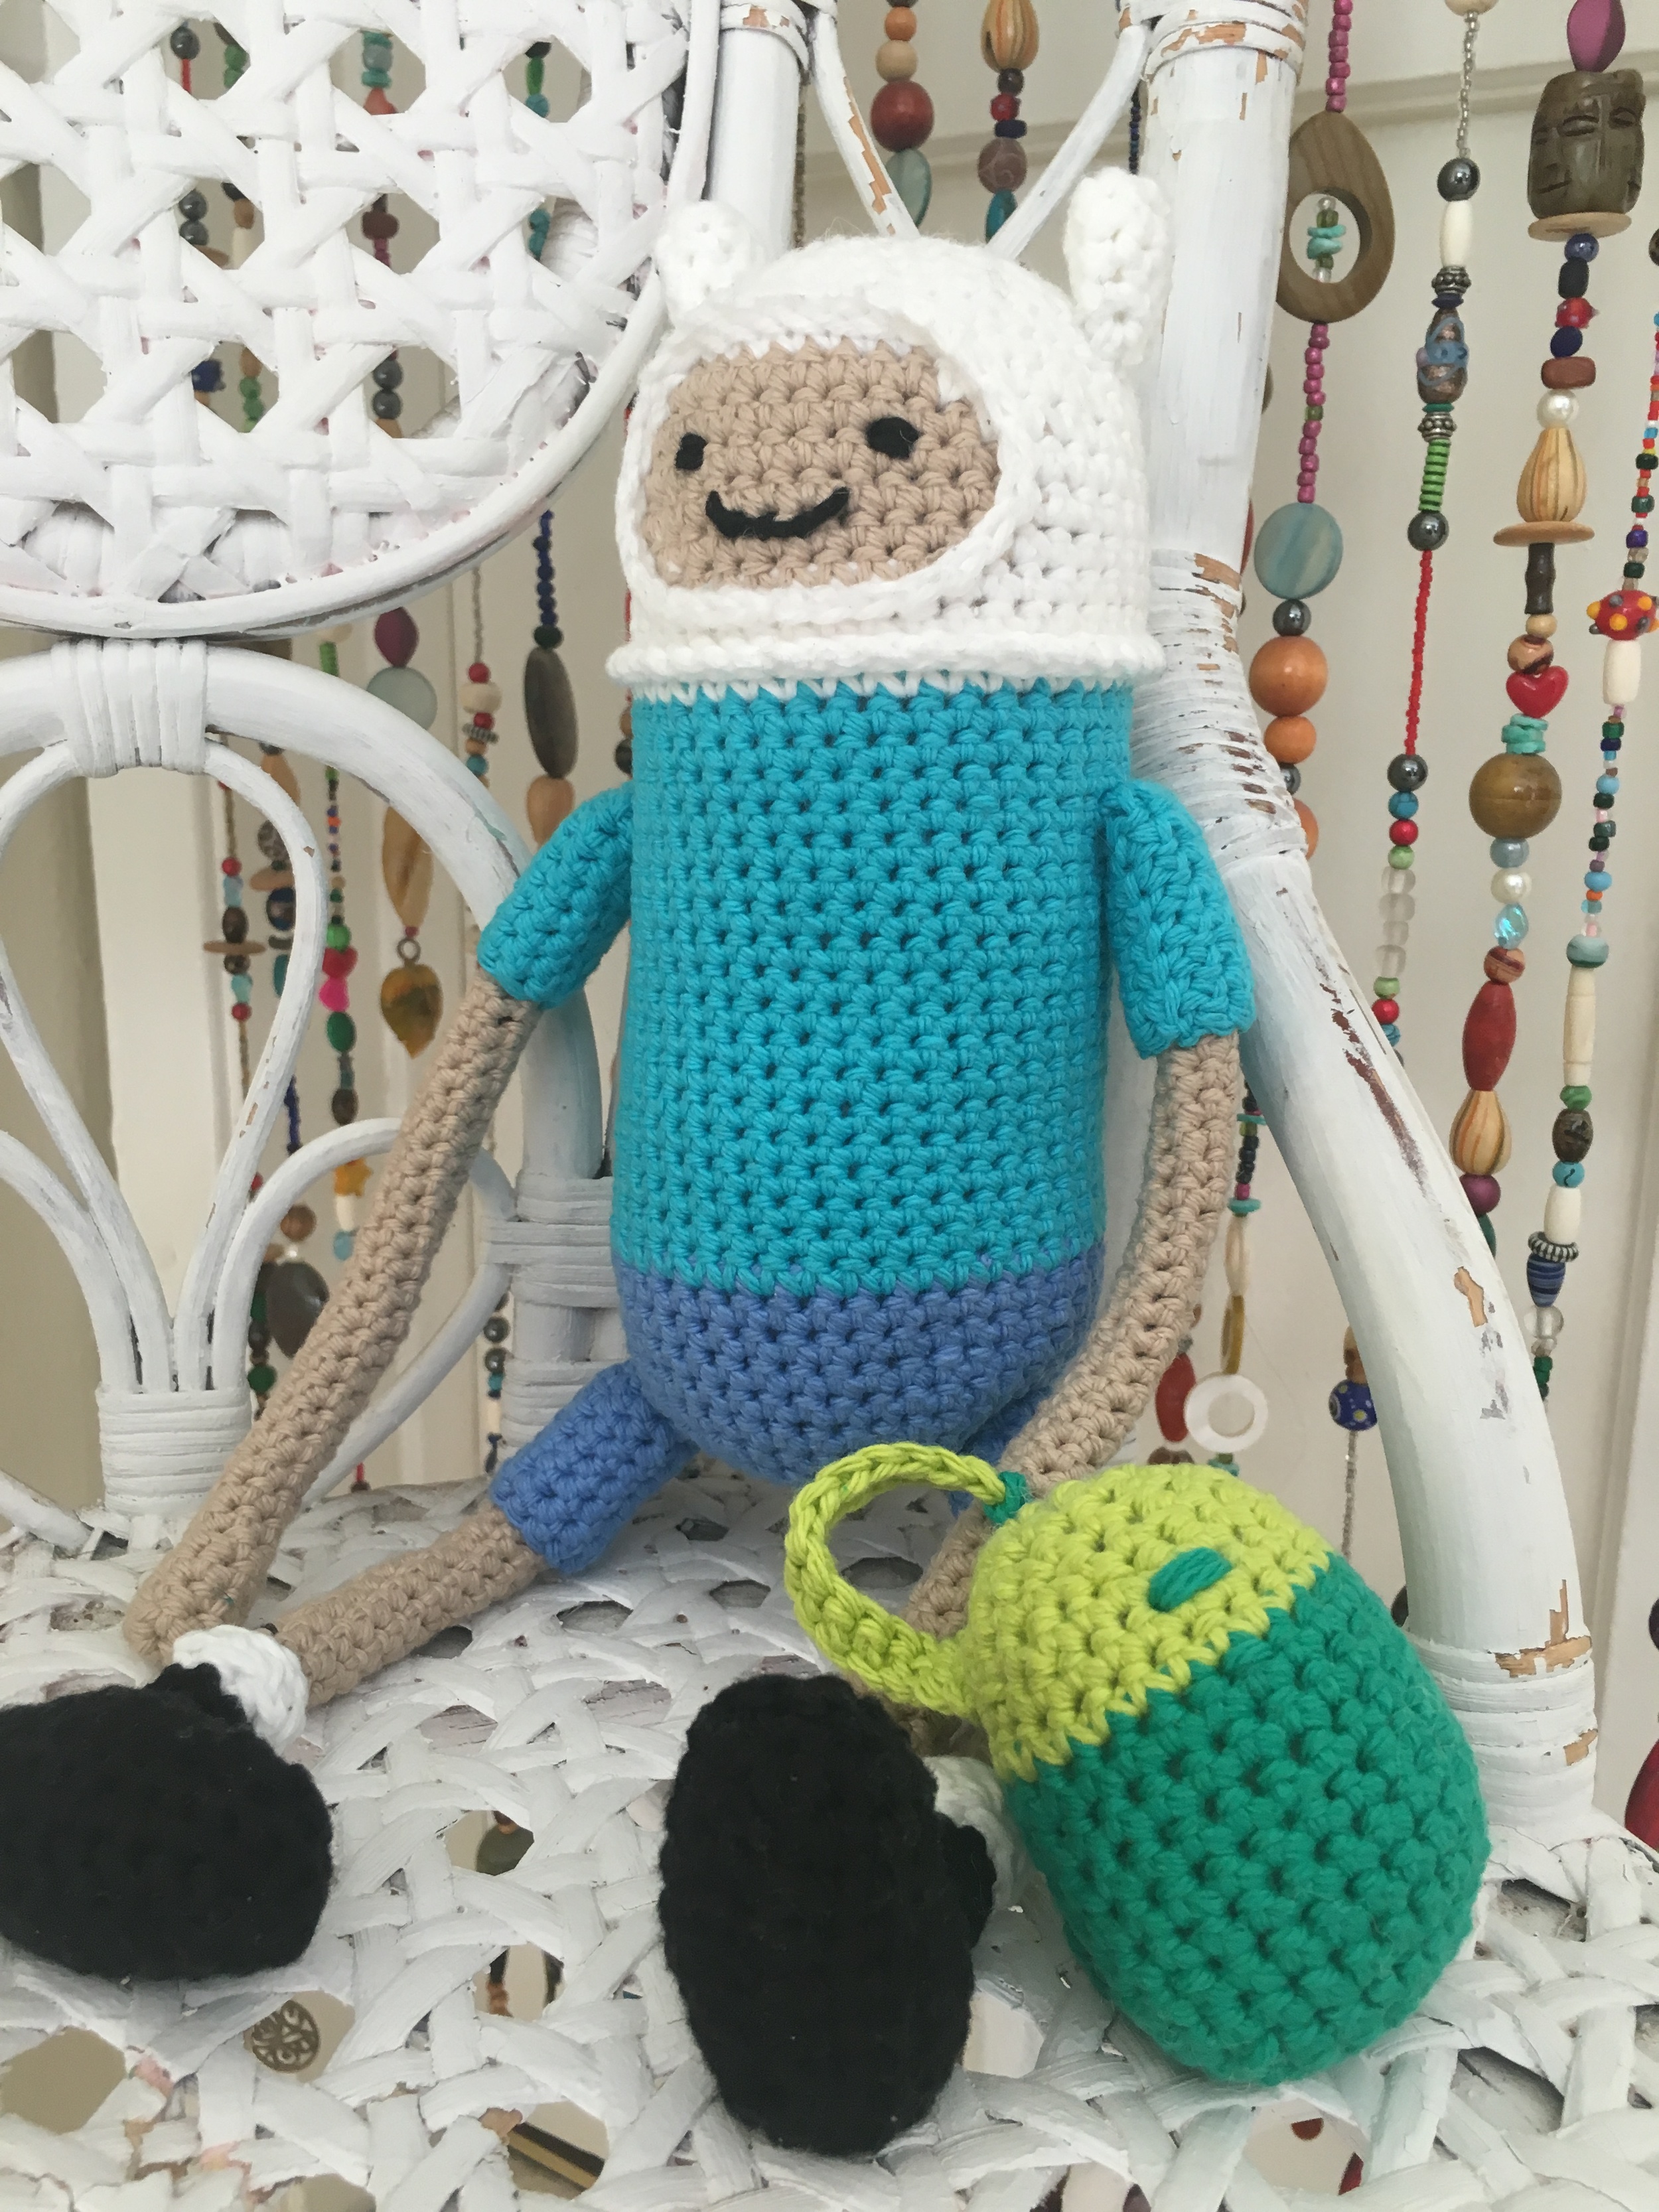
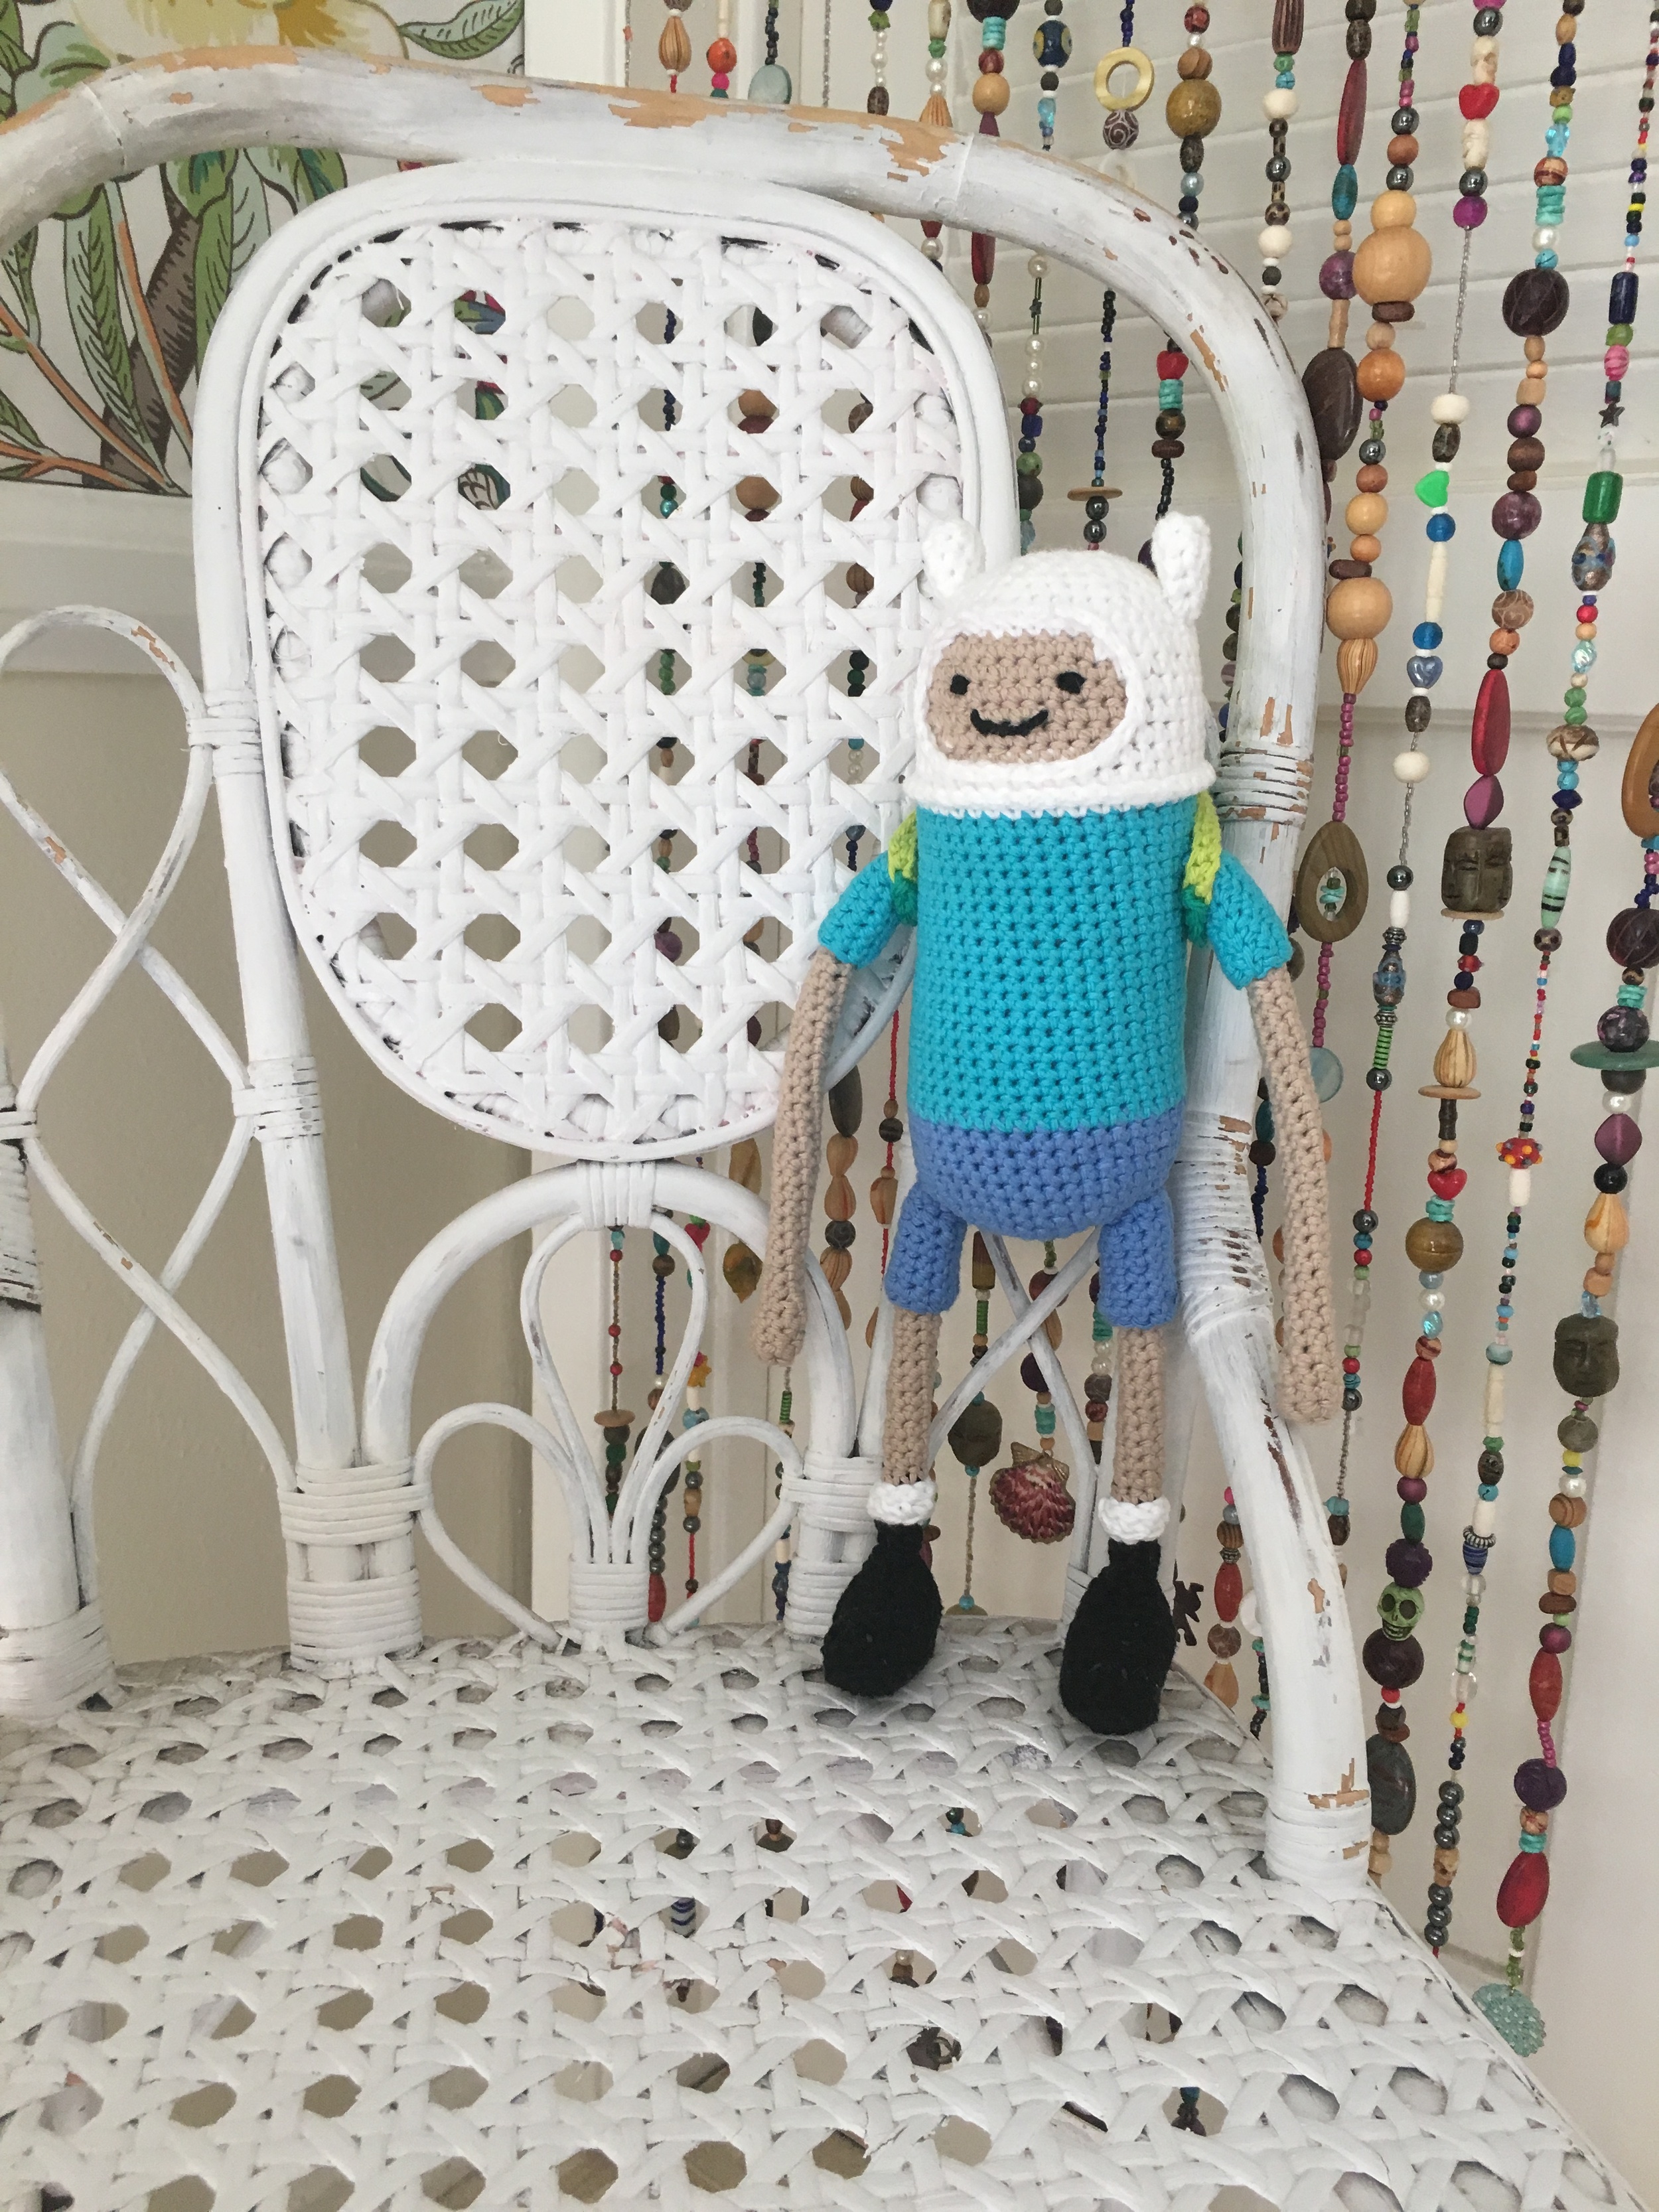
Attach all of your bits and bobs together and add details:
FACE: use black yarn to stitch eyes & mouth
BACK PACK CLASP: use mod green yarn to stitch small clasp spot on upper portion of backpack
And you are DONE! Good work!!! If you have any questions about the pattern, please feel free to comment below or contact me directly. I will be very happy to help!
